For WordPress Installation you can check the Famous 5-Minutes Install here:
Congratulations on purchasing our theme. As a premium item owner we welcome you on board with us. Please go through the documentation which will help you with setting up your amazing website. If you have any questions or queries that are beyond the scope of this documentation, feel free to contact us by Email Thank you!
Let's start with unboxing the theme. By purchasing Mightytek you get a premium WordPress theme designed by our in-house expert team. You get all the features and functionality mentioned in the descriptive section on Themeforest.
For WordPress Installation you can check the Famous 5-Minutes Install here:
Mightytek is divided in Four folders. Short Description for each of them is given below:
To use Mightytek, you must be running WordPress 5.5 or higher, PHP 7.2 or higher, and MySQL 5.6 or higher. We have tested it with Mac, Windows and Linux. Below is a list of items you should ensure your host can comply with.
Many issues that you may run into such as:
white screen, demo content fails when importing, empty page content and other similar issues are all related to low PHP configuration limits. The solution is to increase the PHP limits. You can do this on your own, or contact your web host and ask them to increase those limits to a minimum as follows:
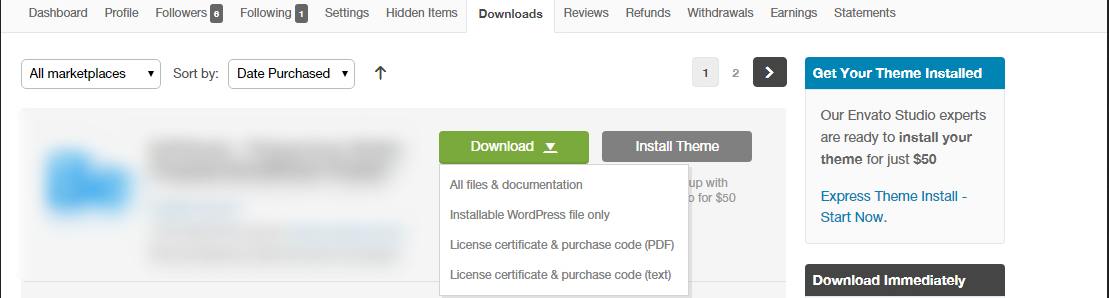
This part of the documentation will show how you will get started with the theme. Download the theme installation package from downloads section of your Themeforest account and save it to your computer. Once you download the ‘theme’ installation file from the Themeforest, extract the file in the folder and locate the Mightytek.zip file.
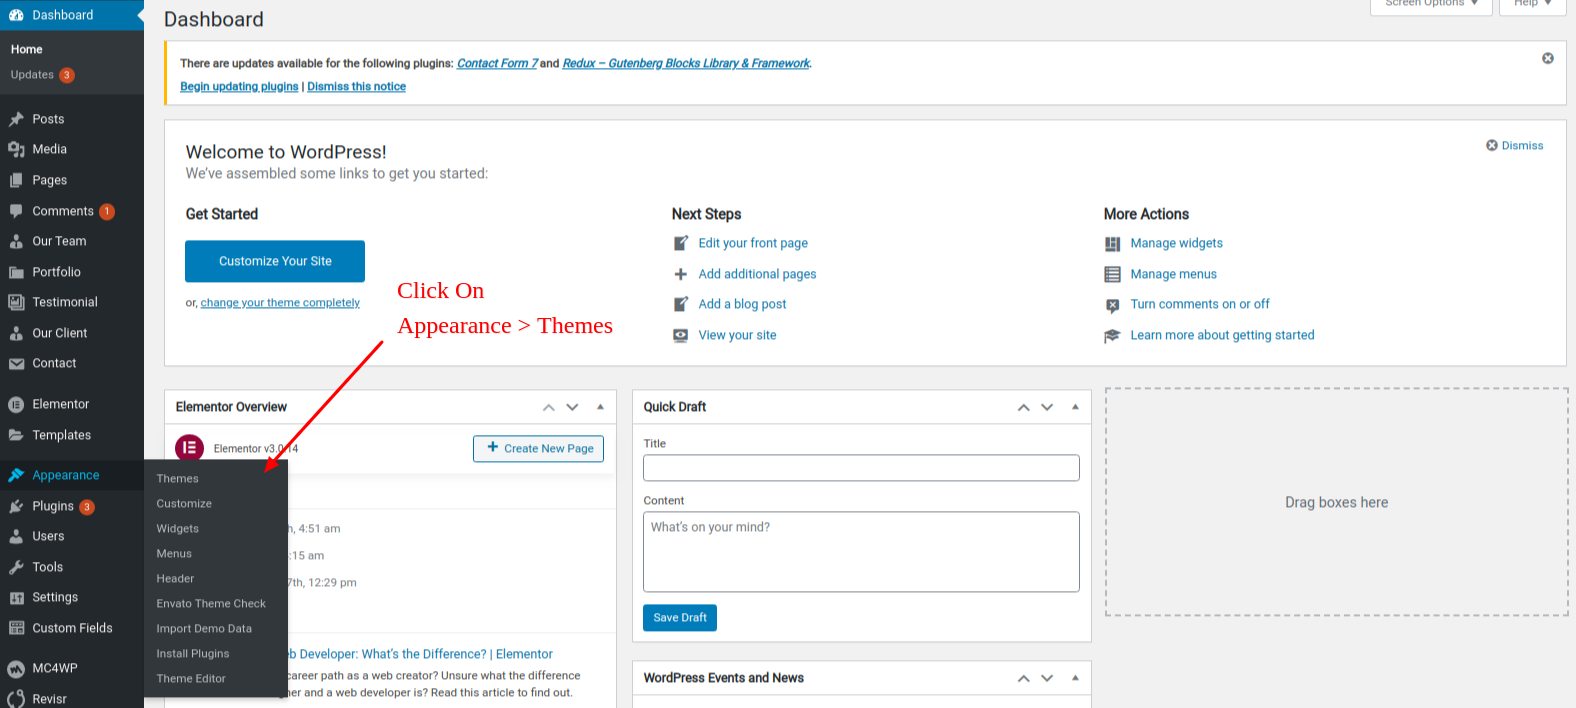
Step 1 - Login to your WordPress Admin Panel.
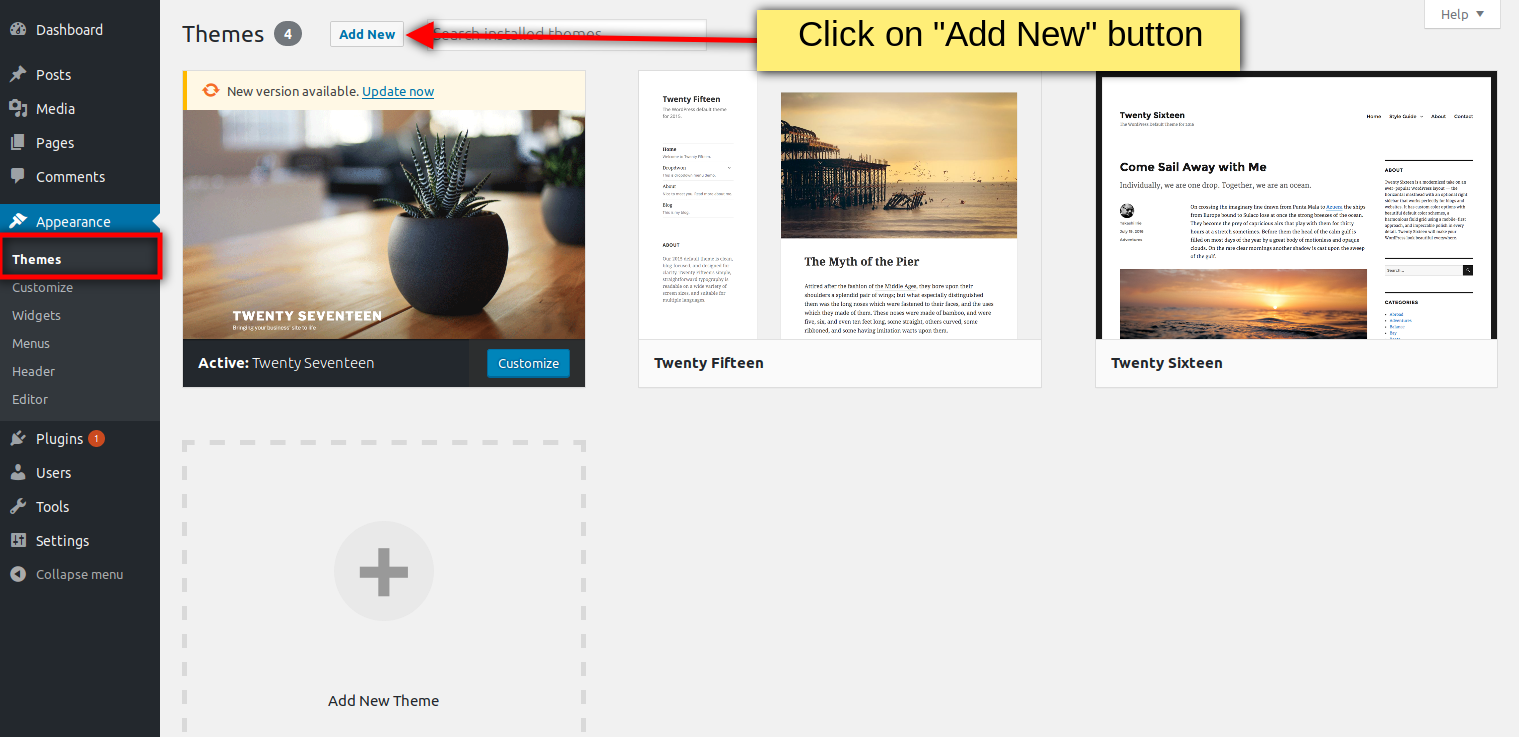
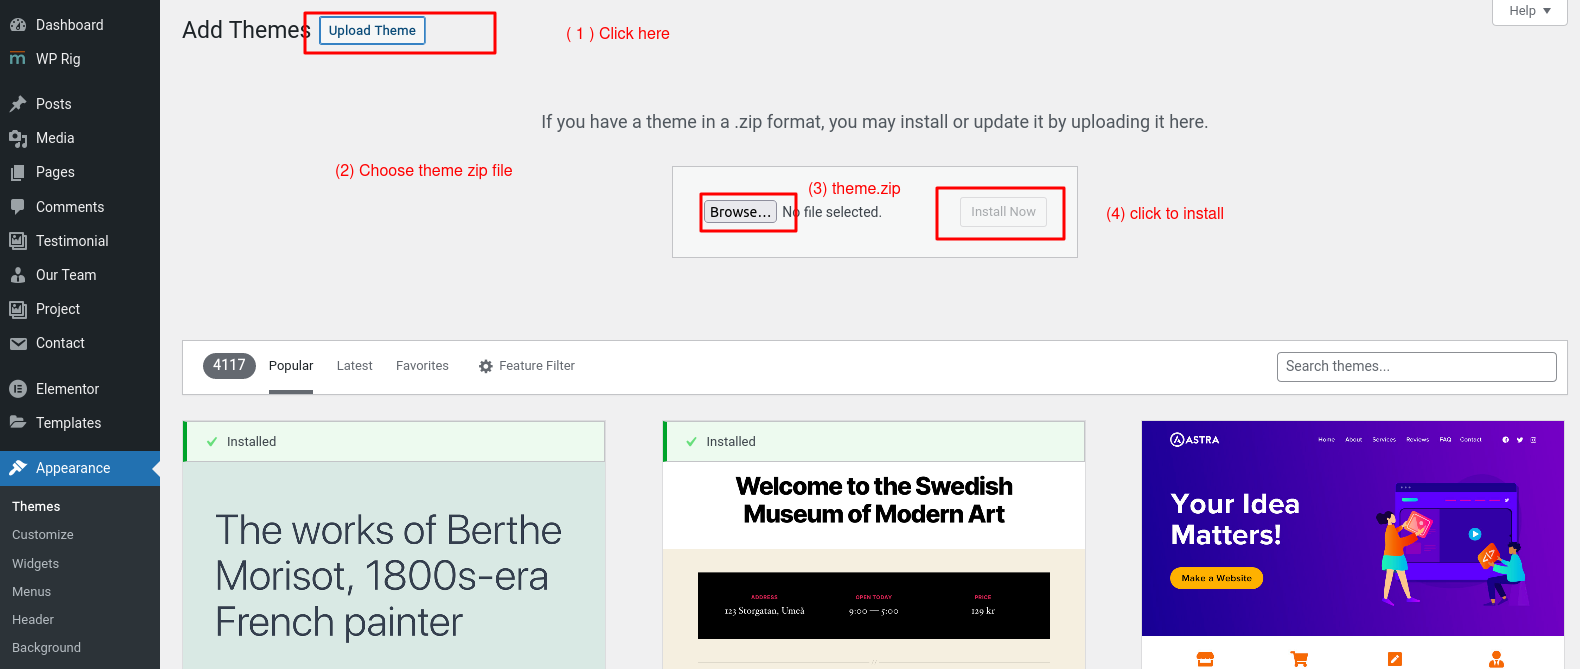
Step 2 - Go to Appearance > Themes. Click the Add New button.
Step 2 - Add New
Step 3 - Locate "Mightytek.zip" that you'll find in your ThemeForest package and unzip it. Once it is done you'll get a folder named Mightytek with all theme files in it.
Step 4 - Click on the Activate button to activate Mightytek. Congratulations, you have now activated Mightytek! You can now proceed with Mightytek's Plugin Installation.
Step 1 - Log into your Hosting server using an FTP client.(Ex: FileZilla)
Step 2 - Locate "Mightytek.zip" that you found in your ThemeForest Package and unzip it. Once it is done you'll get a folder named Mightytek with all theme files in it.
Step 3 - Locate your WordPress directory and upload Mightytek folder (unzipped in the previous step) into ../wp-content/themes/
Step 4 - Click on the Activate button to activate Mightytek. Congratulations, you have now activated Mightytek! You can now proceed with Mightytek's Plugin Installation.
All required plugins are already added in your downloaded package.
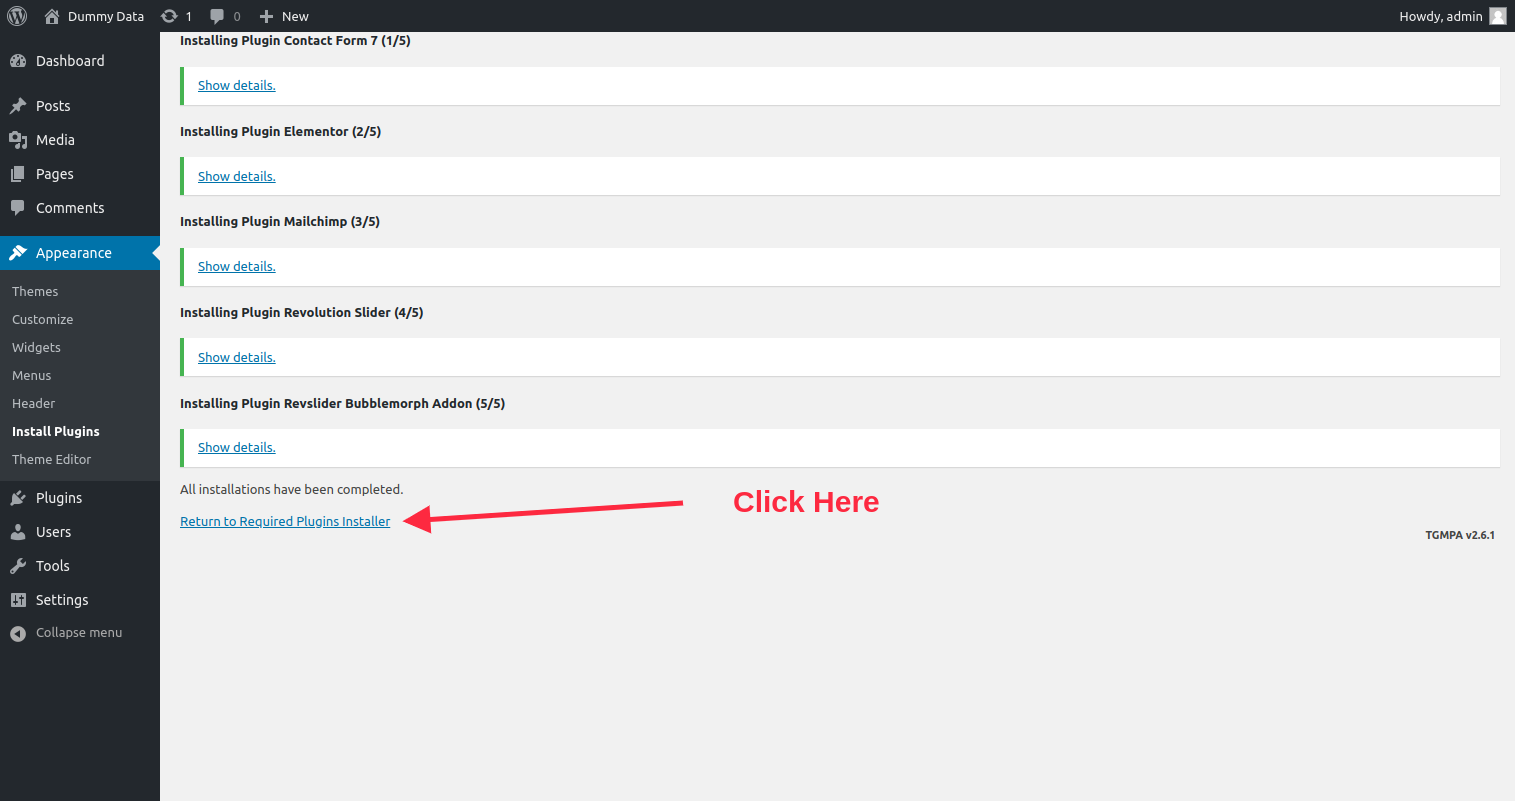
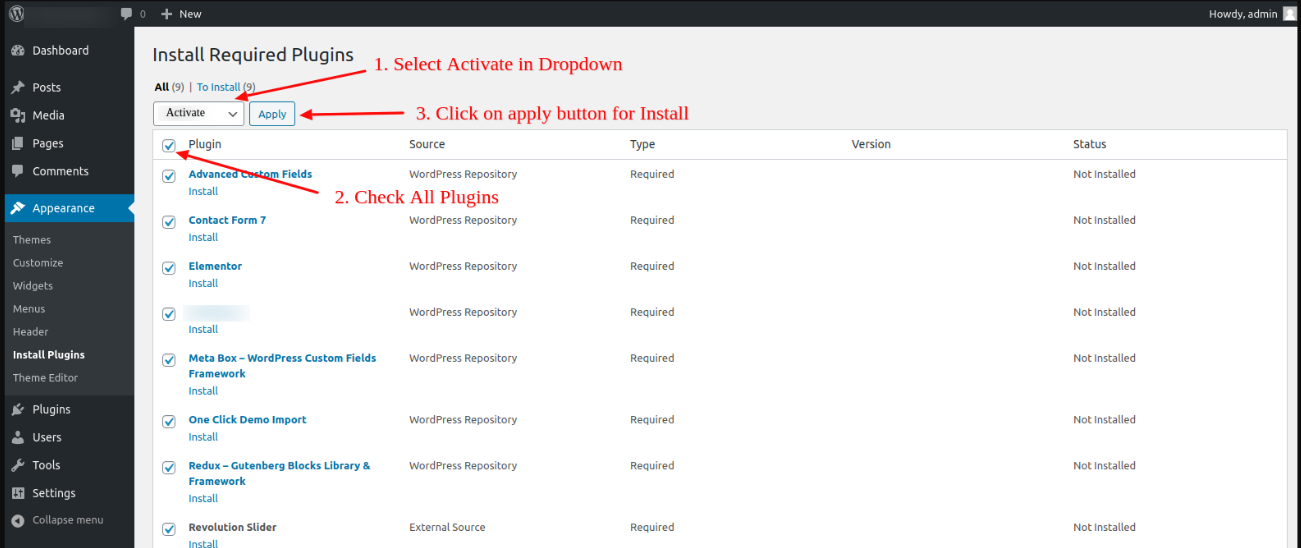
Step 1 - After theme installation you should be redirected to Install Required Plugins page, which shows list of plugins:
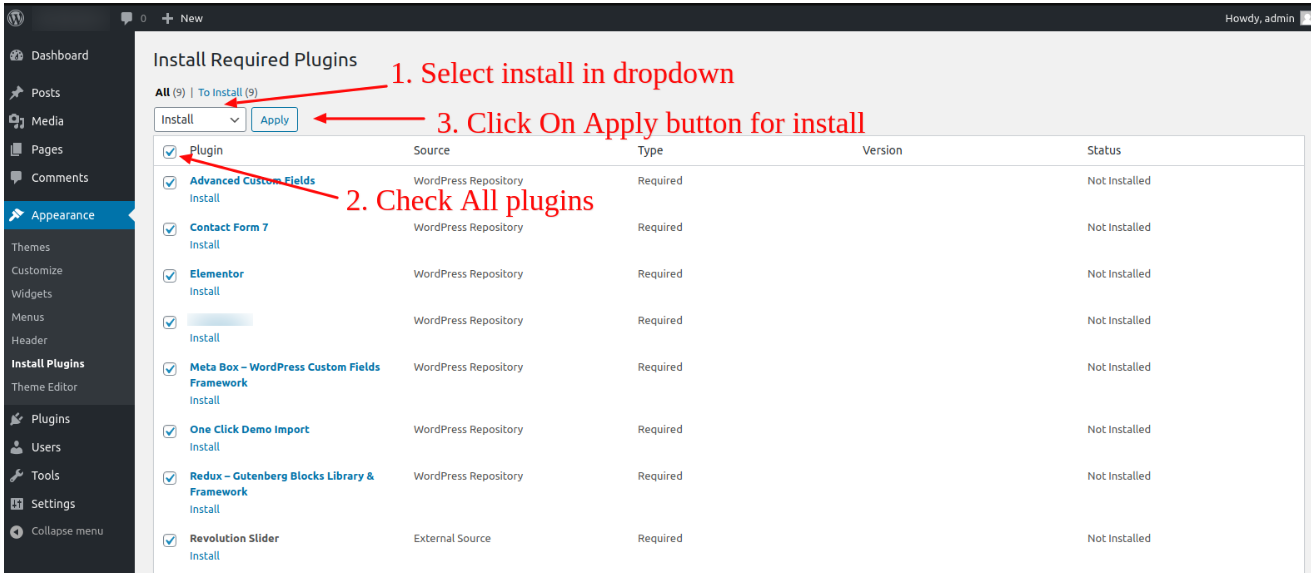
Step 2 - Now, Select all "Plugins".
Step 3 - Choose "Install" from the drop-down list at the top and then click "Apply".
With Mightytek, you can build a functioning website just by clicking a button and kick-start with our demo data or navigate to 5.2.1 Create A New Page and step by step build your website from scratch. Your Mightytek installation will be ready with data on our demo site, and you can use it as a template to develop your own website.
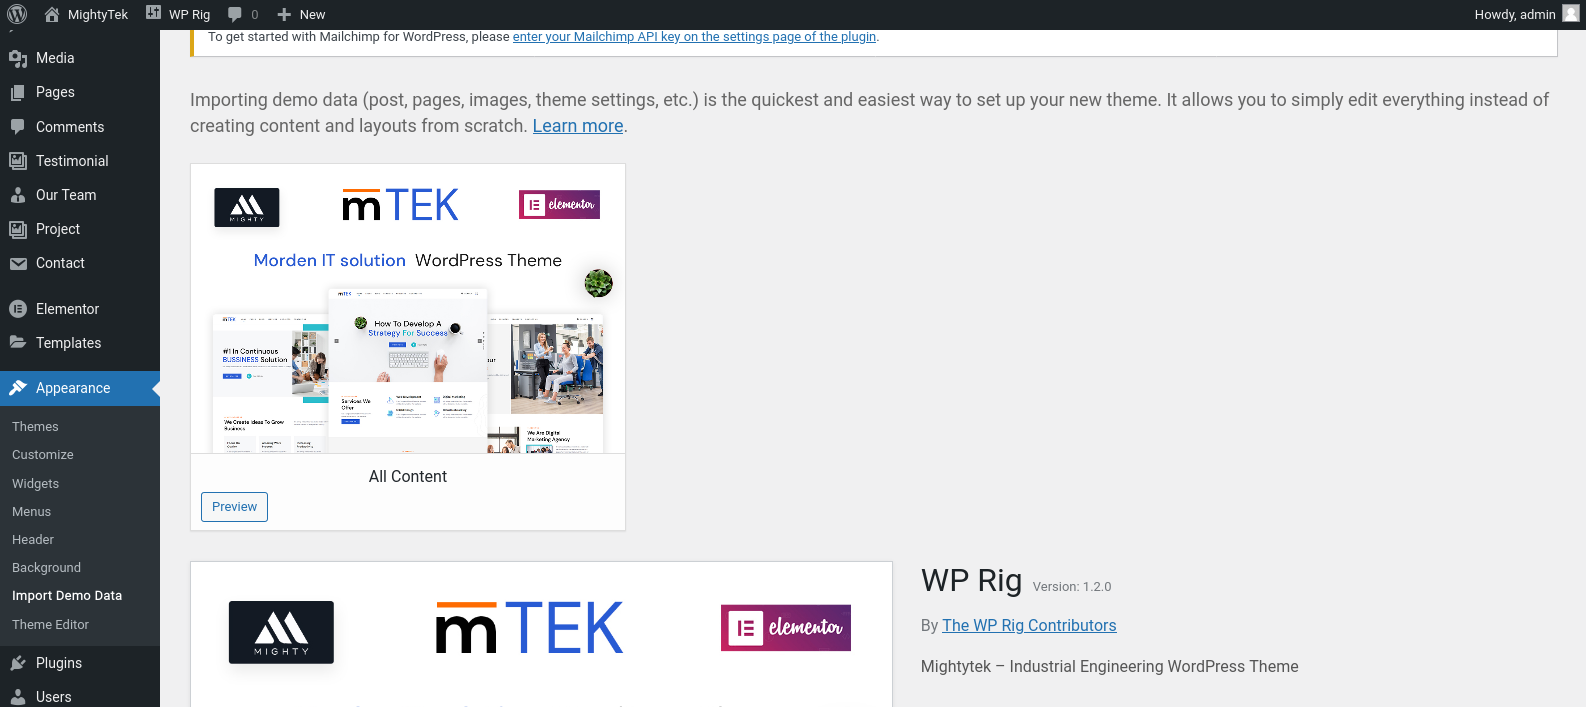
Go to Appearance > Import Demo Data. Then, Click on import.
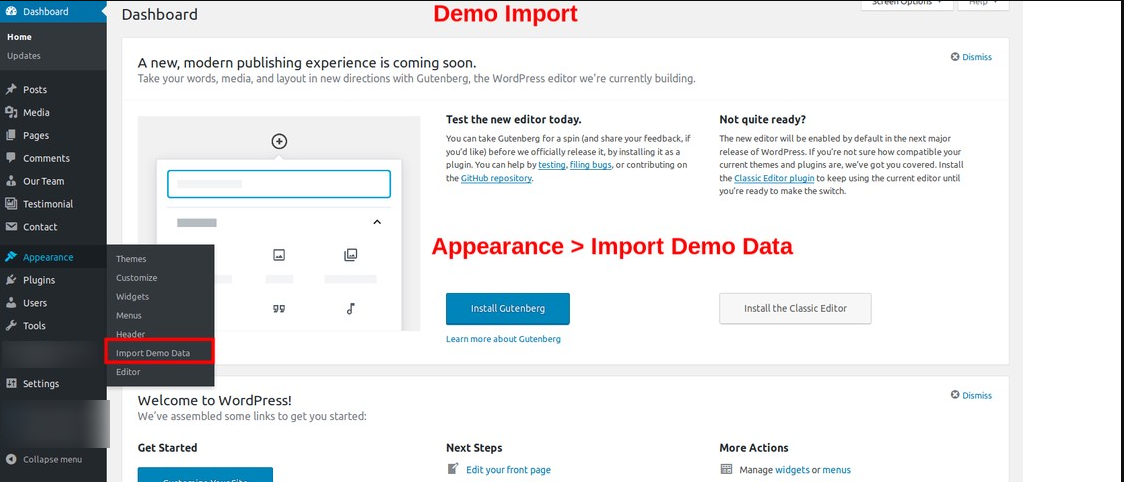
Here you can see so many options.
Note: Progress bar will appear while it is setting up demo data.
Also, if you import manually then select file(Mightytek/inc/Demo/ocdi/).
Congratulations, Now you can visit your website to see the imported data.
You can create any number of pages you want with our content. Our theme includes several page templates to choose from, you just need to choose from the page template that suits your needs. All of this is done in the pages section of your WordPress admin.
If you are not using one click import demo data then, you will need to MANUALLY CREATE your Home and other pages.
Here’s how to build it:
Step 1 – Navigate to pages in your admin sidebar and click Add New Button.
Step 2 – Input a name for your page and click "Edit With Elementor"(Elementorplugin is required)
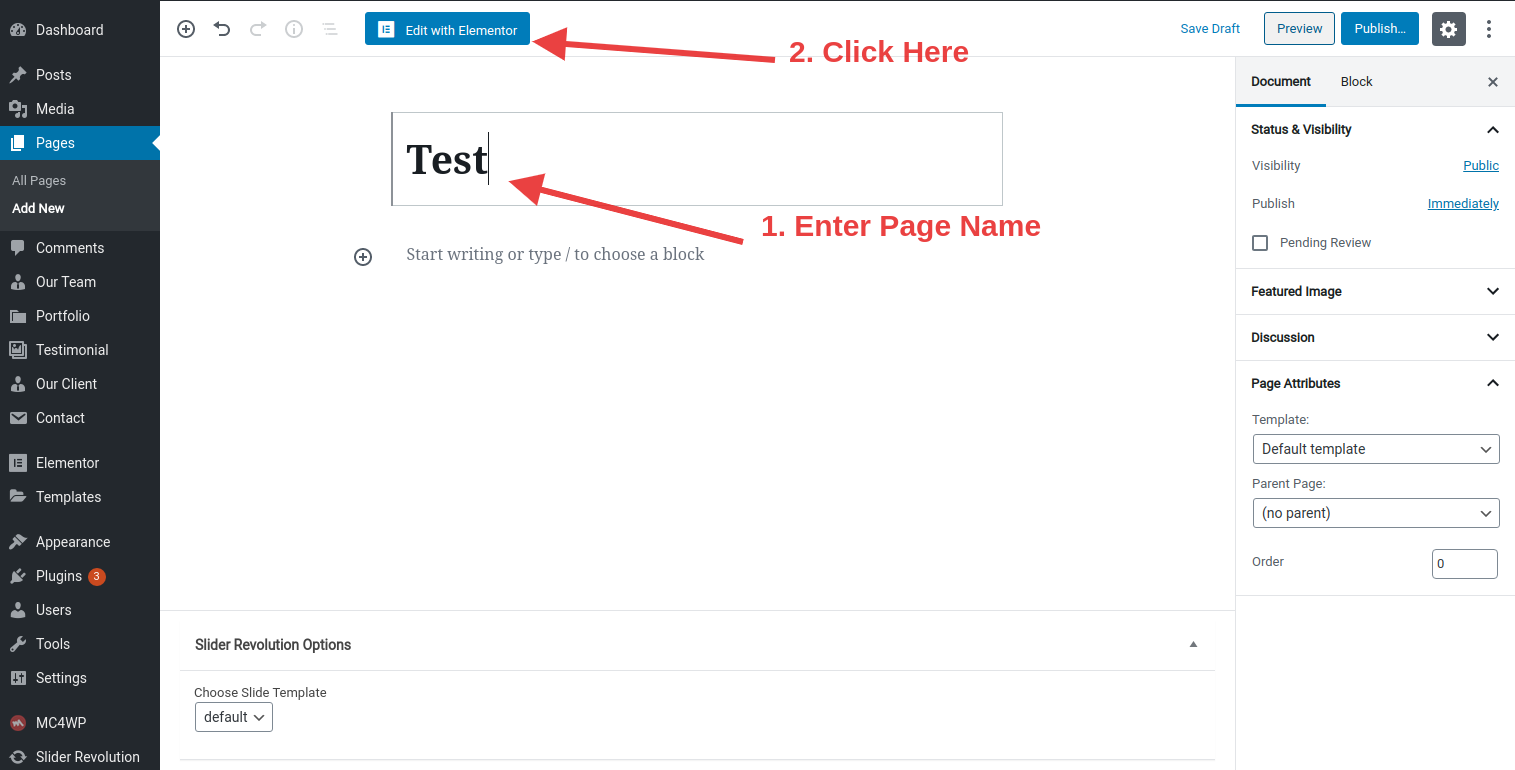
Step 3 – Set your Parent page. It’s usually set to No Parent.
Step 4 – Set your page template from the template dropdown list.
Next, you can publish this page and set it as your frontpage(settings > reading > static page) in the WordPress Settings panel.
-------------------Remove------------------------
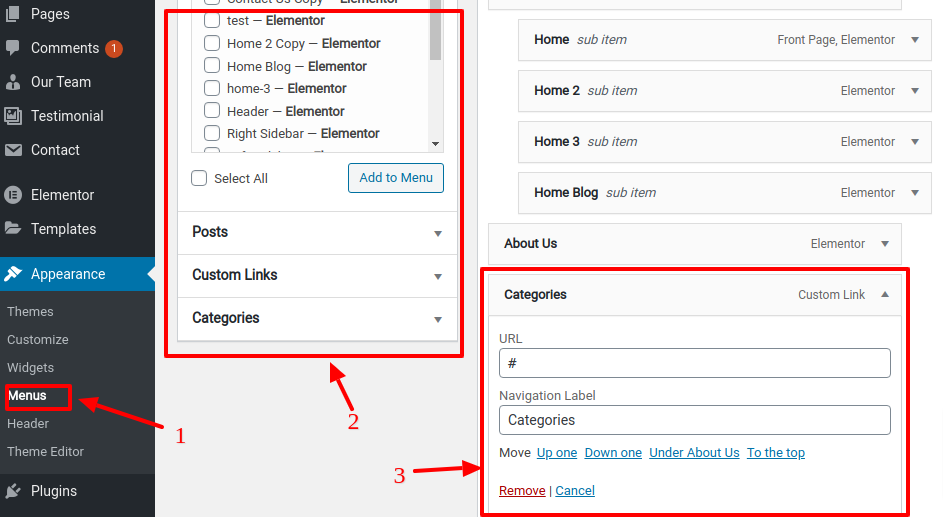
Currently OnePage sites are trending and Mightytek can help you do it easily. You just have to create a Menu with Links as items.

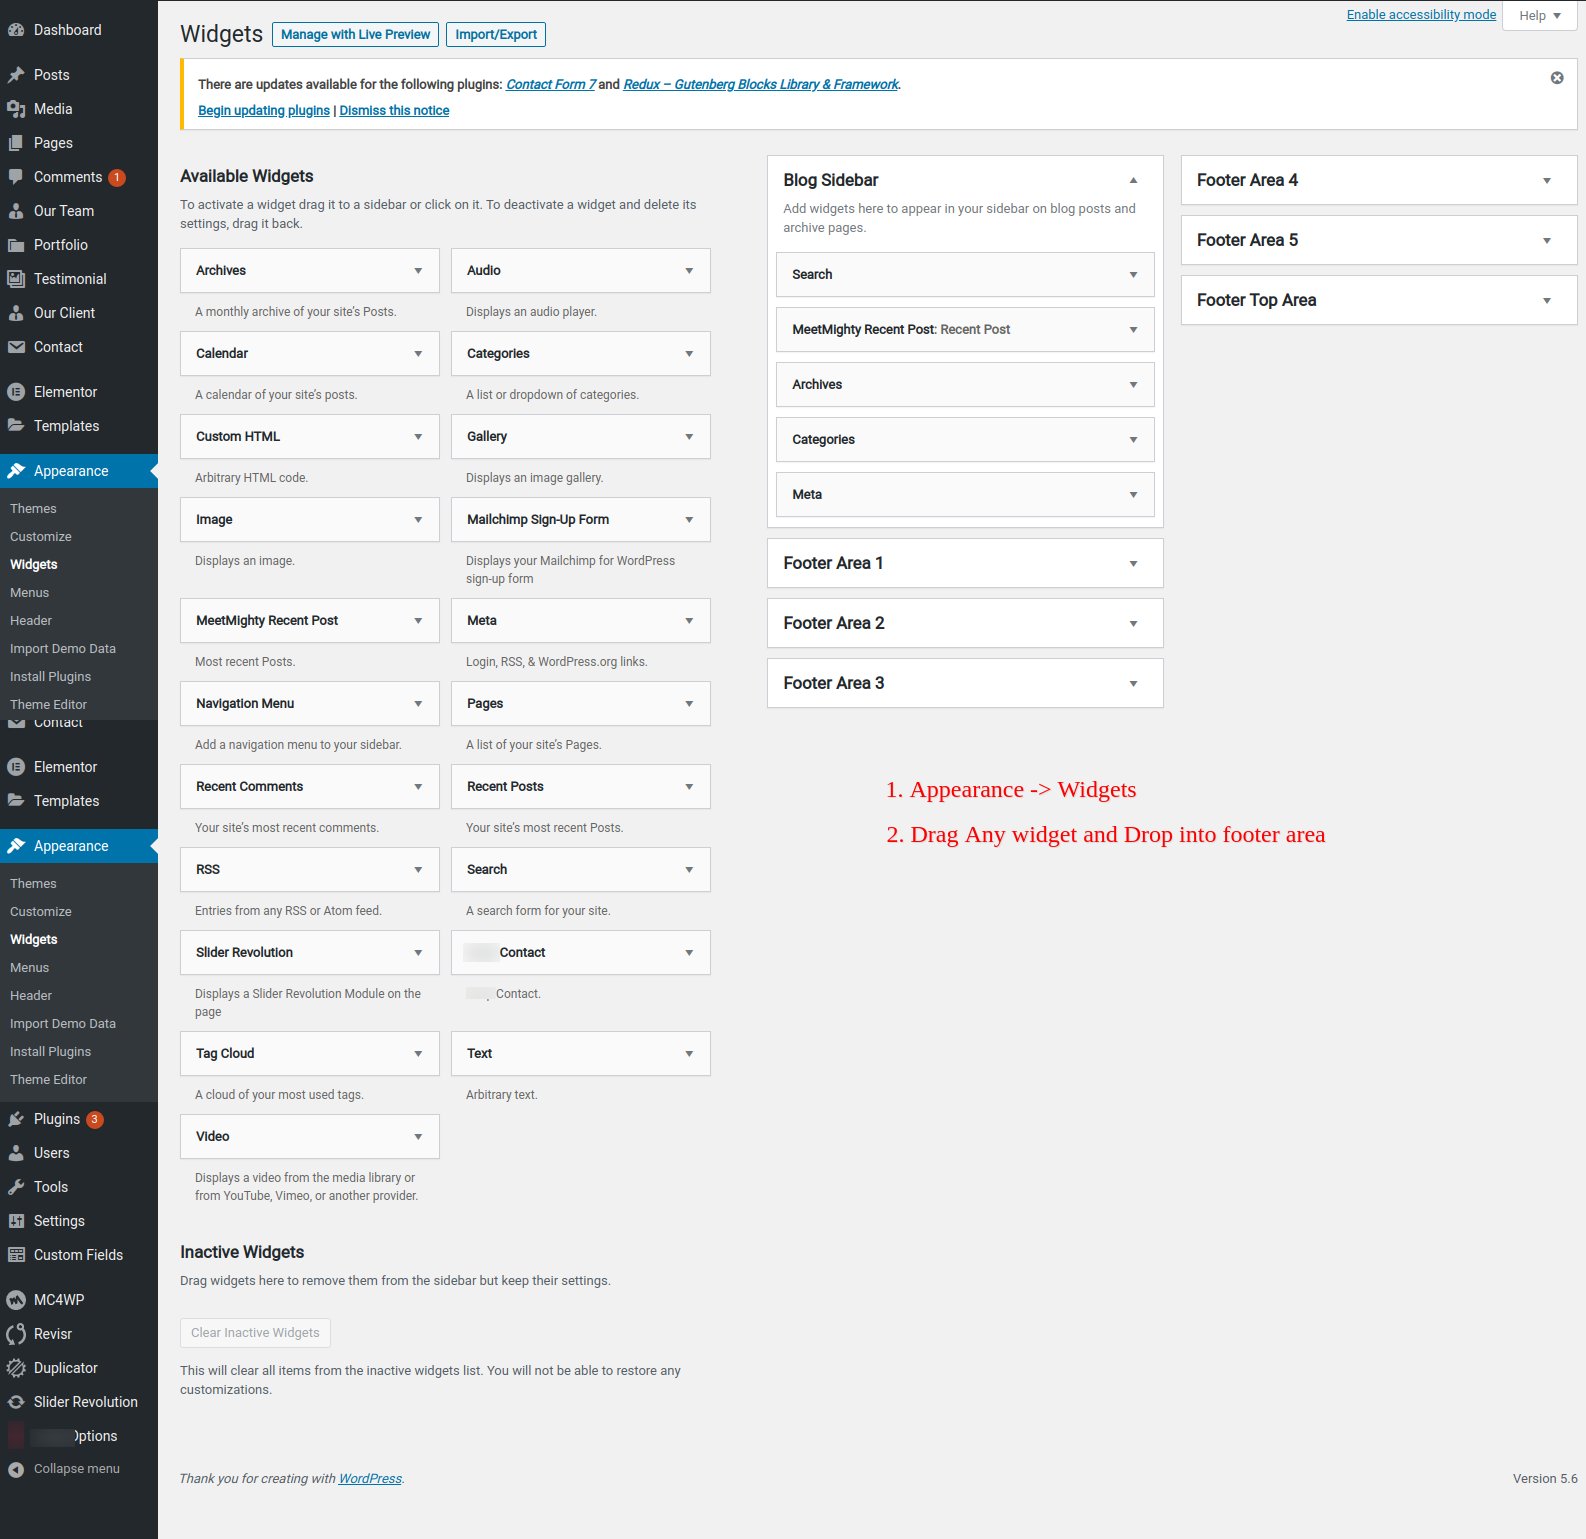
This section shows a list of pre-defined widgets on a page, so that you will find it easier when pulling out widgets to set up your site.
To build contact form you can refer to given link.
https://www.youtube.com/watch?v=eBn4Qjp4F3w&ab_channel=FerdyKorpershoekYou can visit Contact Form 7 Plugin fpr further details.
"This part of the documentation will show how can you change theme settings without modifying theme files or touching any code. So let’s start!"
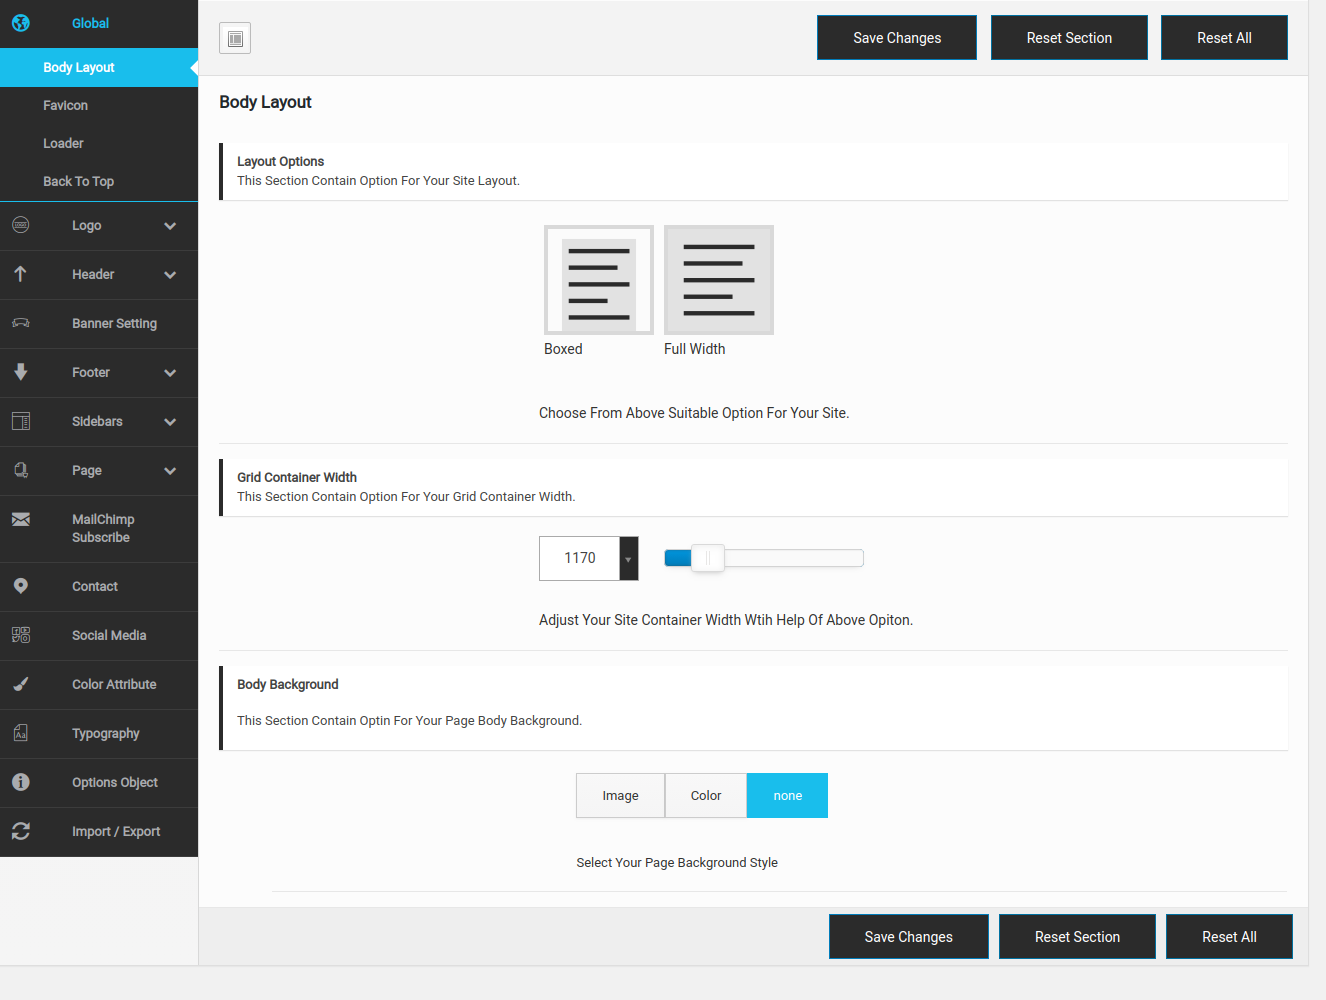
1.) - Body Layout : Adjust Your Page Body Options
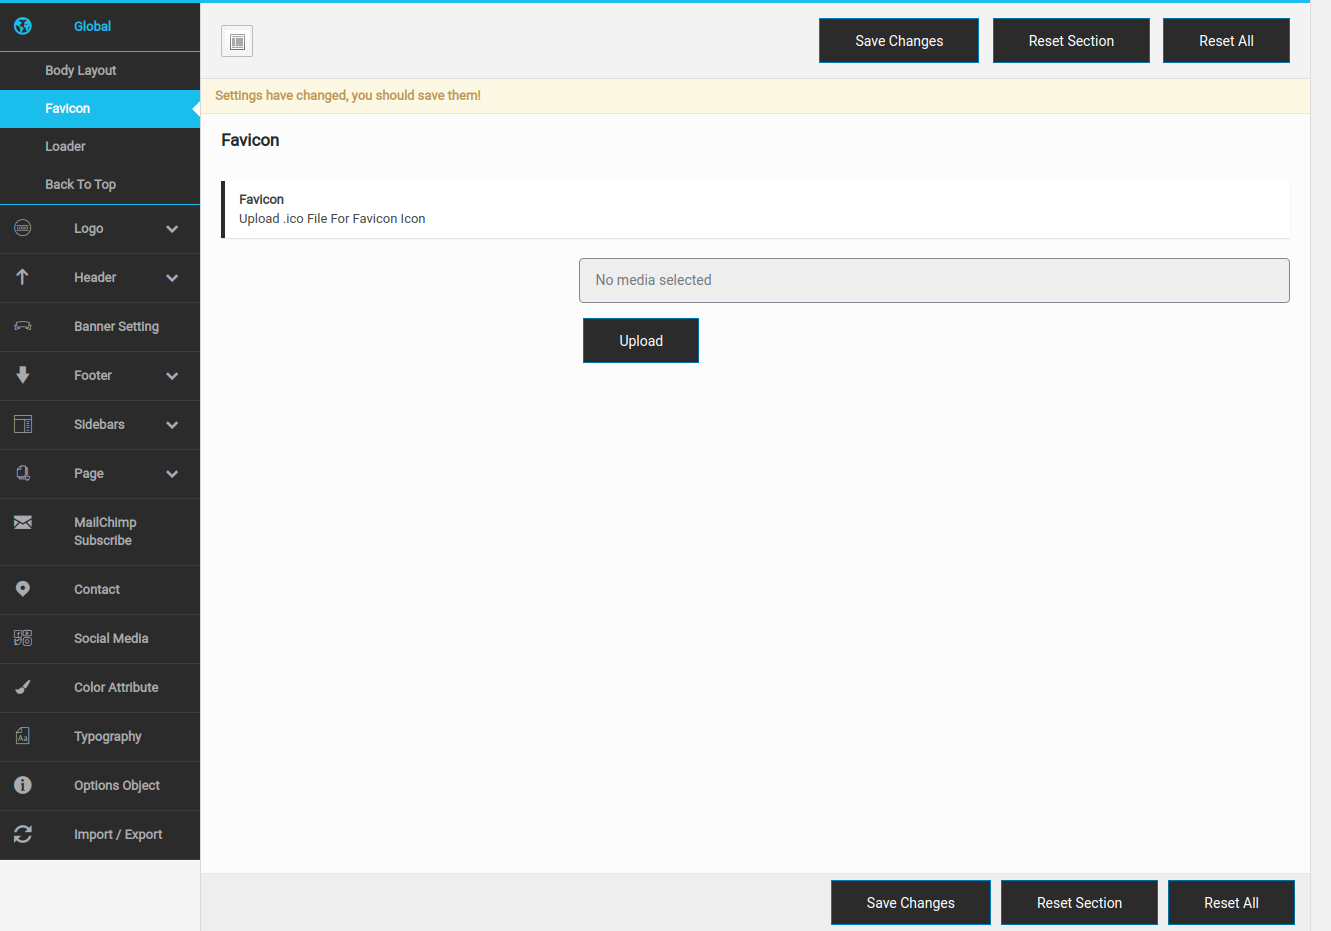
2.) - favicon : Upload favicon icon.
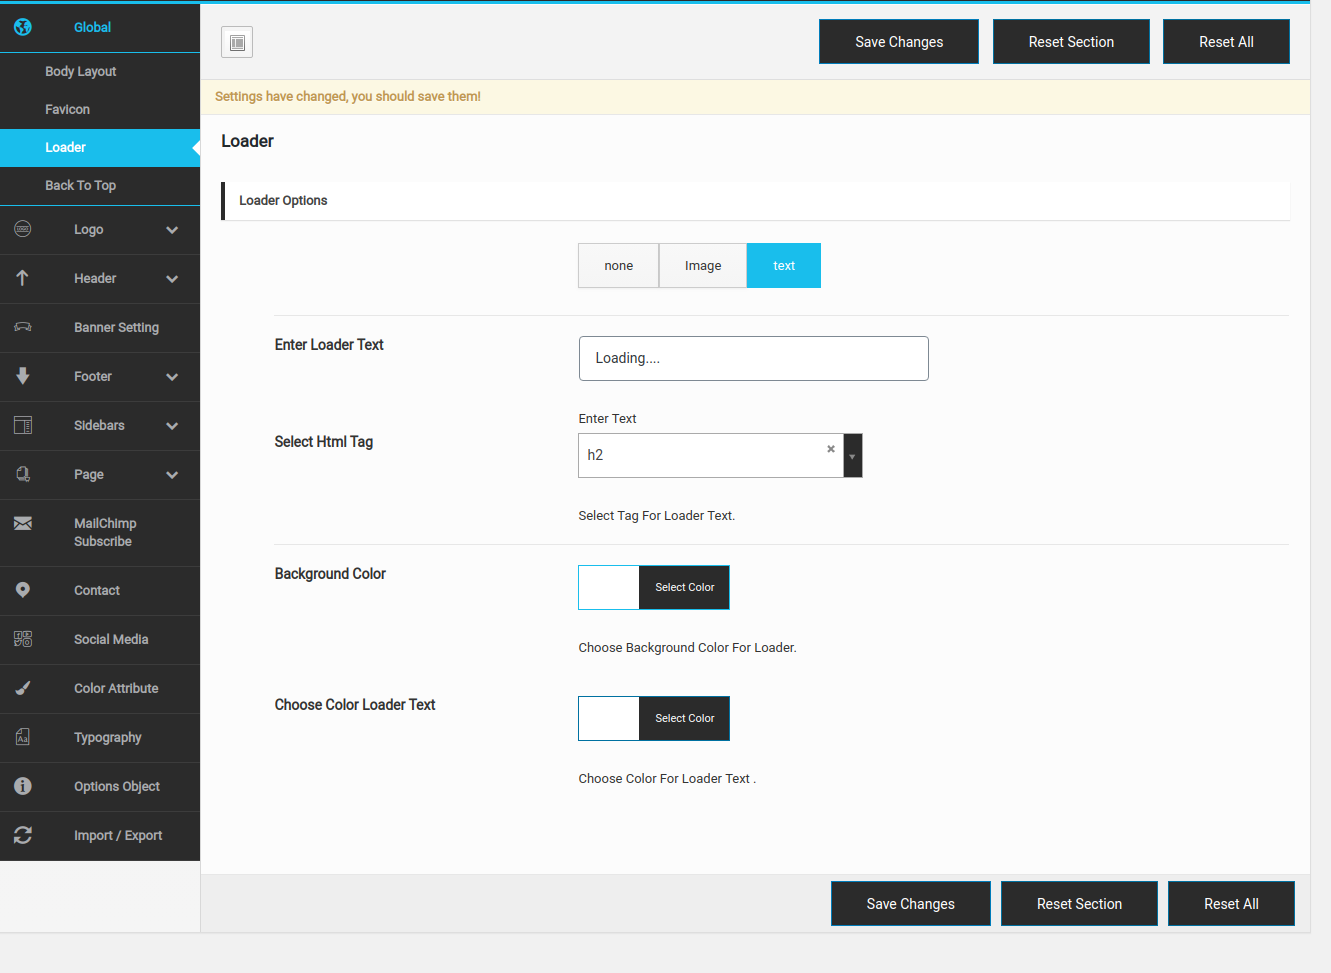
3.) - Loader : Adjust Your Page Loader
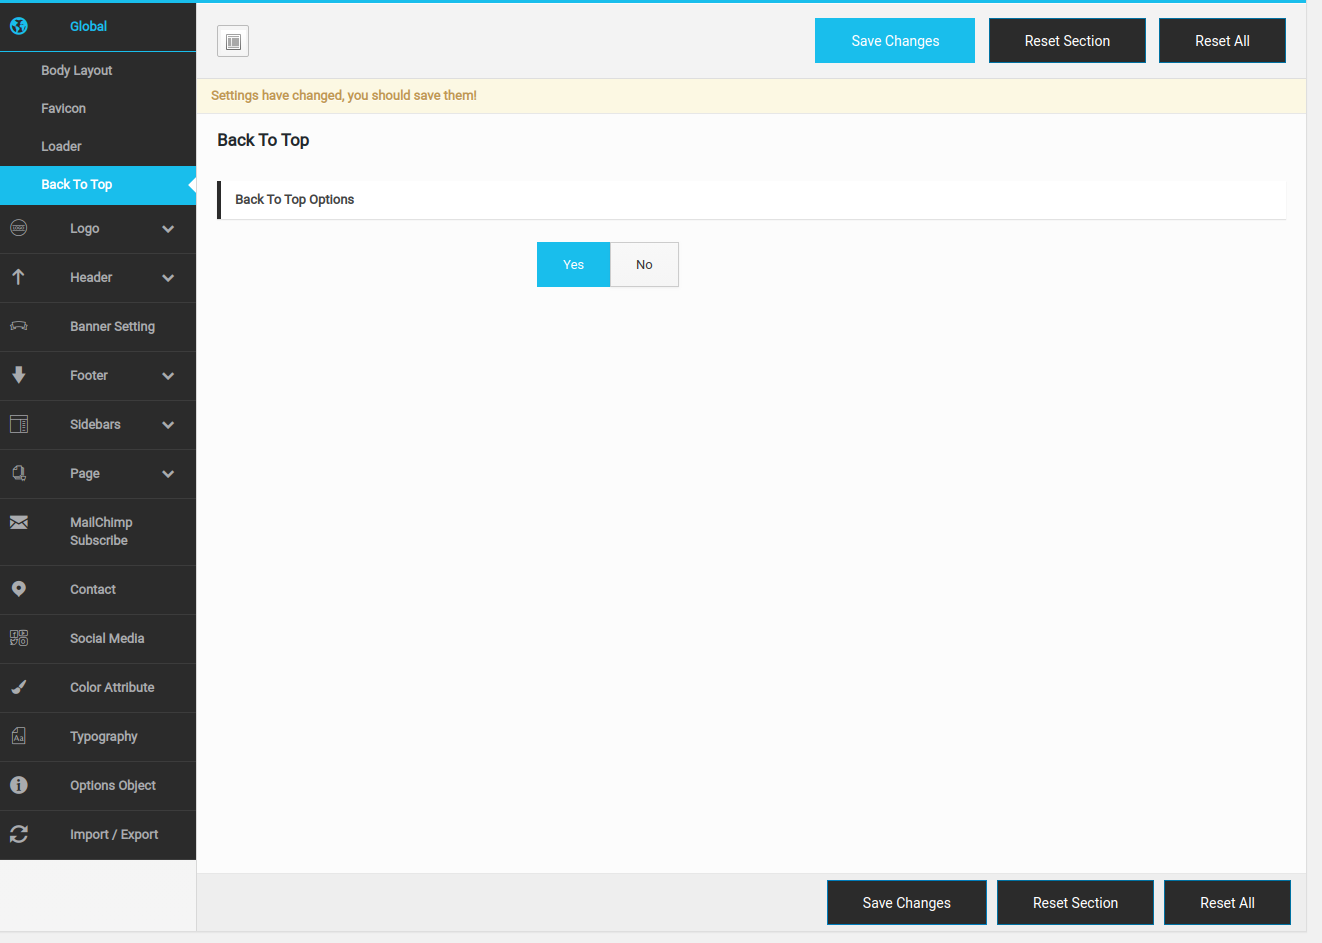
4.) - Back To Top : Adjust Back To Top Button.
1.) - Header Logo : Set Your Header Logo
![]()
2.) - Sticky Header Logo : Set Your Sticky Header Logo
![]()
3.) - Sticky Responsive Logo : Set Your Responsive Header Logo
![]()
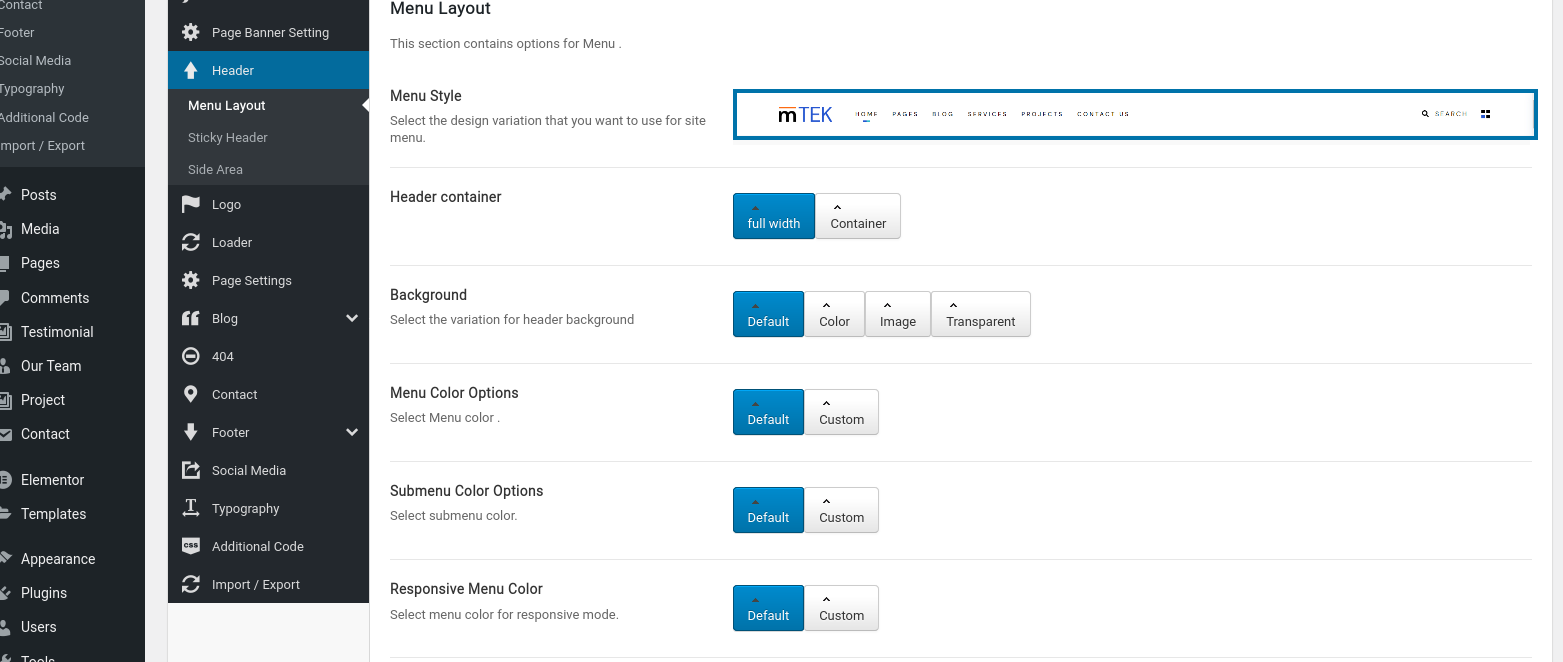
1.) - Header Layout Set Your Header Layout
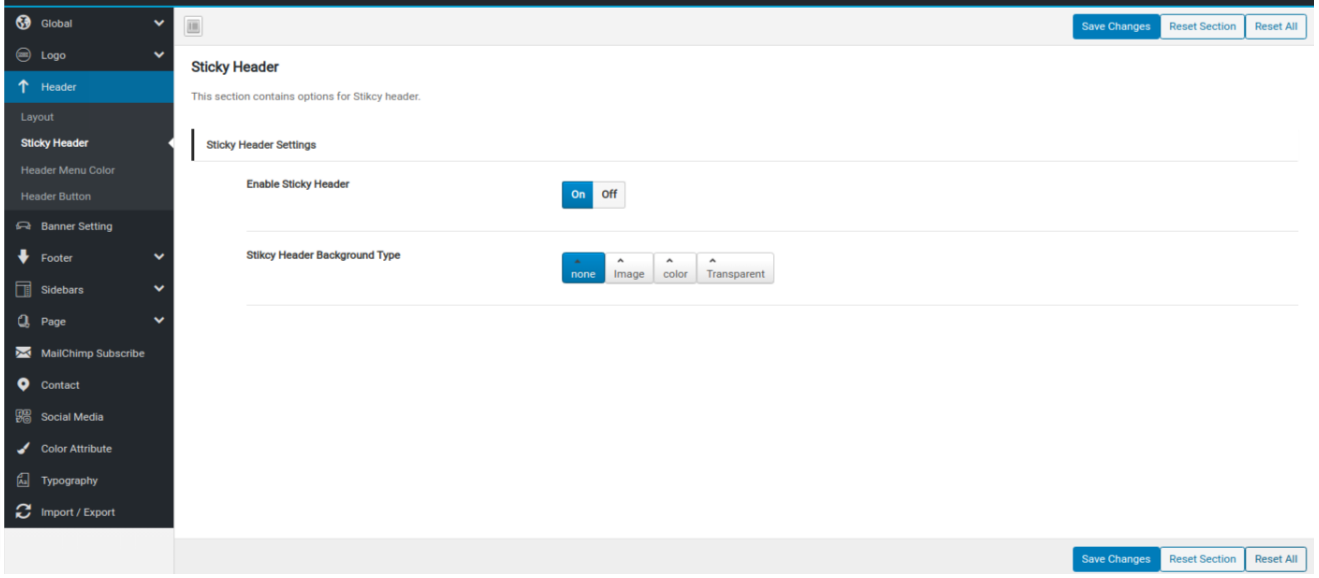
2.) - Sticky Header Set Your Sticky Header Options
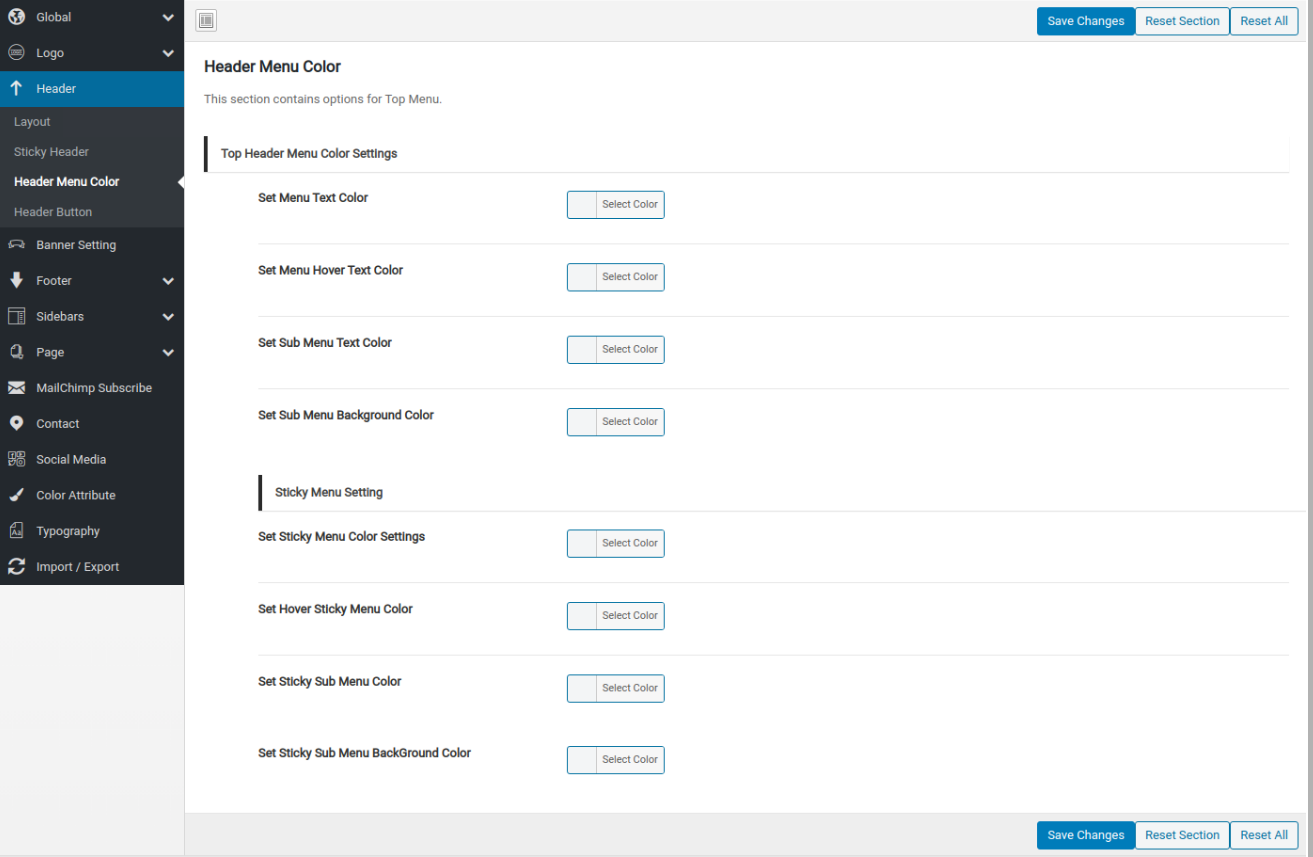
3.) - Header Menu Color Set Your Header Menu Color
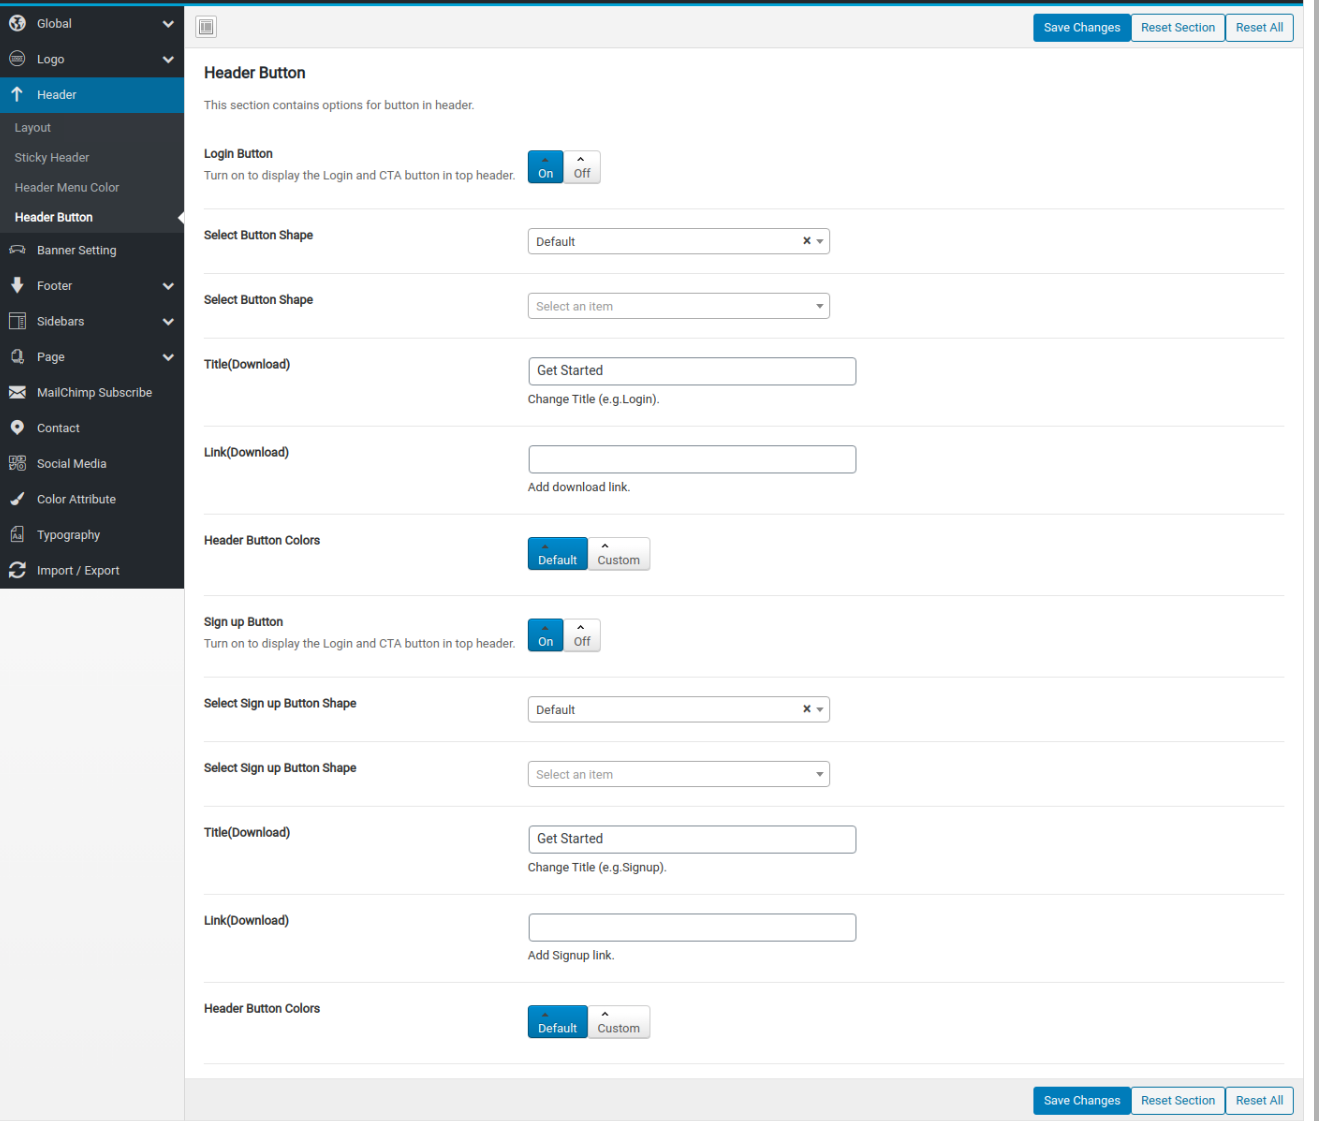
4.) - Header Button Set Your Header Button Option
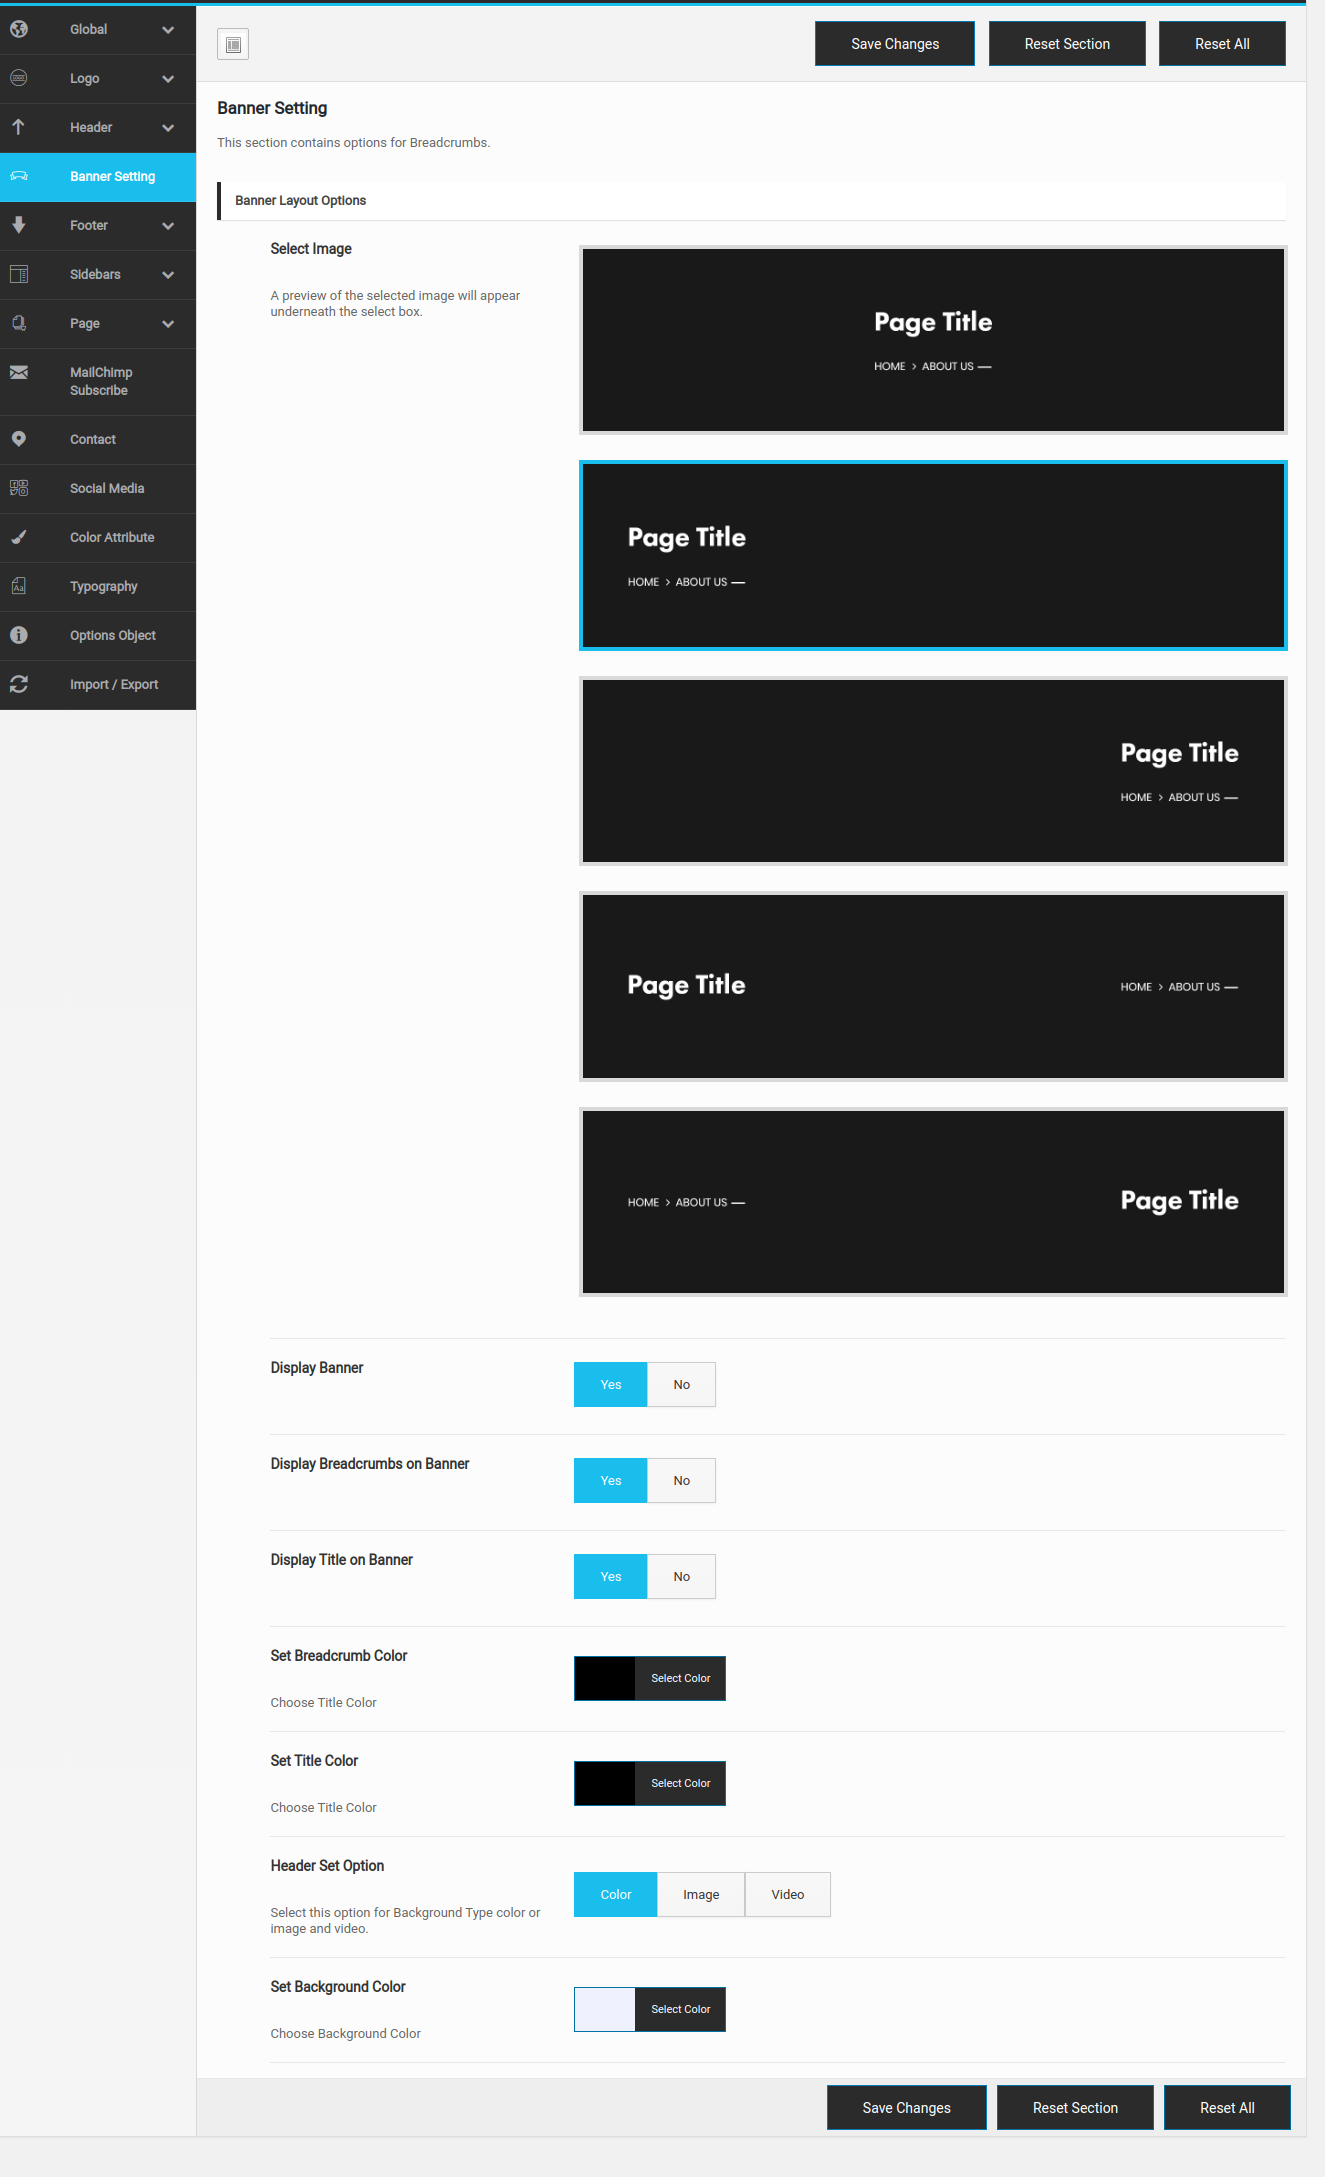
1.) - Page Banner : Set Your Page Banner
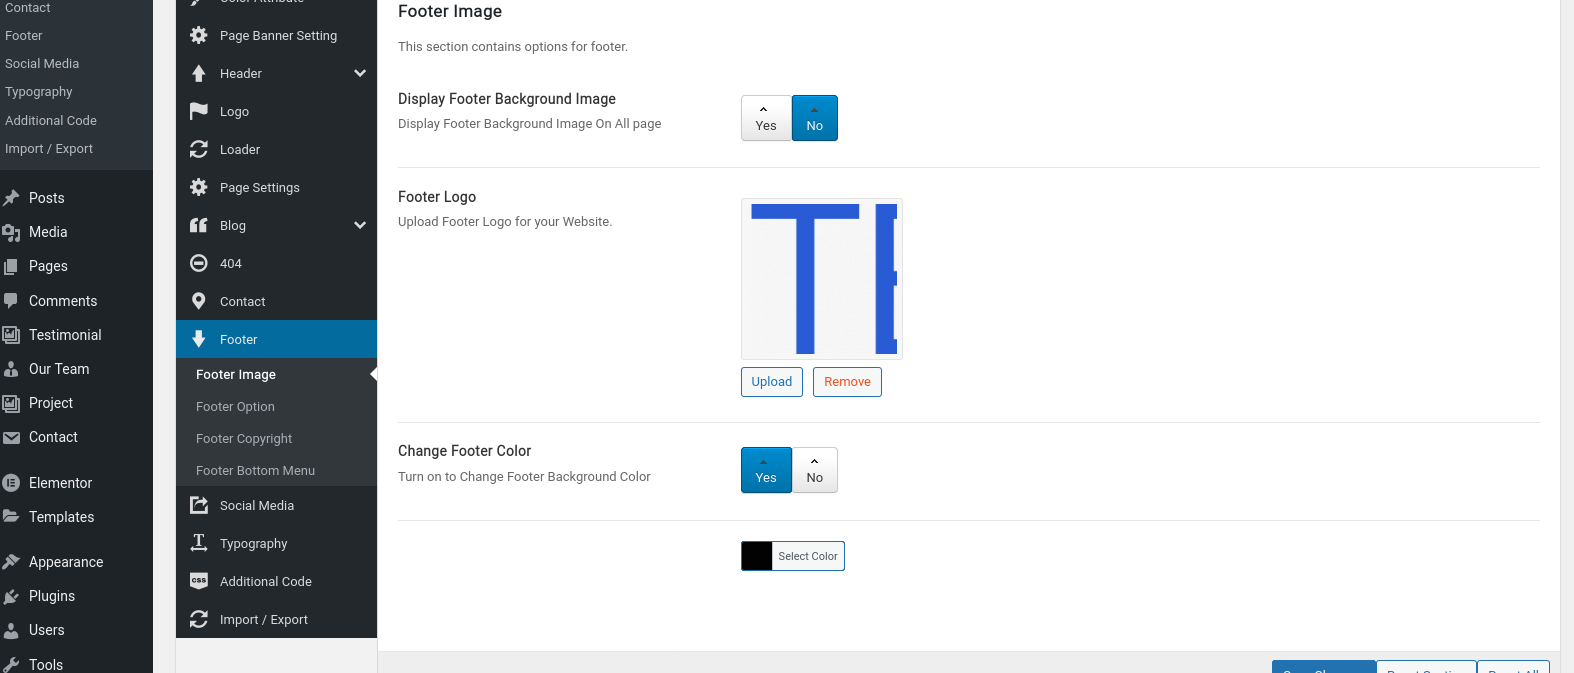
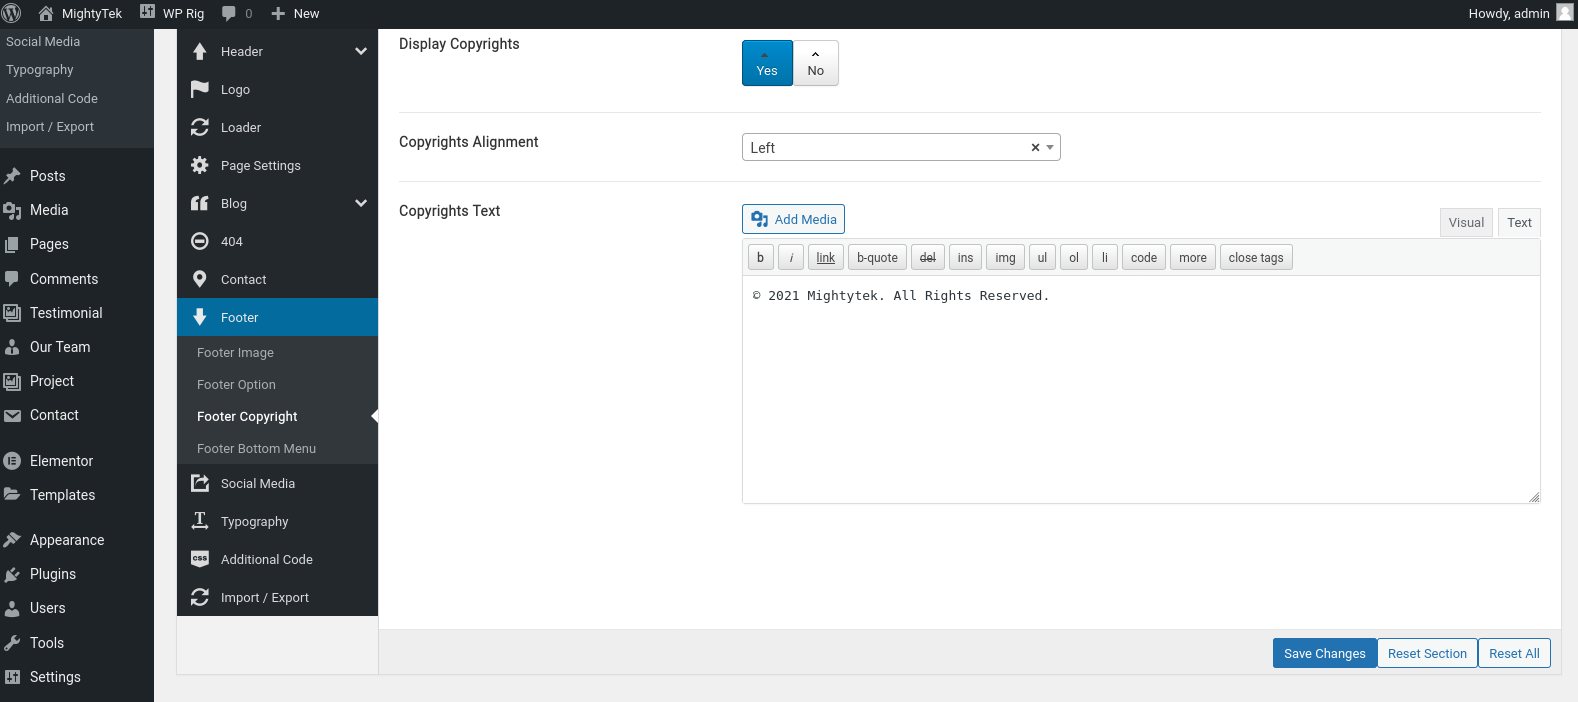
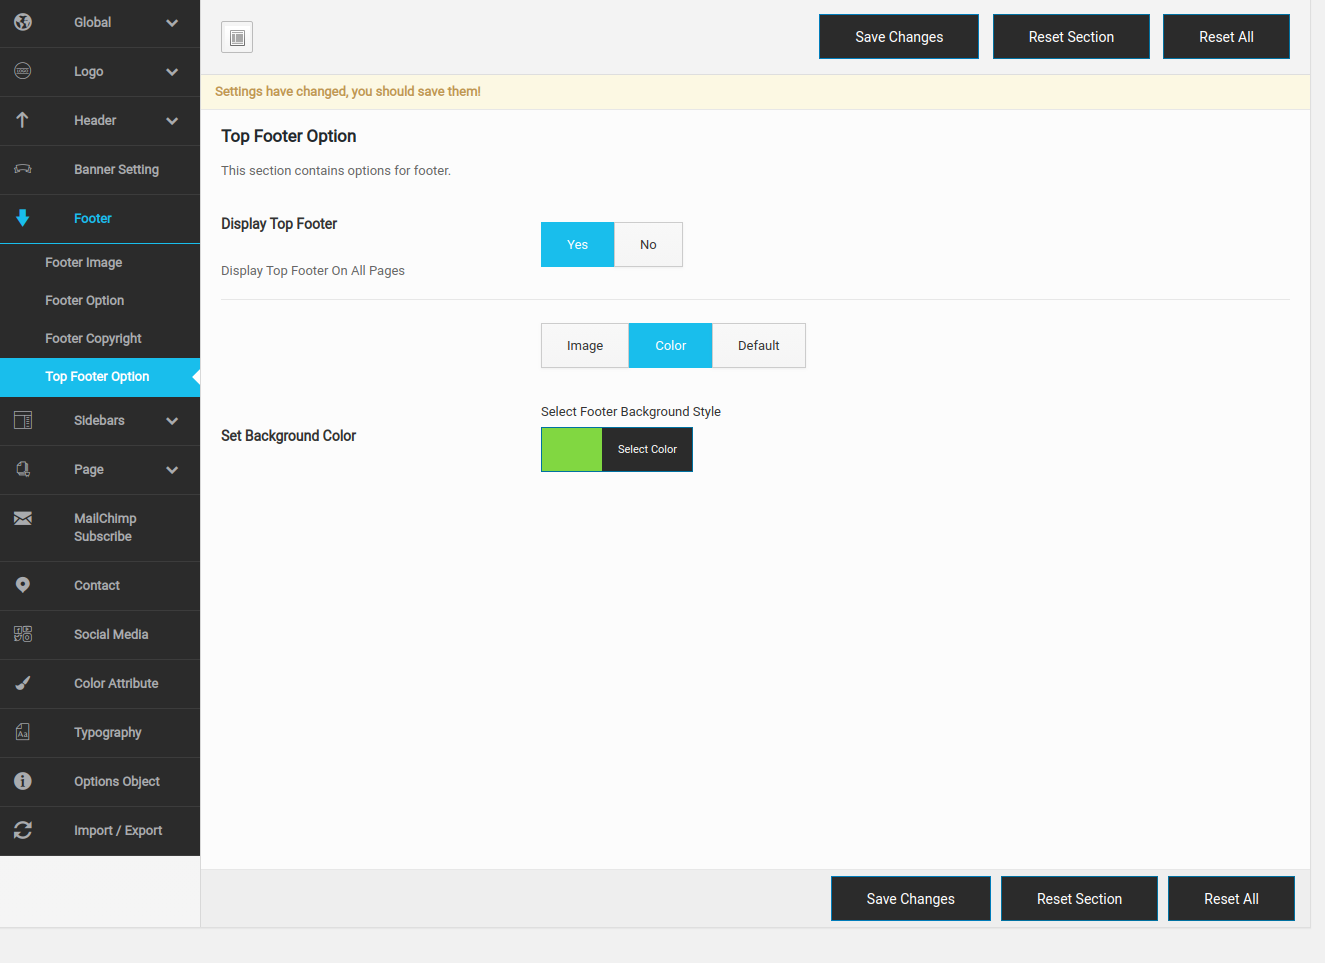
1.) - Footer Option : Set Your Footer Image And Color
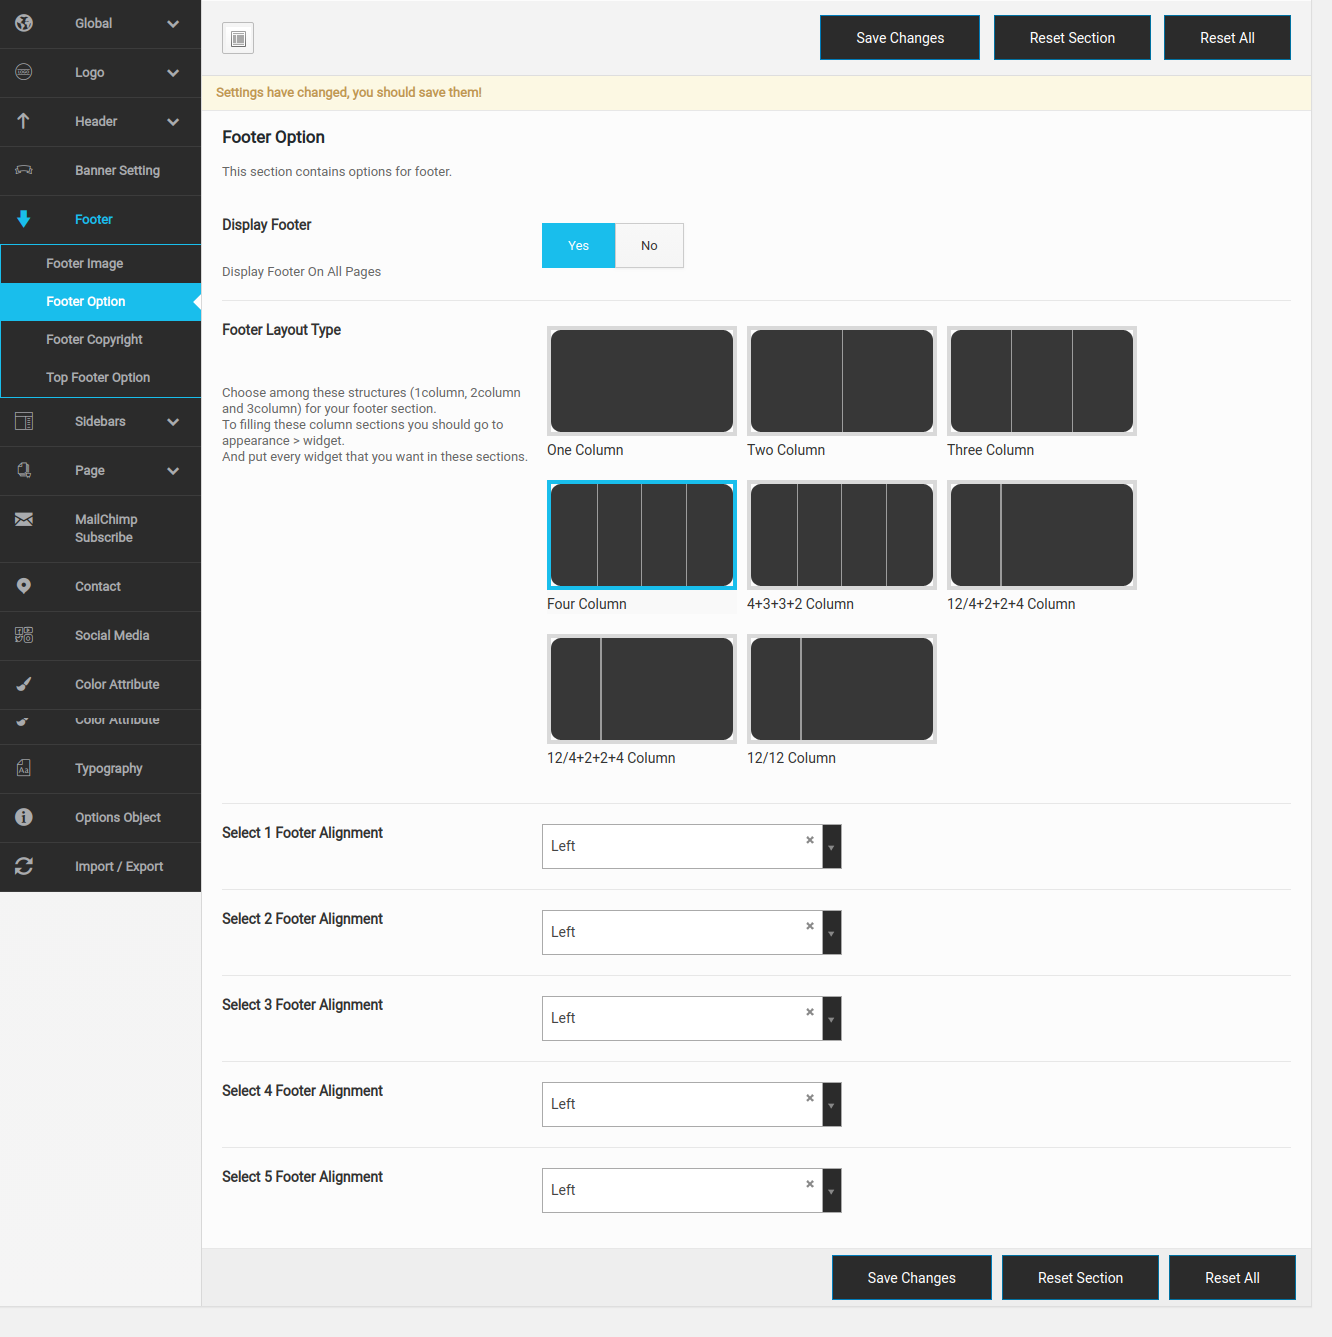
2.) - Footer Layout Option : Set Your Footer Layout
3.) - Footer Copy Right Option : Set Your Footer Copyright
3.) - Footer Top Option : Set Your Footer Top
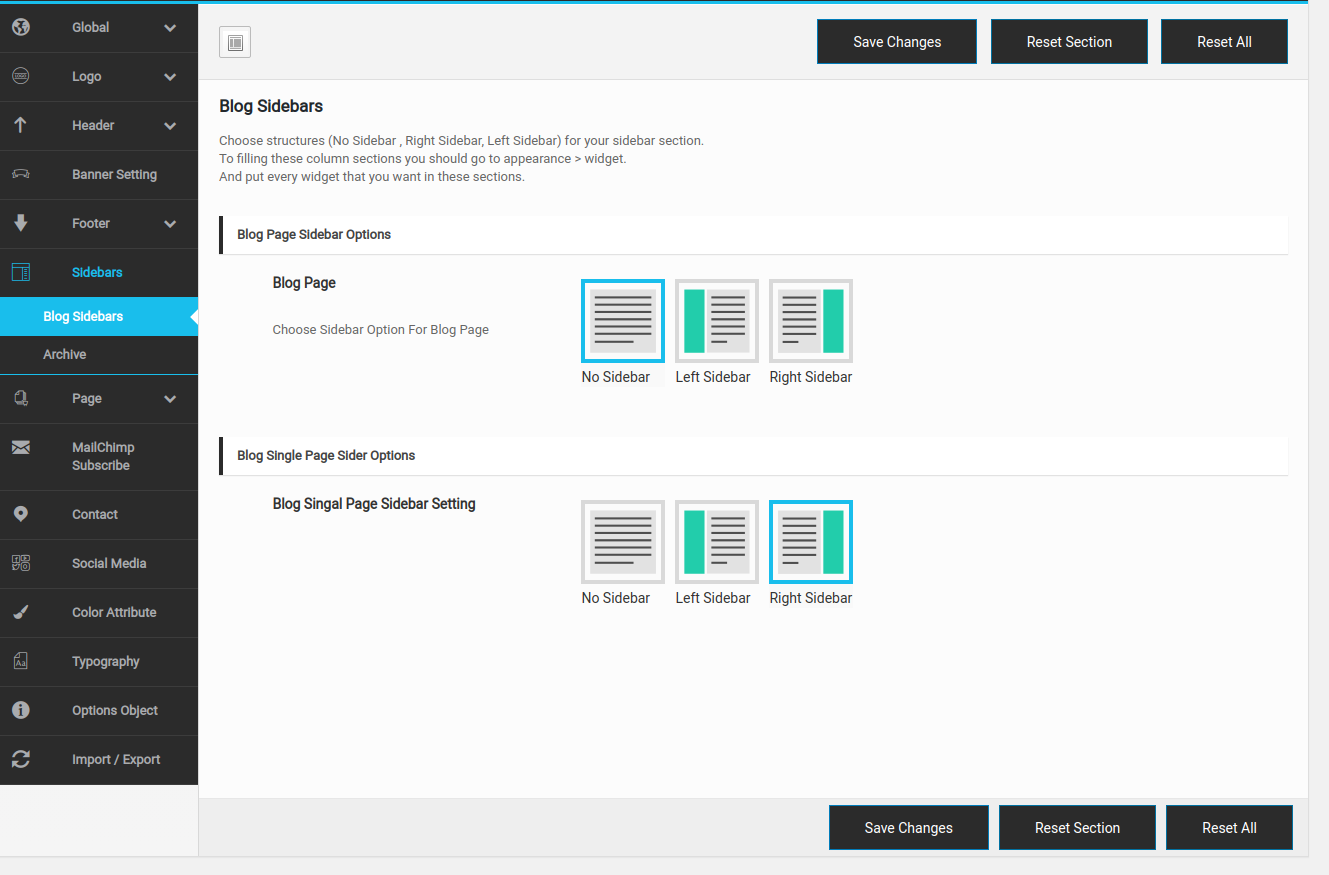
1.) - Blog Page Sidebar : Set Your Blog Page Sidebar
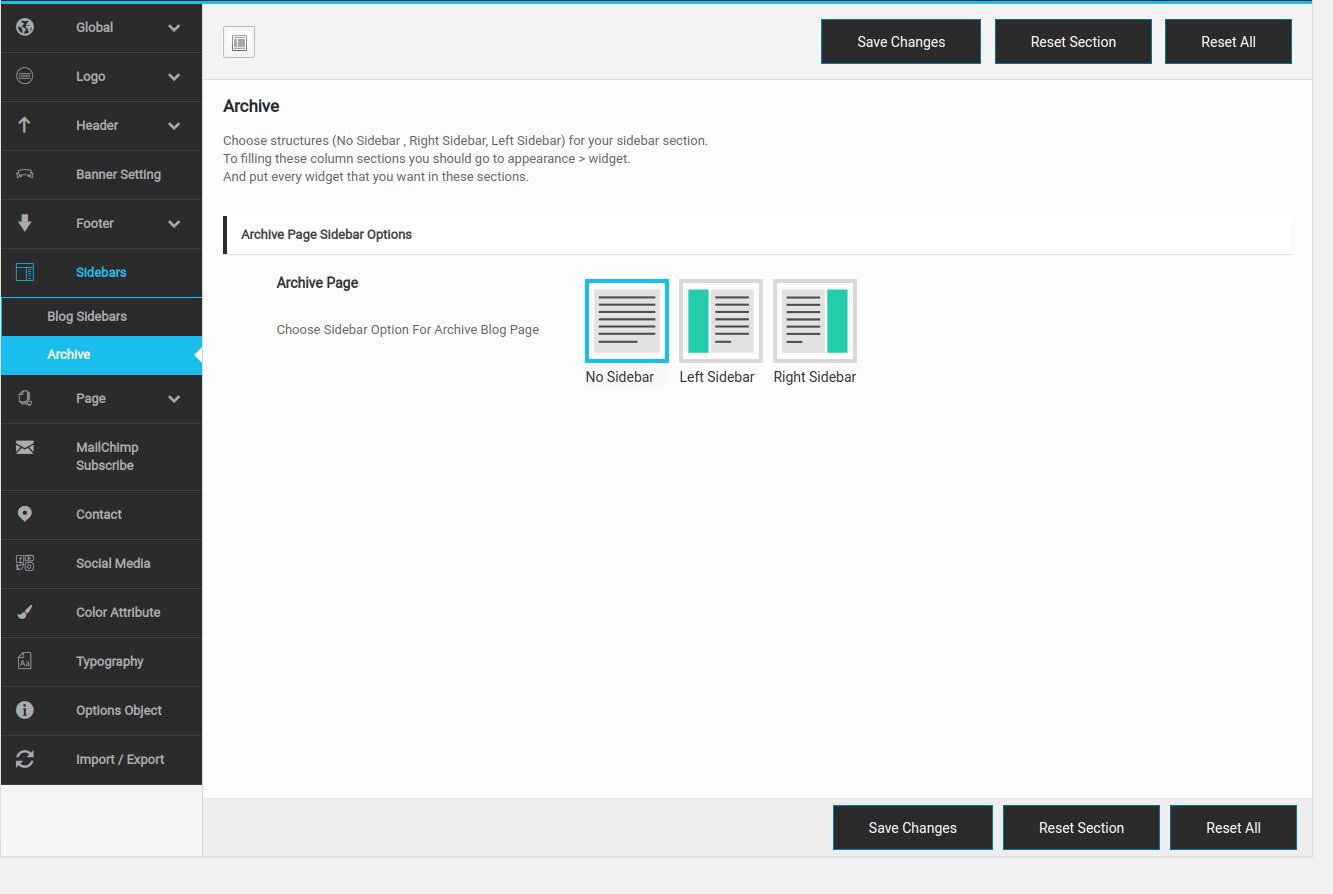
1.) - Archive Page Sidebar : Set Your Archive Page Sidebar
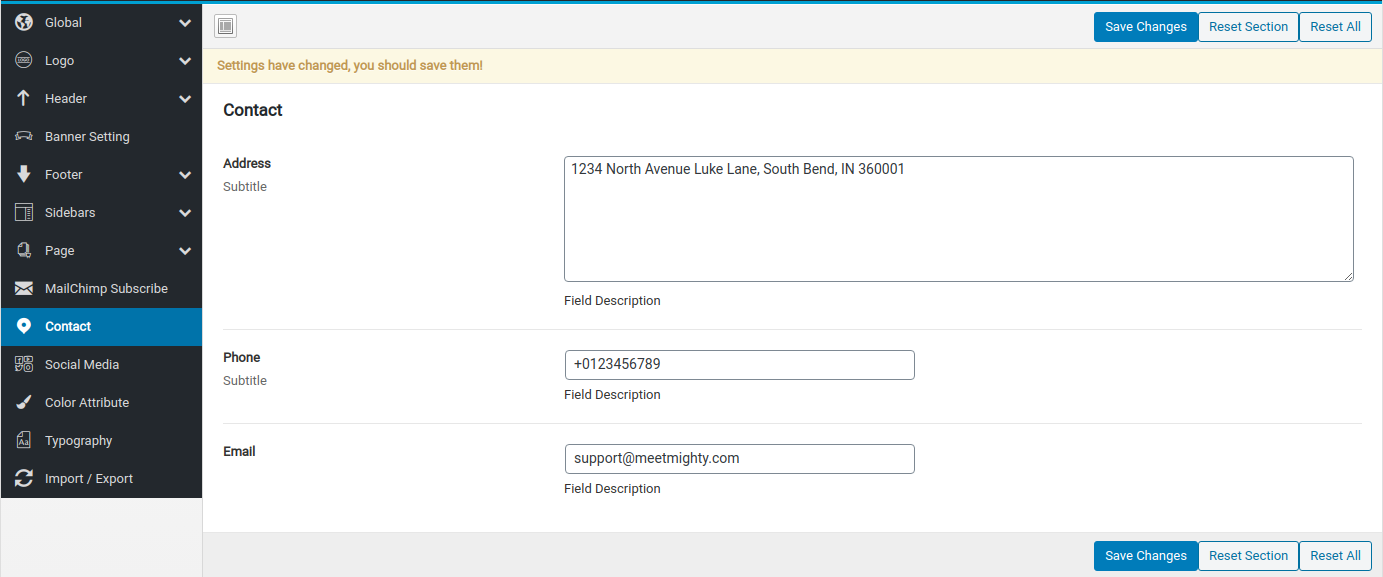
1.) - Address : - Enter your address.
2.) - Phone : - Enter your contact number.
3.) - Email : - Enter your email id.
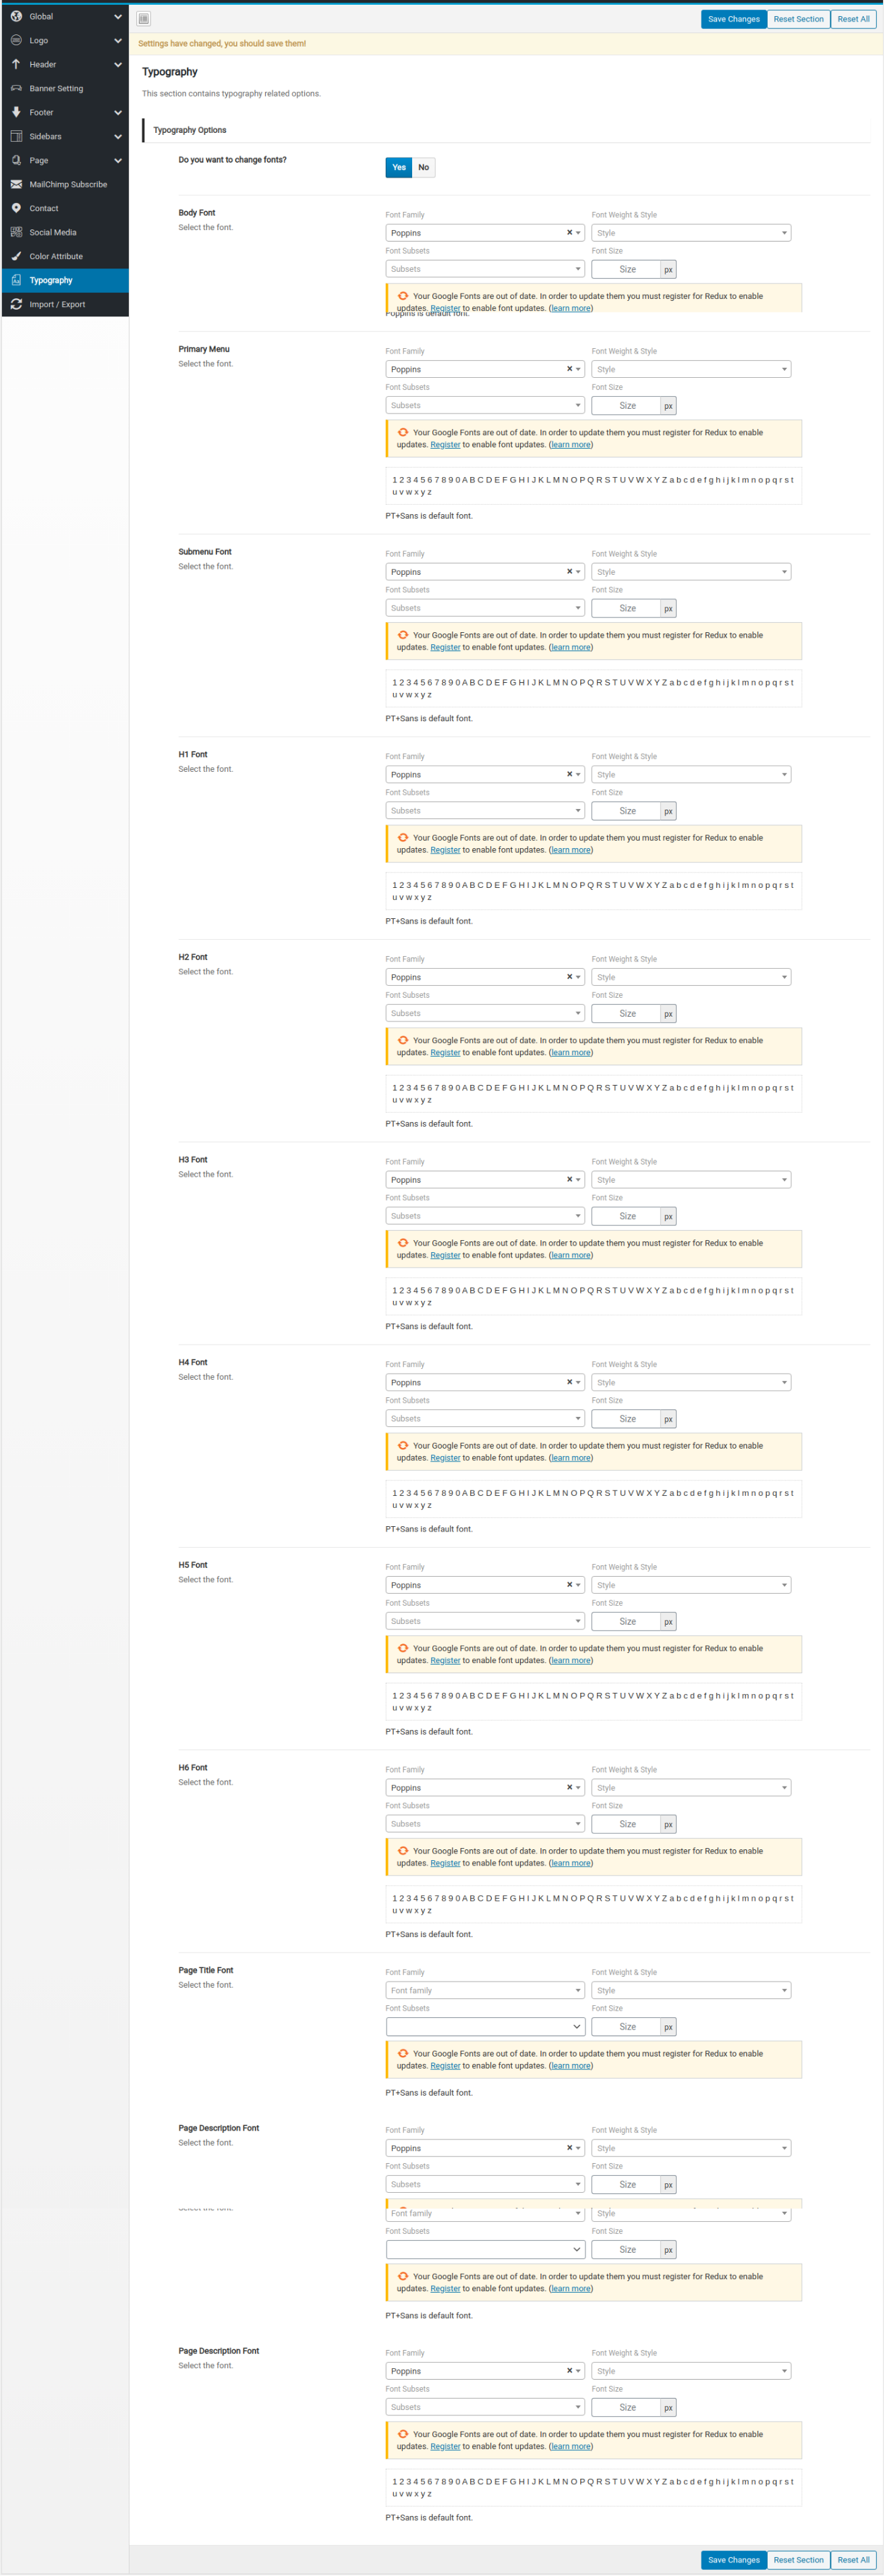
1.) - Do you want to change fonts? : - Change all the font size, family etc.
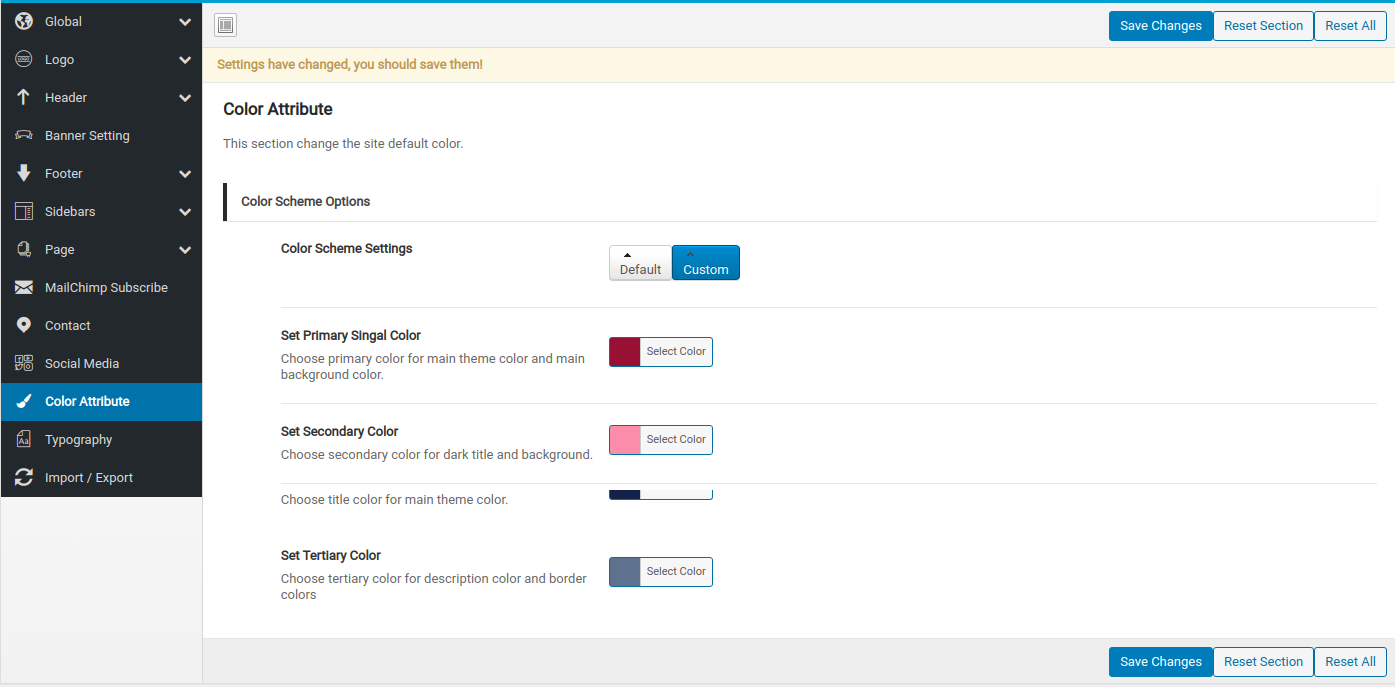
2.) - Background Color : - You have to change the whole site color.
3.) - Background Gradient Color : - You have to change the whole site Gradient color(dual).
4.) - Set Primary Color : - Set the Primary color of the text.
5.) - Set Secondary Color : - Set the Secondary color of the text.
Content management is a breeze with Fortuna and it requires absolutely no coding skills. Using a highly customized version of the Elementor plugin the theme offers a user friendly drag and drop interface for easy page creation and editing. Follow these simple steps to create a Page with Mightytek:
Step 1 - Go to Pages > Add new in your Dashboard. Add a title to your Page (top field).
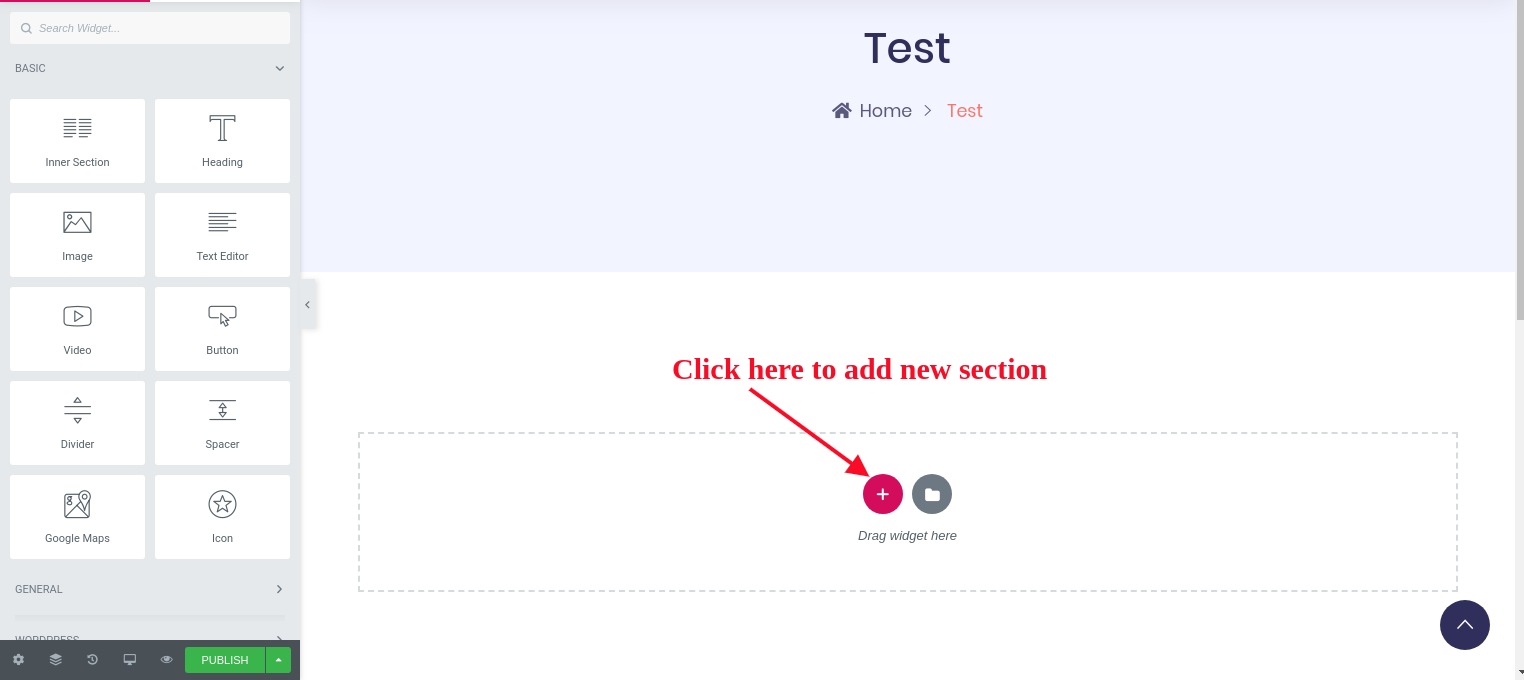
Step 2 -Add New Section
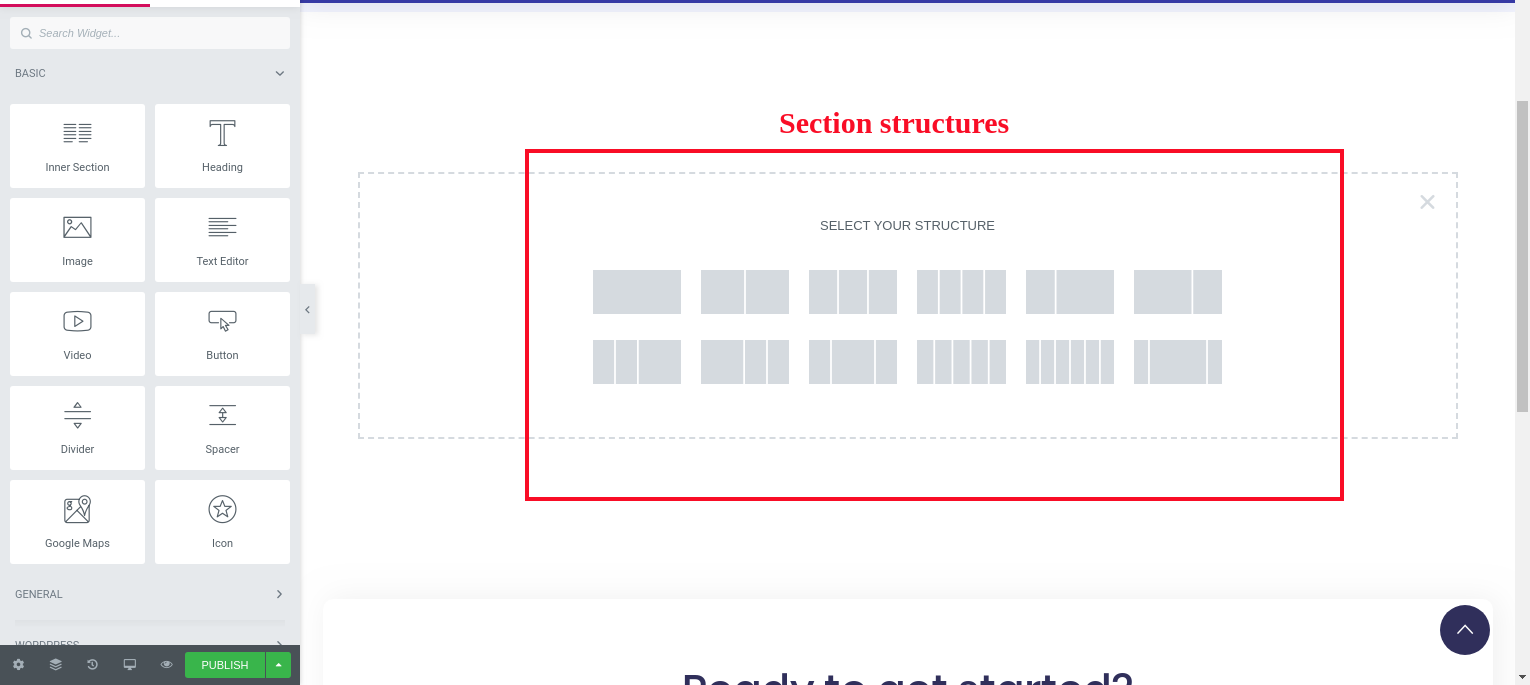
Step 3 -Select Your Section Structure
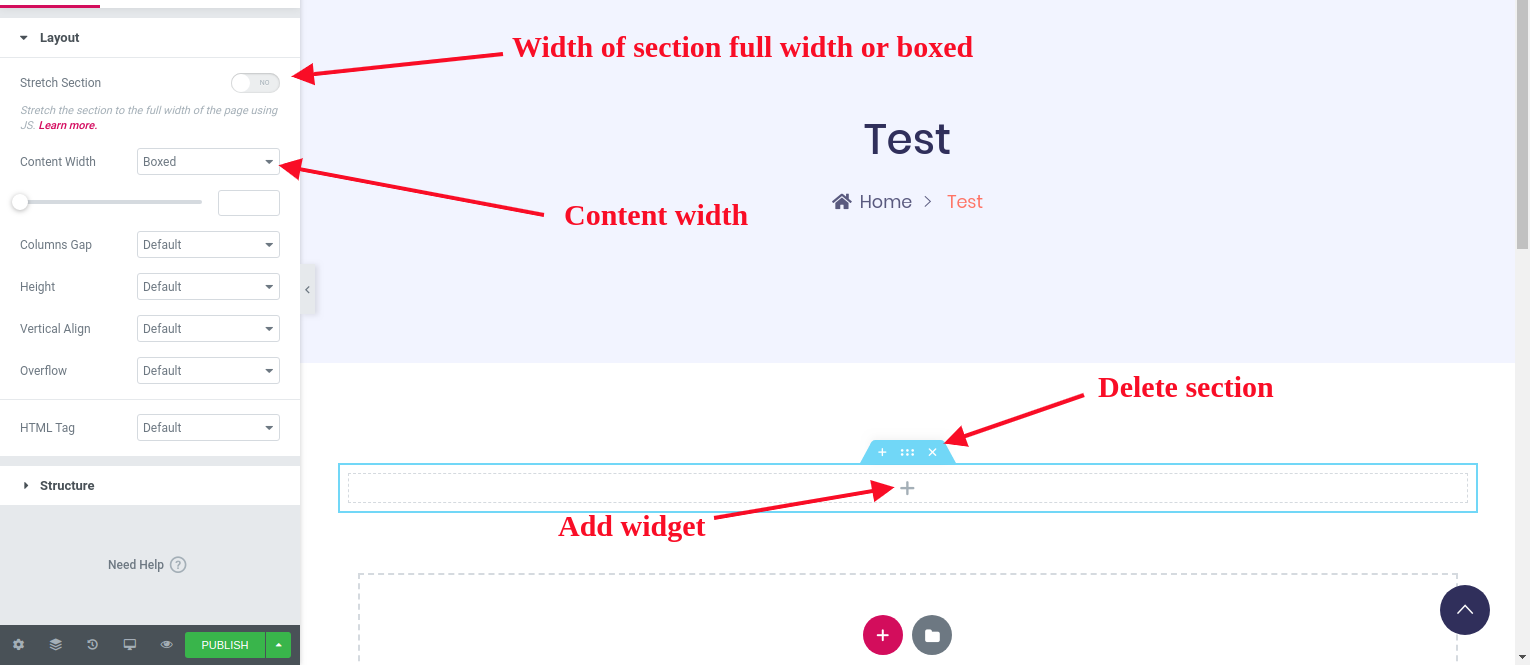
Step 4 -Edit Your Section. Add New Widgets
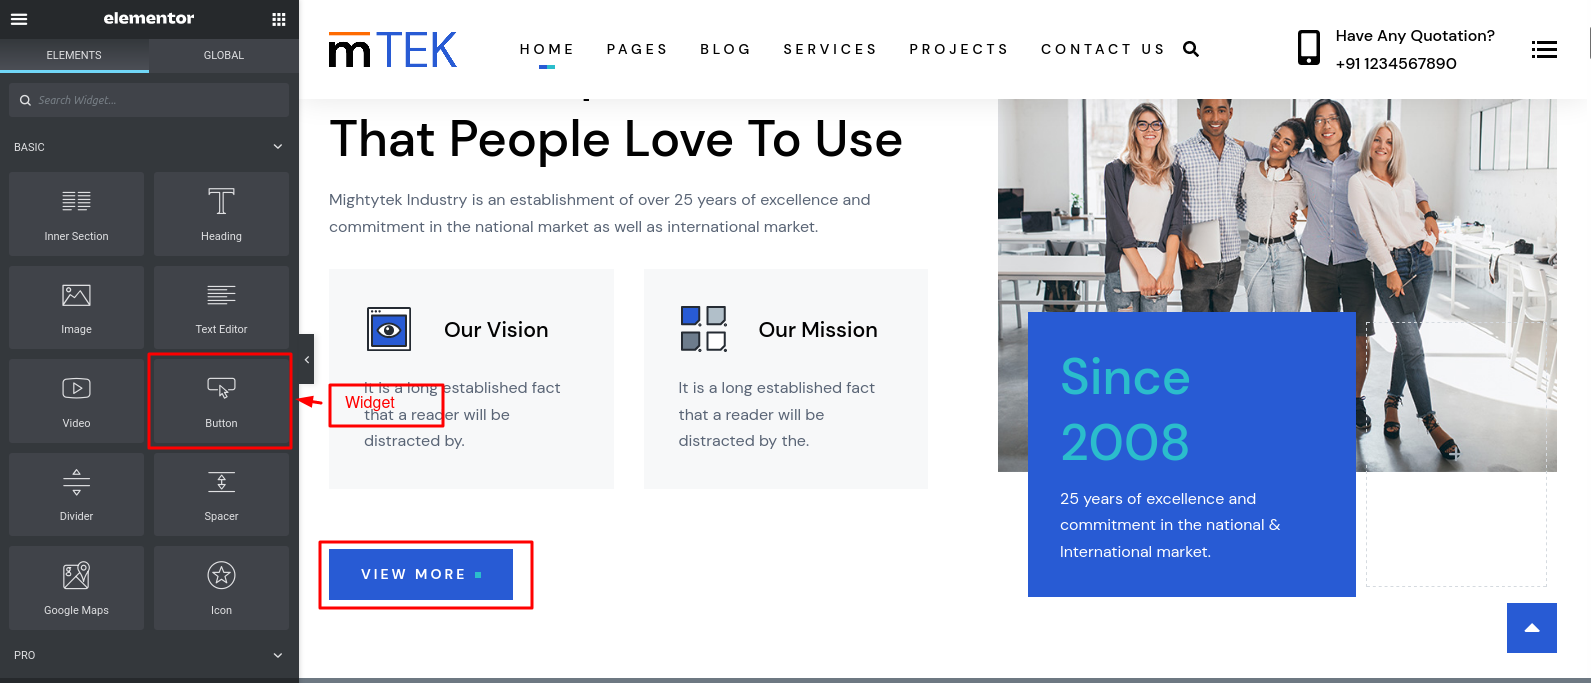
Adding Page Elements to your Page is pretty straightforward. First you have to create a new page, add a row to it and defined your Row columns (read more in the previous section). To know More Please Read Elementor
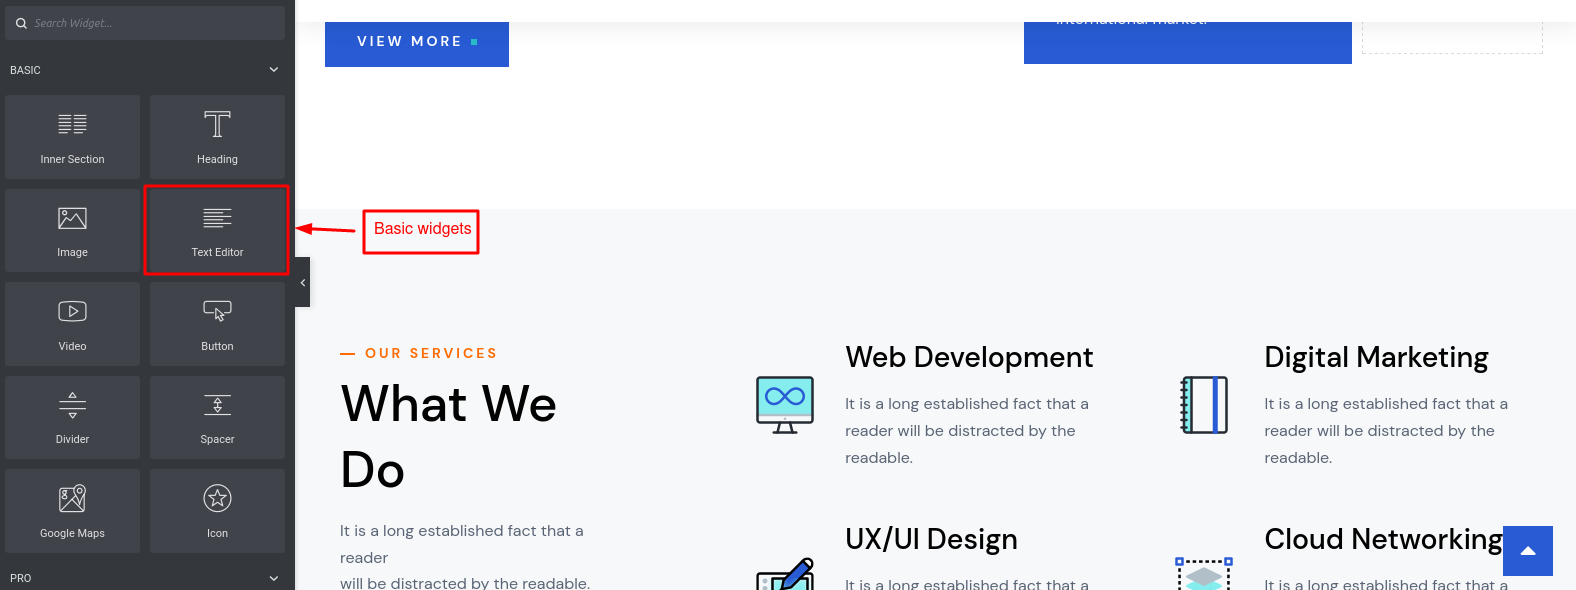
Basic Widget
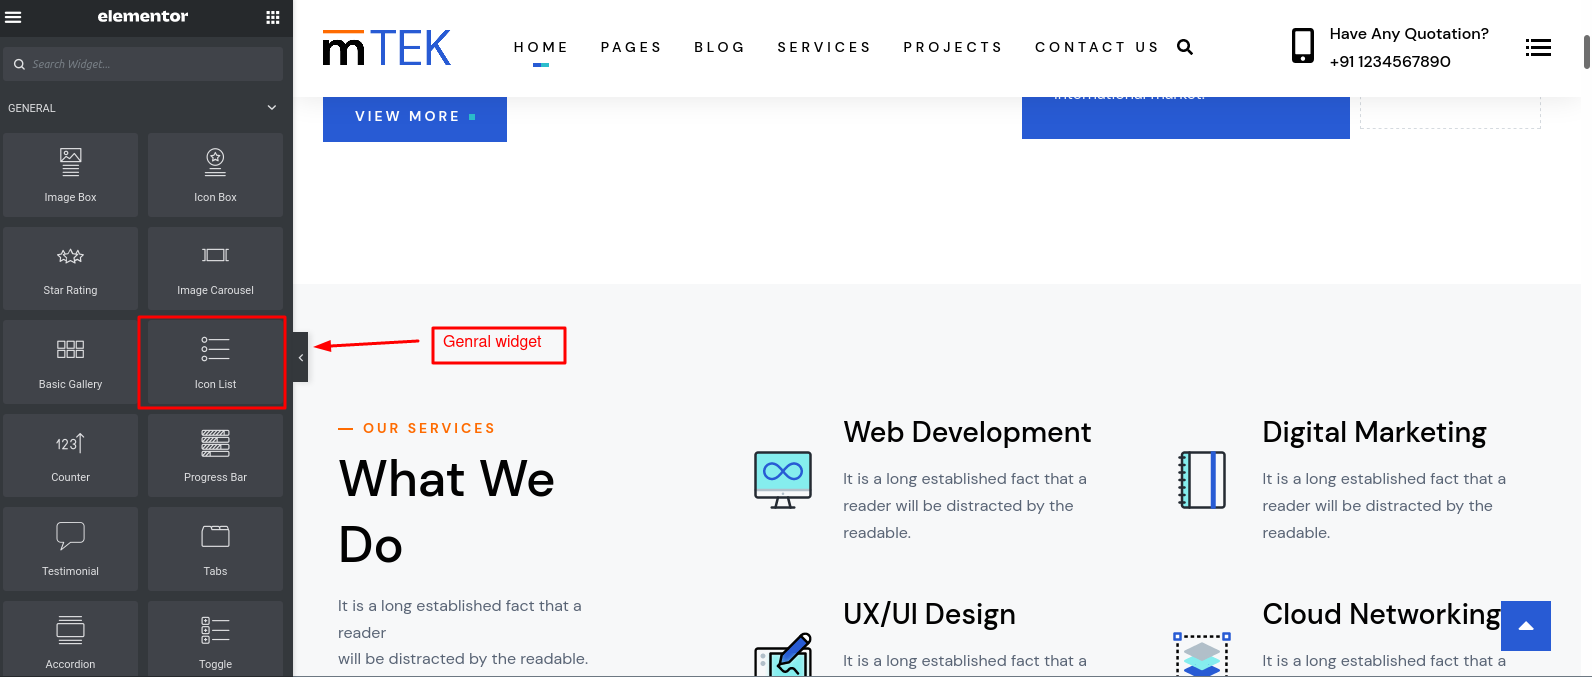
General Widget
WordPress Widget

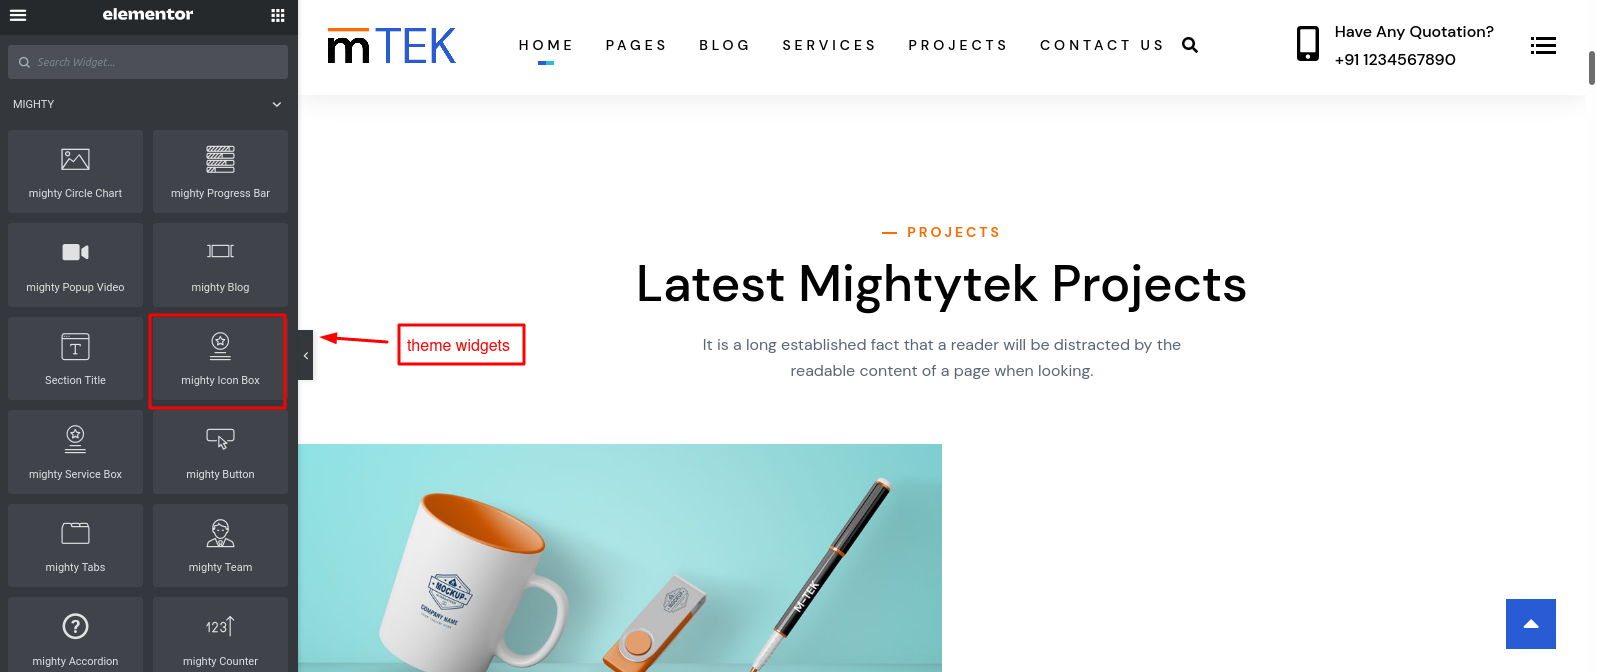
Mightytek Theme Widget
You get a free 6 month support with this theme. If you need technical help or encountered an unusual error or if you got a bug or an issue, we have got all of this covered for you. Please feel free to E-mail at our mail address - [email protected].
Update your theme to give for the best experience – check out what’s new and improved. Thank you
You get free 6 month support with this theme. If you need some help or found a bug or an issue, you can always contact us and we will try our best to respond you within a day or two."
"And you’ve made it! Congratulations, your websites is all done. If you have any question or have a query, or simply wish to give a suggestion or two, You can also drop us an email at [email protected]. We wish you all the best for your project and success with our item.
copyright MeetMighty 2021
Social Profiles :
These options are for a box that enable people to share your blog content on various social networks which automatically shows up under the content blog posts, an important function that helps promoting your site. You can also check the options to decide which network they are allowed to share the content of your website on. You can also turn off all options if you don't want your content to be shared at all.
Social Media Option: Enter your social media Url.