General Information
Thank you for choosing our plugin. We hope you enjoy building your project with us. It is a
powerhouse of great features and powerful functionalities that would take months to develop.
Help and Support
The expert team at Meet mighty is always happy to help you with any questions or concerns you
encounter. If you need any support with the item, please contact us through our email and support
portal.
Support email:- [email protected]
Support portal:- https://support.meetmighty.com/
Plugin Installation
1. WordPress Information
For WordPress Installation you can check the Famous 5-Minutes Install here:
Support System: https://wordpress.org/support/article/how-to-install-wordpress
To use Plugin, you must be running WordPress 5.0.0 or higher, PHP 7.3 or higher, MySQL 5.6 or higher
2. Recommended PHP Configuration Limits
White screen, demo content fails when importing, empty page content and other similar issues are all
related to low PHP configuration limits. The solution is to increase the PHP limits. You can do this
on your own, or contact your web host and ask them to increase those limits to a minimum as follows:
- max_input_vars = 3000
- memory_limit = 128M
- max_execution_time = 300
- max_input_time = 300
- upload_max_filesize = 64M
- post_max_size = 64M
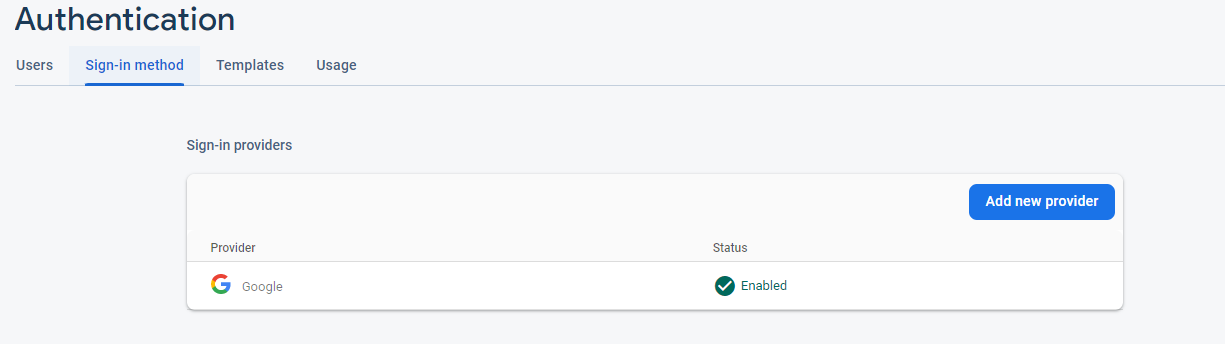
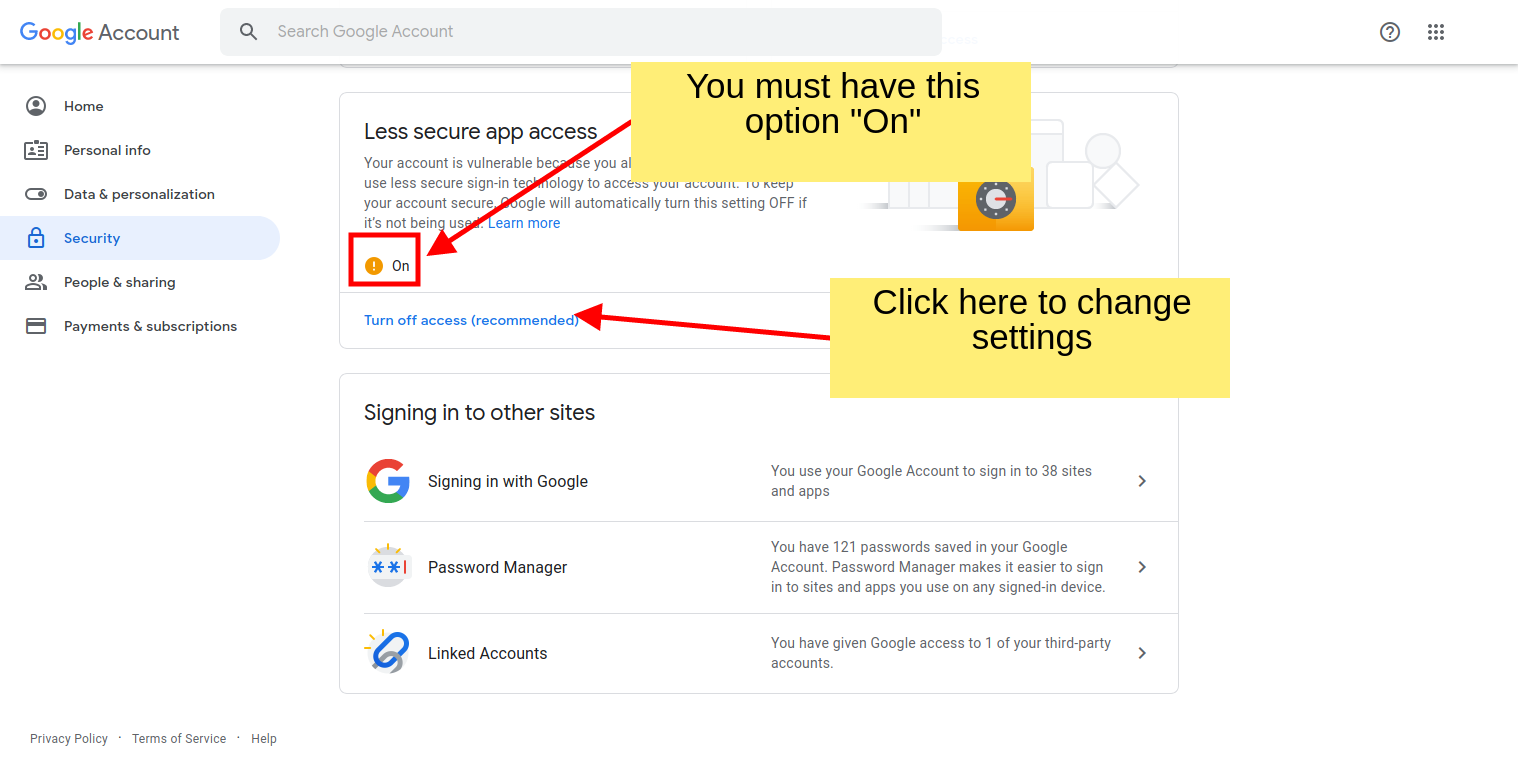
3. Enable JWT Authentication
WordPress JSON Web Token Authentication allows you to do REST API authentication via token. It is a
simple, non-complex, and easy to use.This plugin probably is the most convenient way to do JWT
Authentication in WordPress.
Enable PHP HTTP Authorization Header
Shared Hosts
Most shared hosts have disabled the HTTP Authorization Header by default.
To enable this option you’ll need to edit your .htaccess file by adding the following:
RewriteCond %{HTTP:Authorization} ^(.*)
RewriteRule ^(.*) - [E=HTTP_AUTHORIZATION:%1]
To enable this option you’ll need to edit your .htaccess file by adding the following: (See Issues)
SetEnvIf Authorization "(.*)" HTTP_AUTHORIZATION=$1
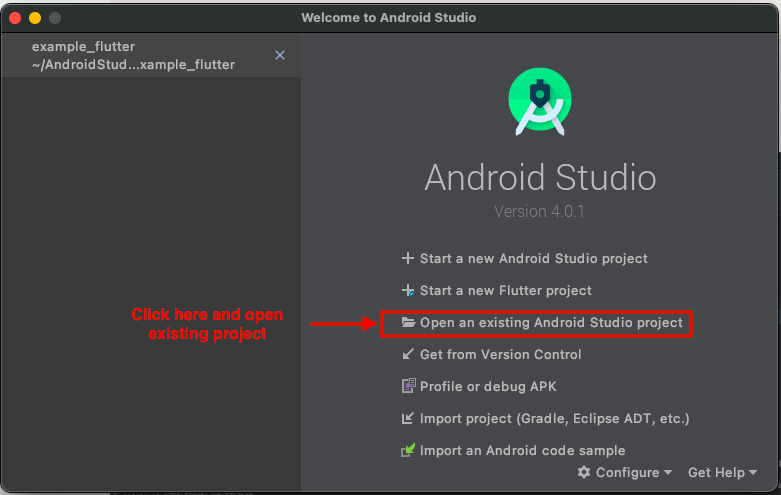
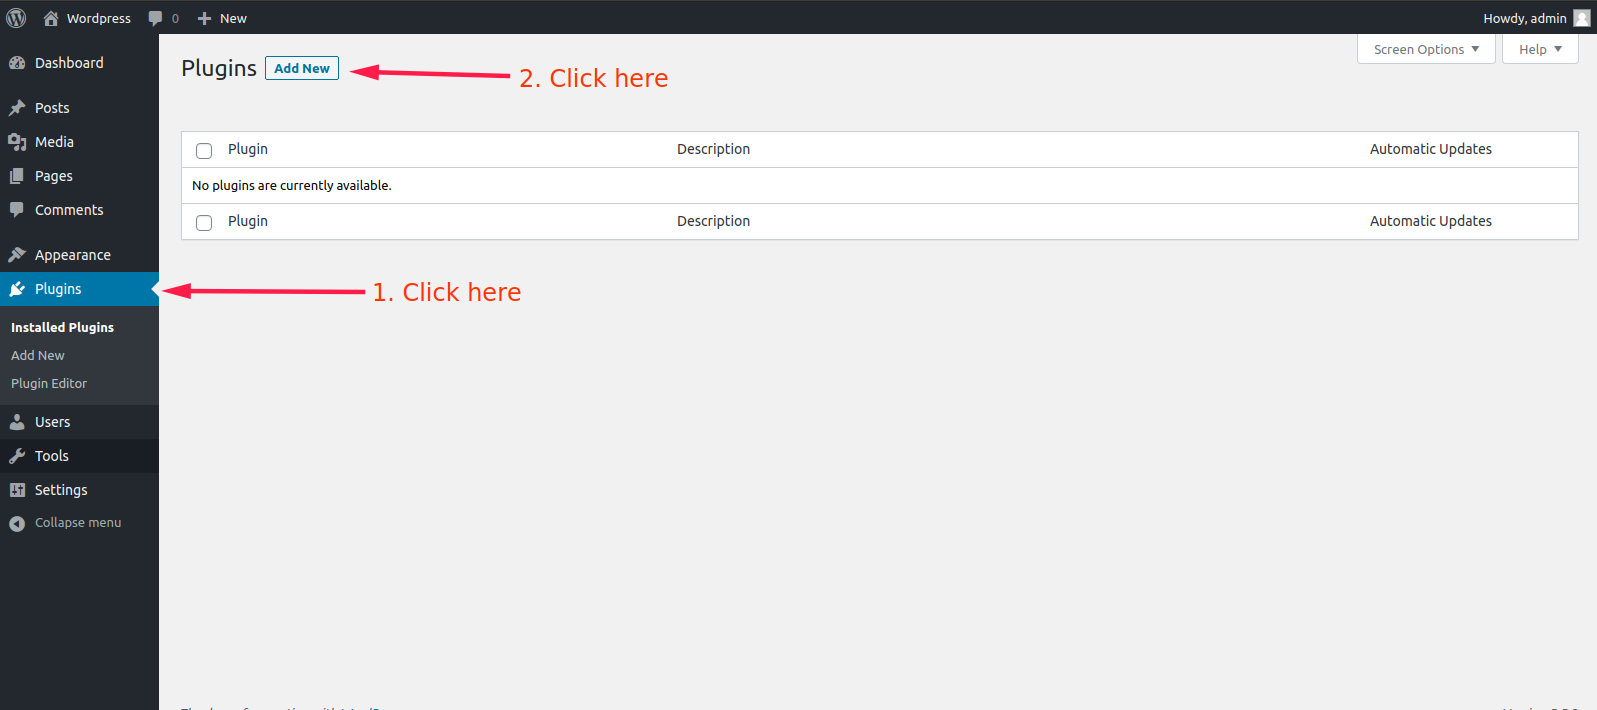
4. How to install plugin
How to add a new plugin in WordPress
PlantApp With Dokan – Best WooCommerce Multivendor Marketplace Solution
If you want store with dokan then install and active plant-app-api.zip file. You can locate the plugin zip folder in your package zip file
wordpress_zip/plant-app-api.zip
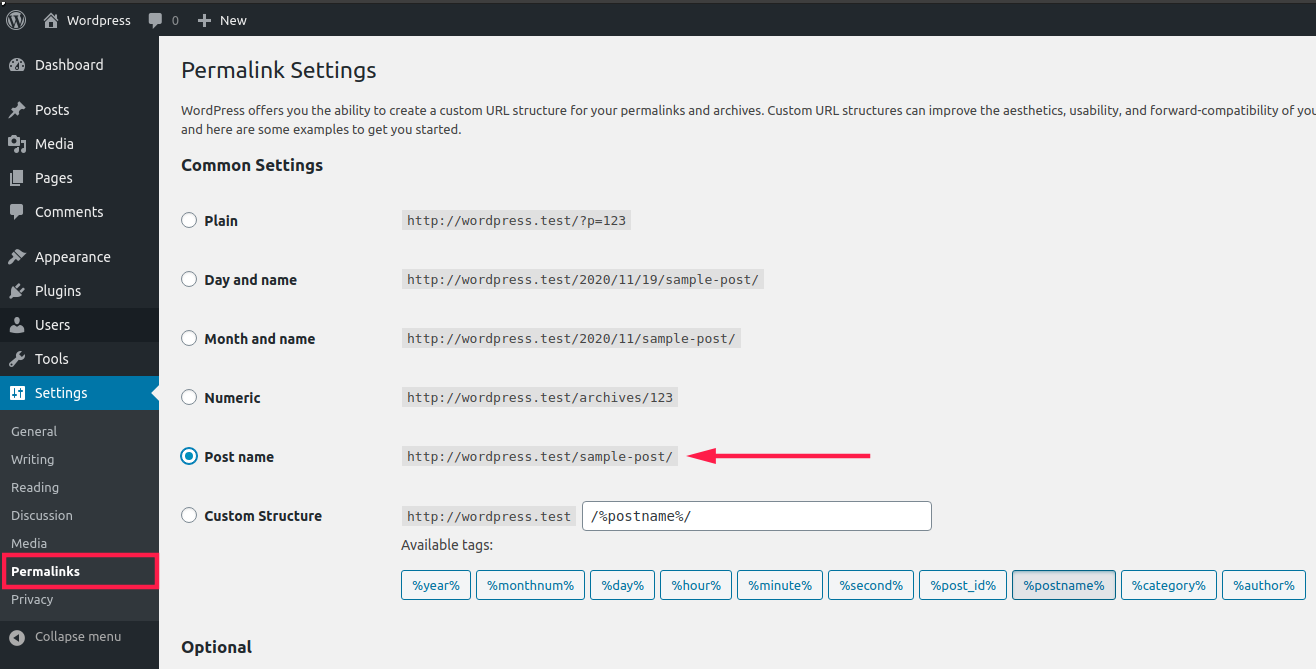
Permalink Setting
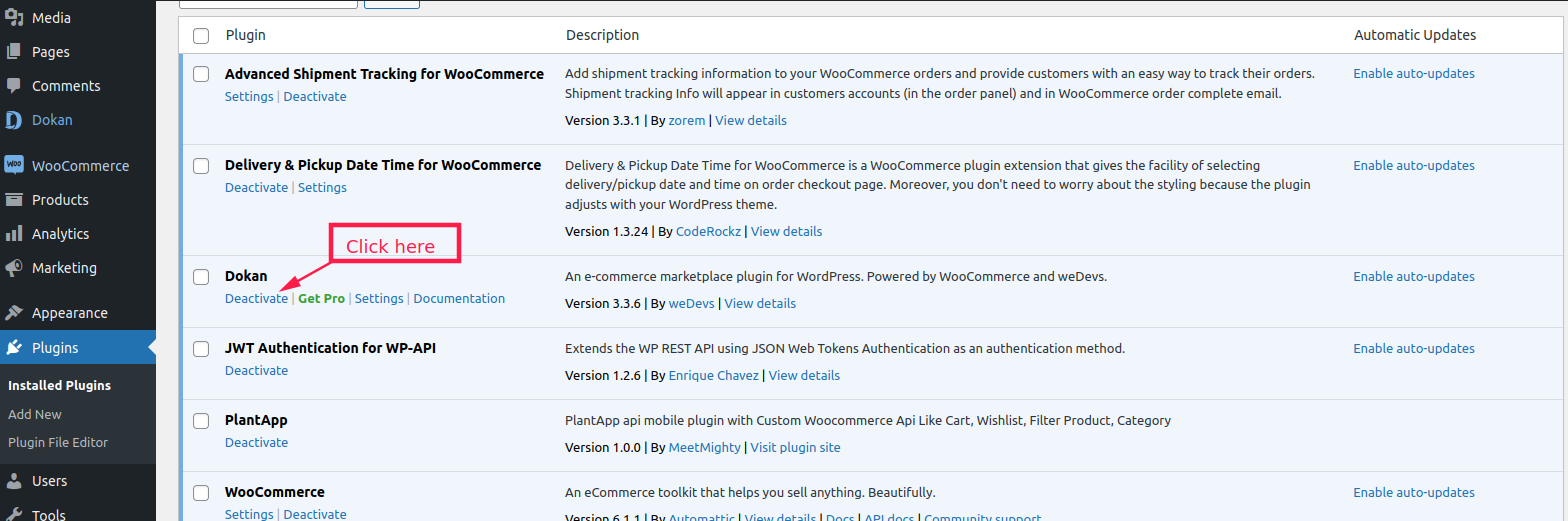
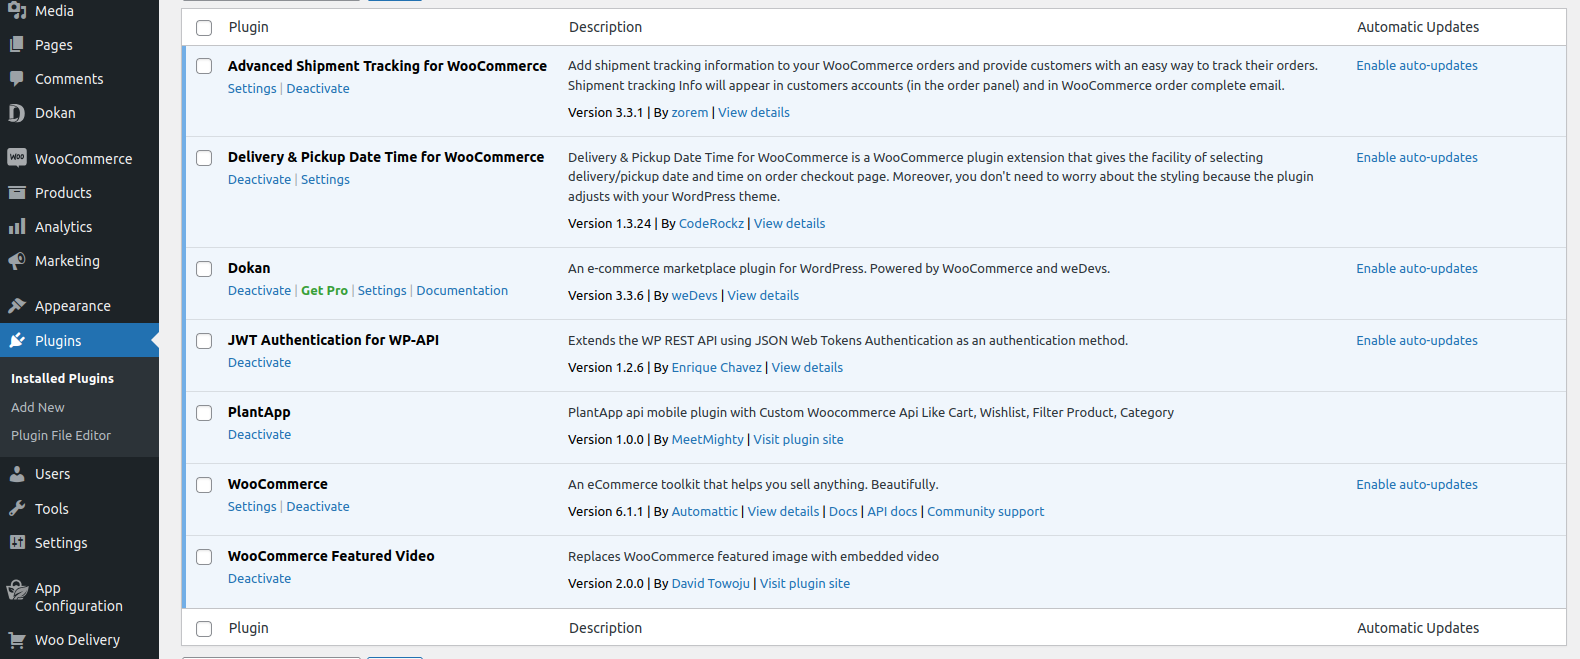
 Required Plugin With Dokan
1. Make sure required plugin should be activated.
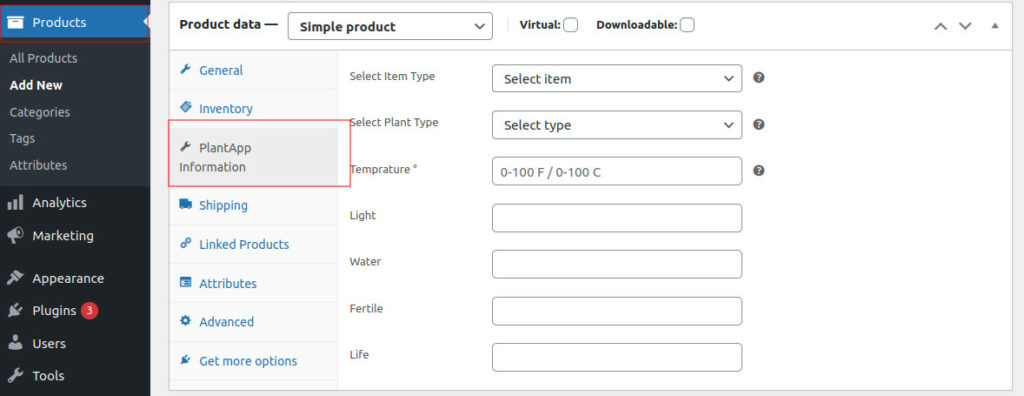
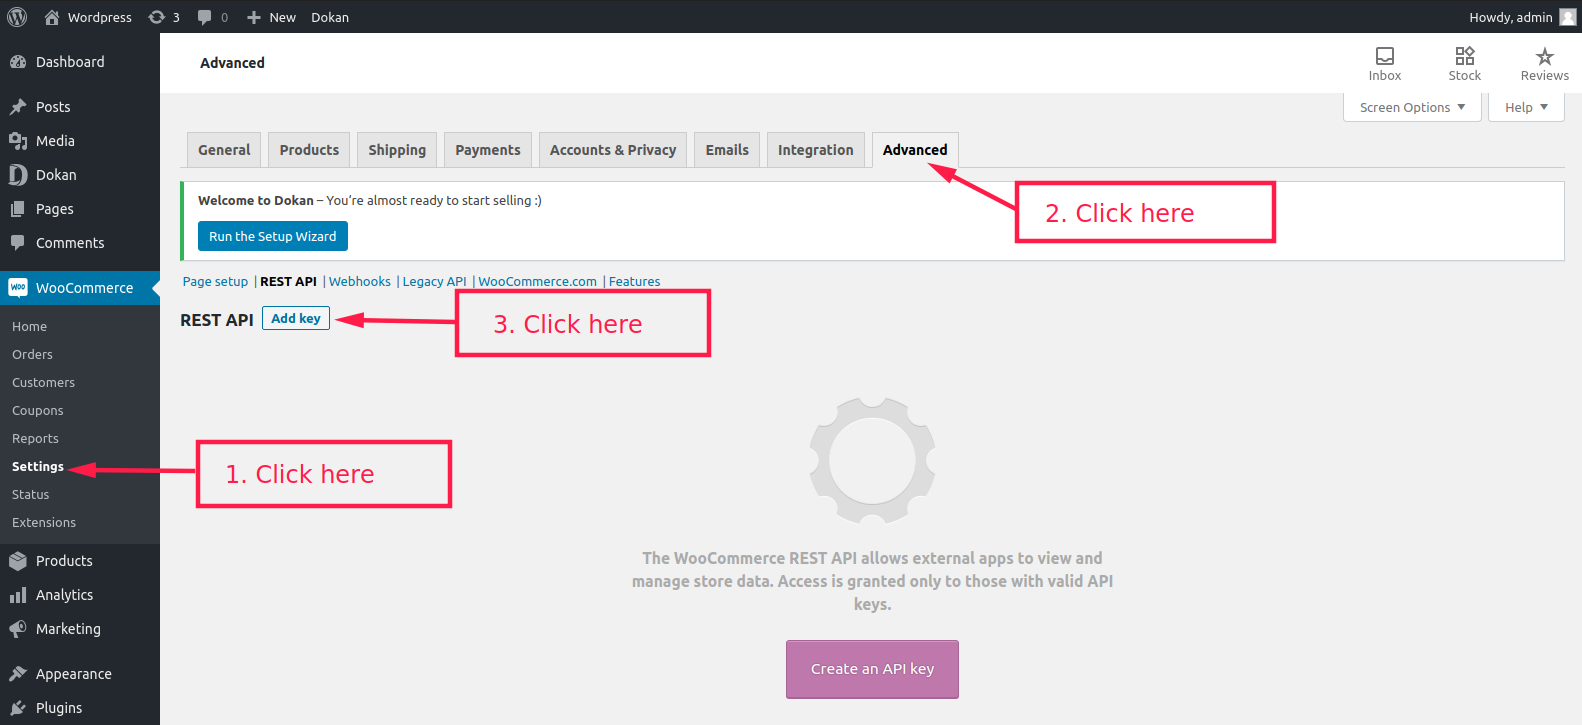
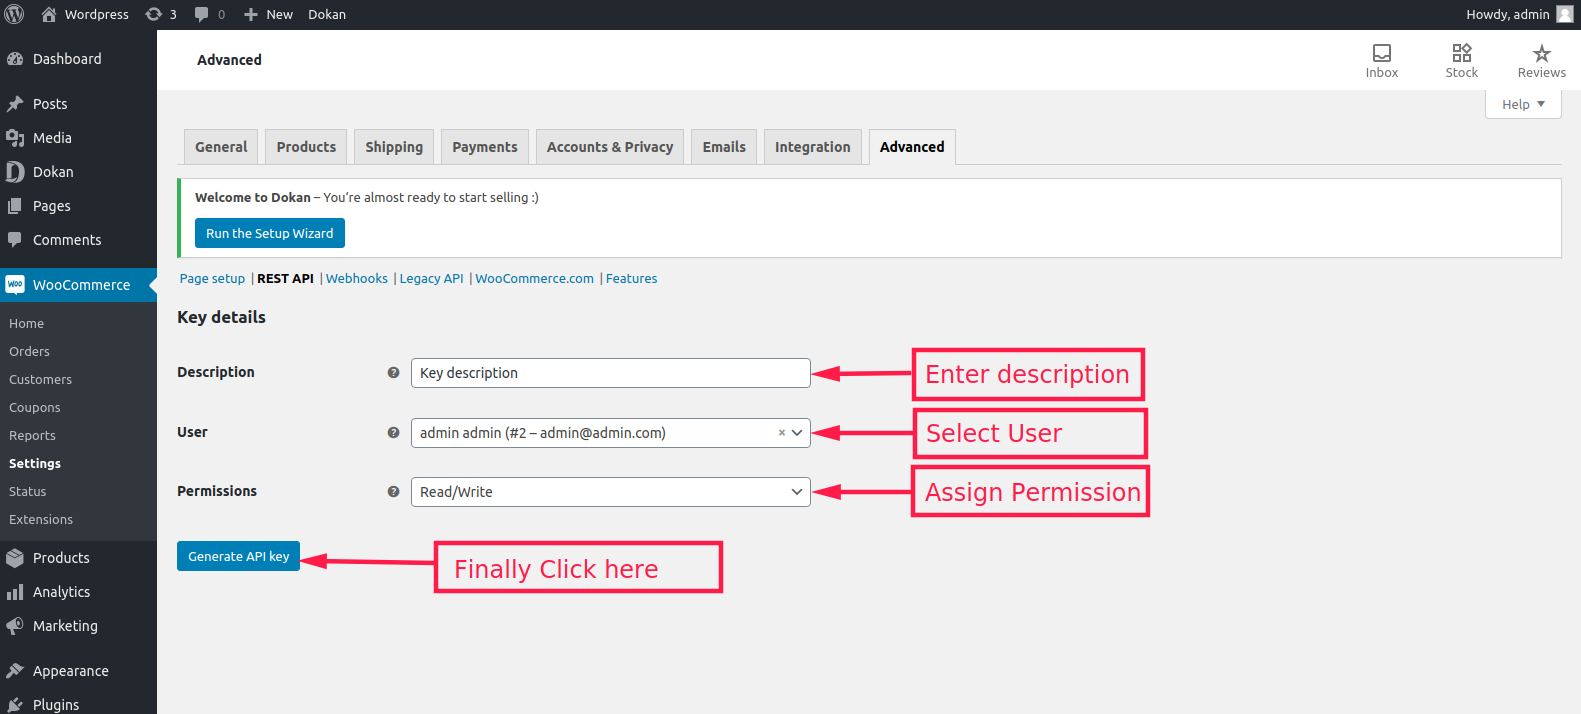
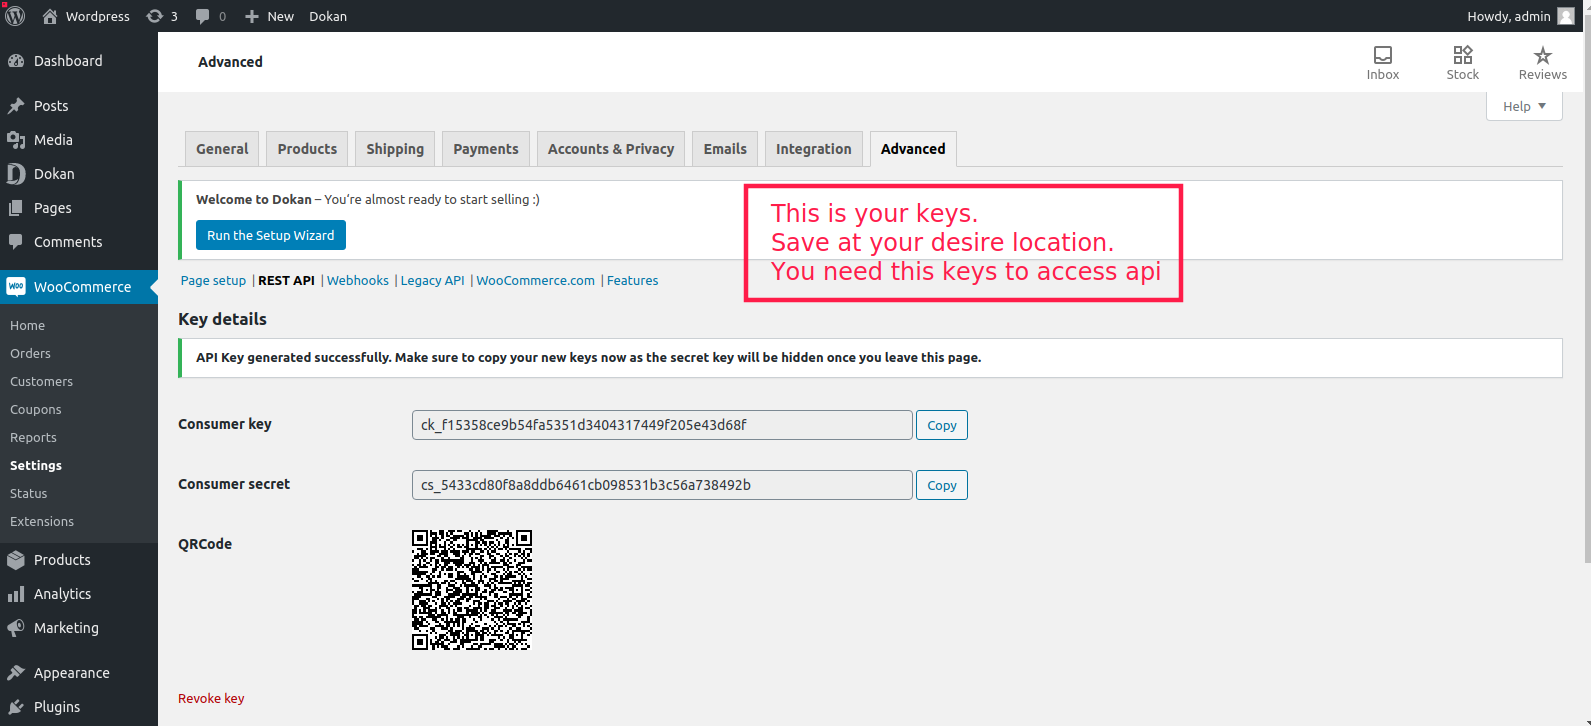
 Woocommerce Setup
1. Auth key Generation.
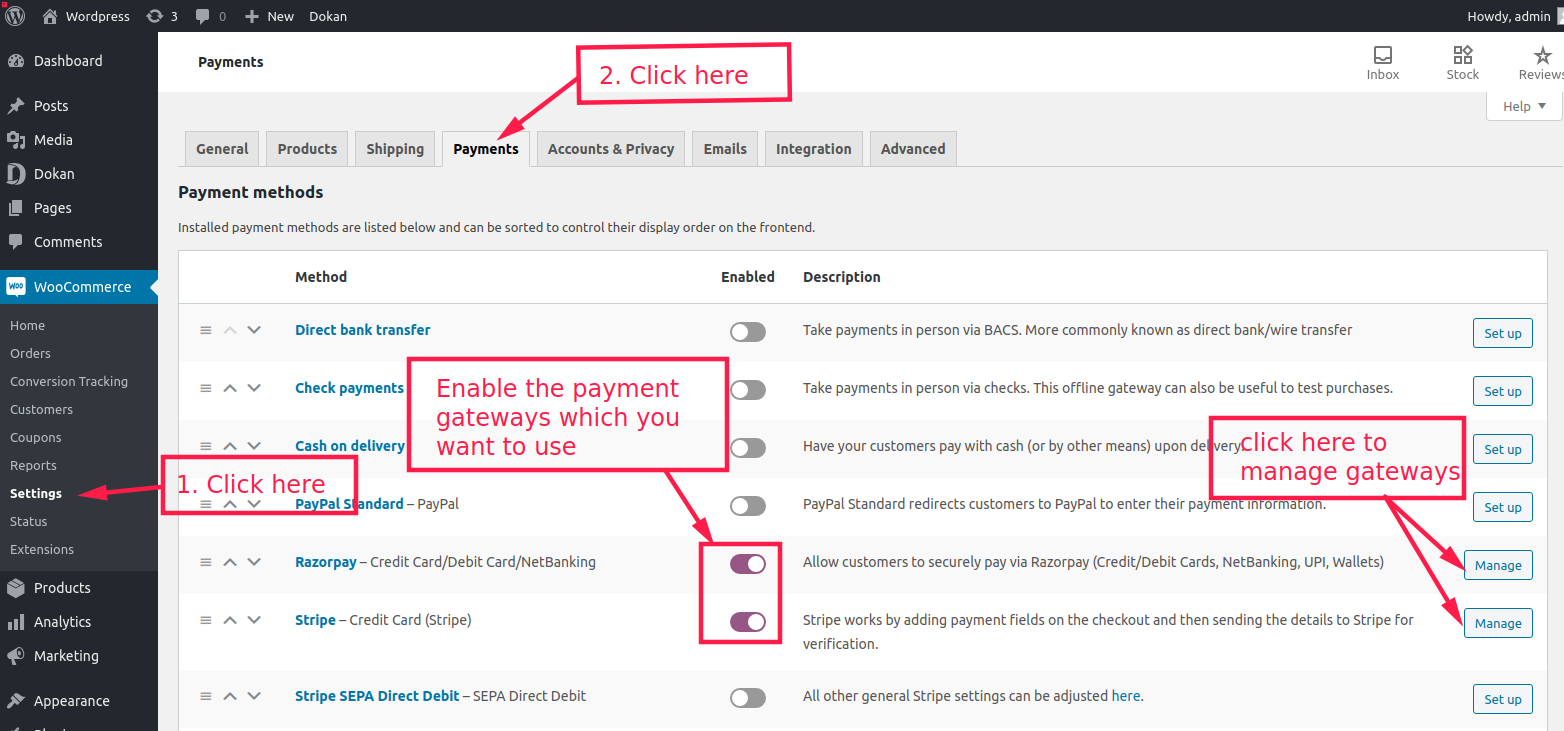
Installed Payment Gateways
Currently, this app compitable with below payment gateways
- Razorpay for WooCommerce
- WooCommerce Stripe Gateway
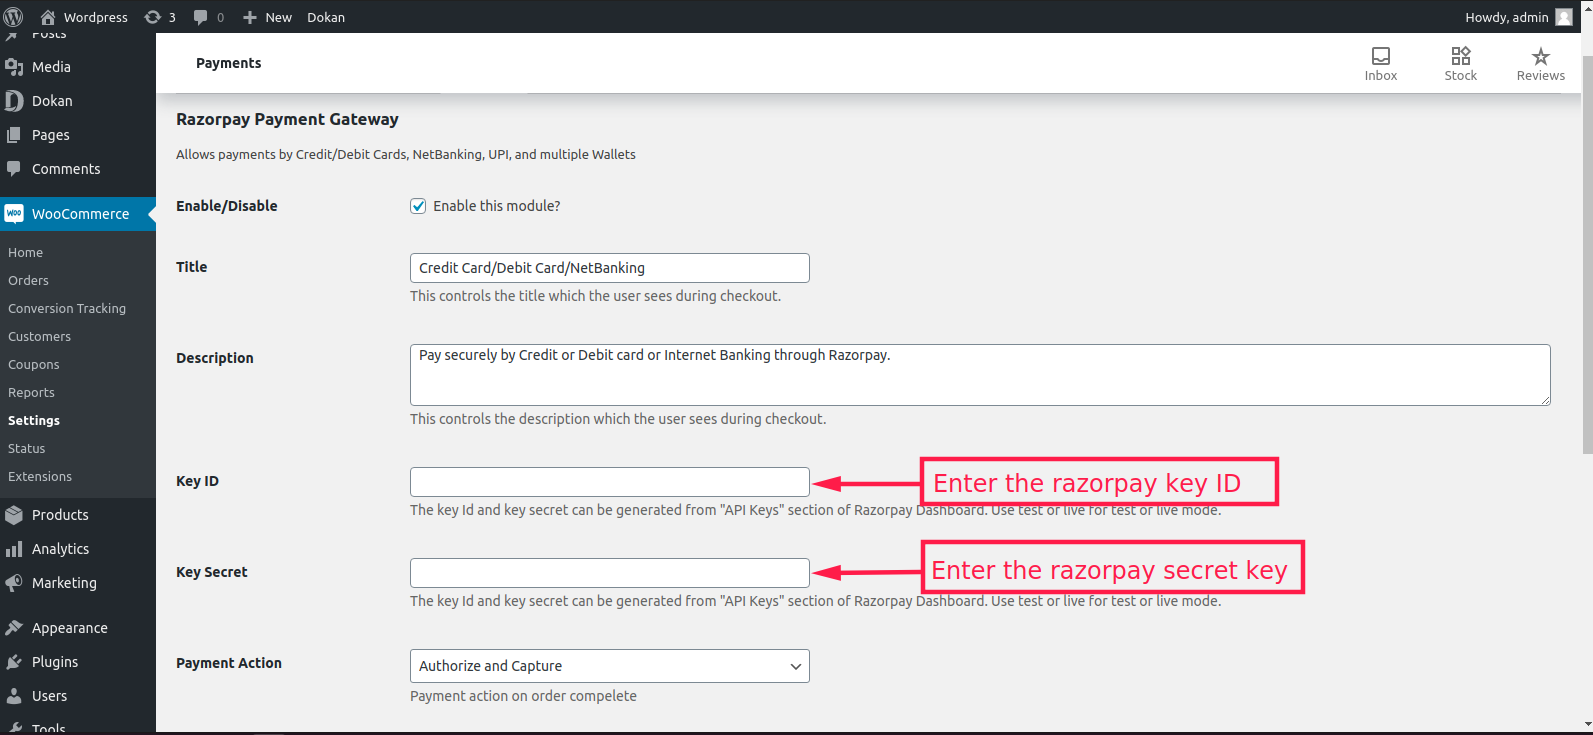
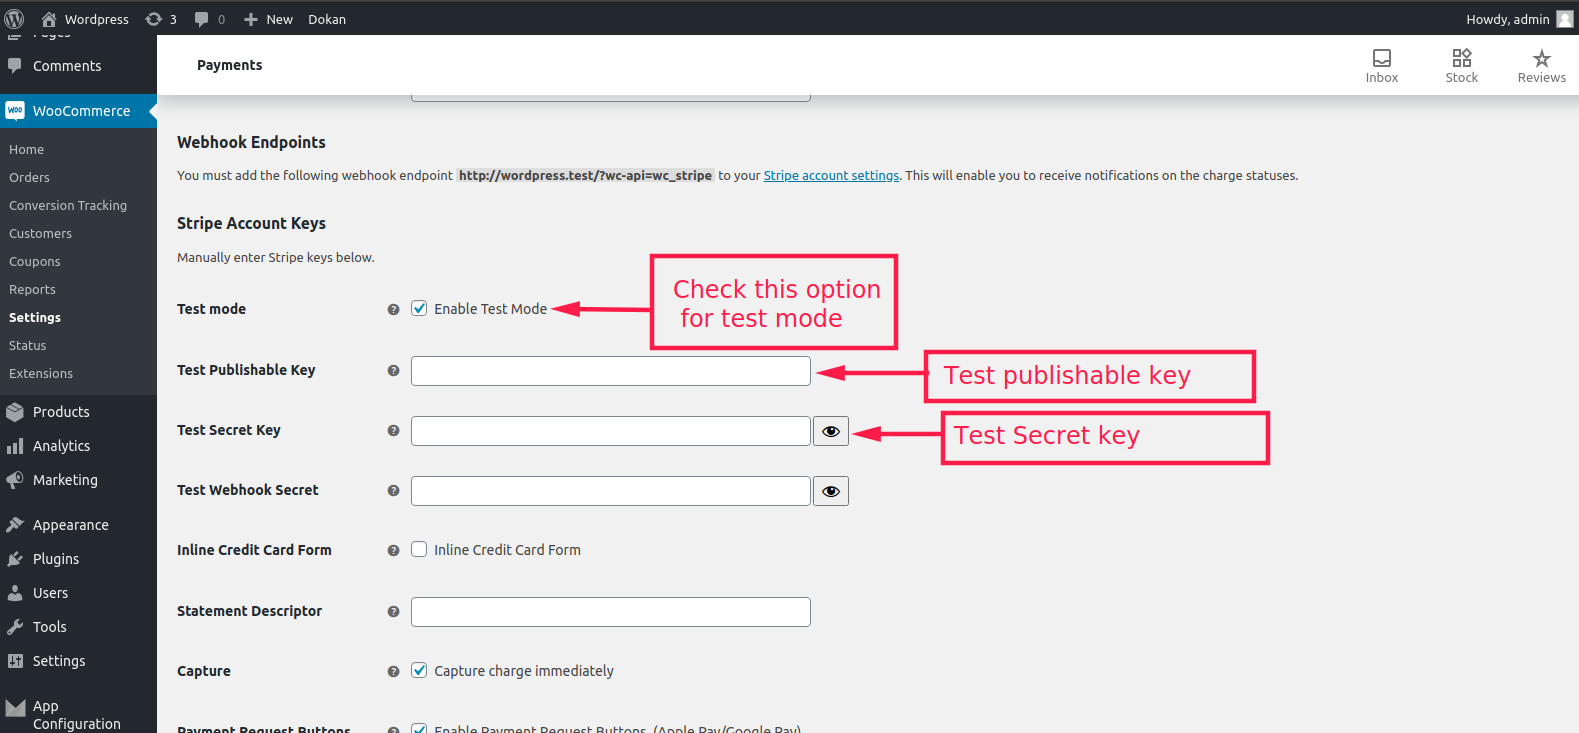
- How to Enable Payment Gateway
- Razorpay Key
- Stripe Key
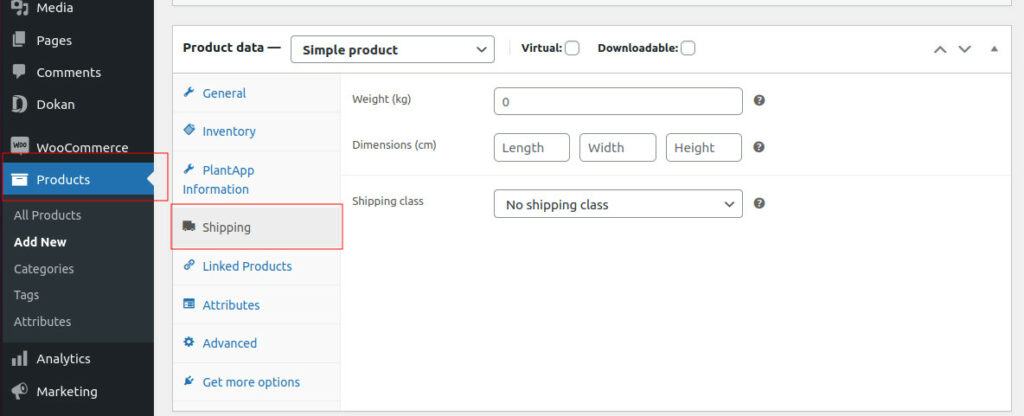
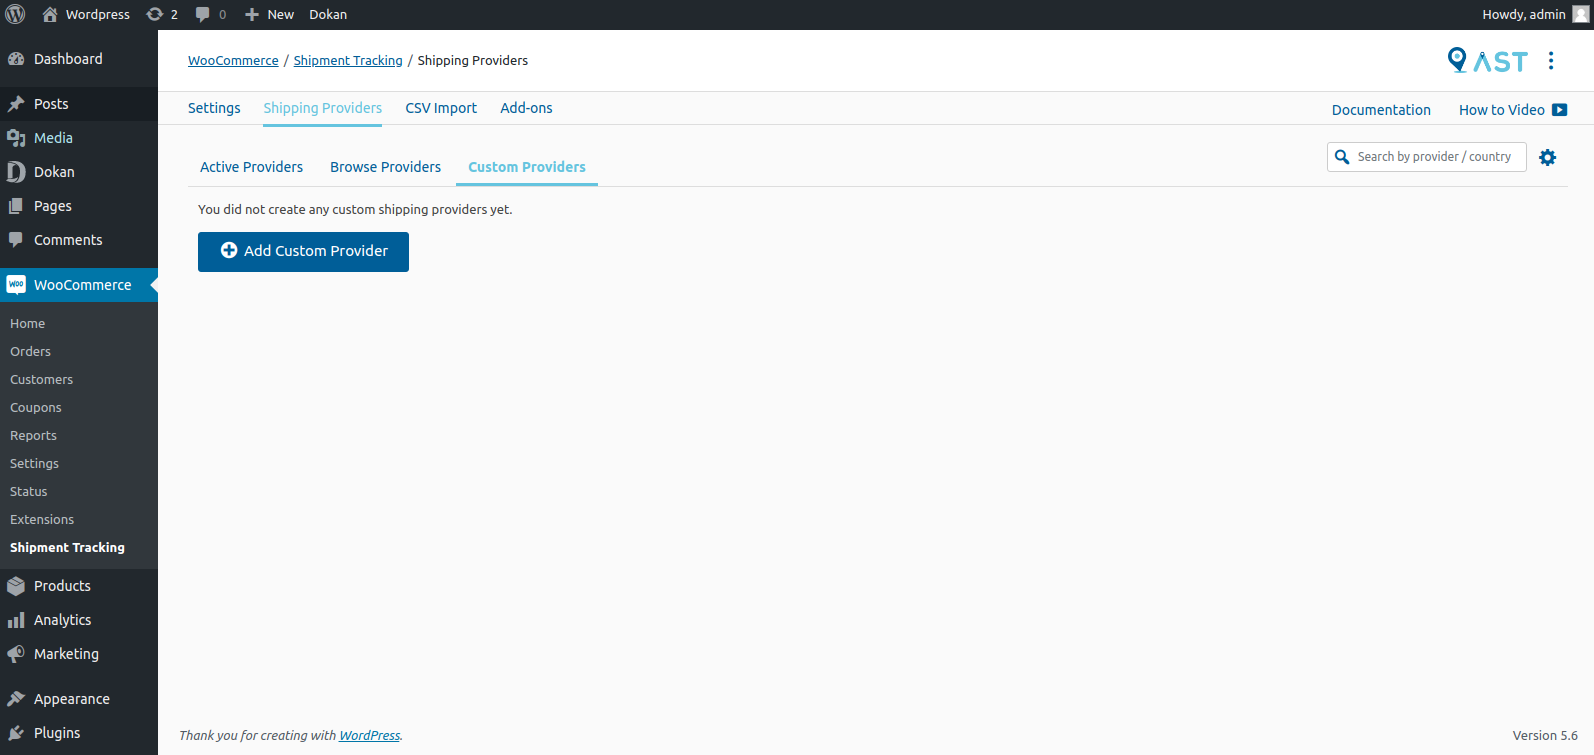
Advanced Shipment Tracking for WooCommerce
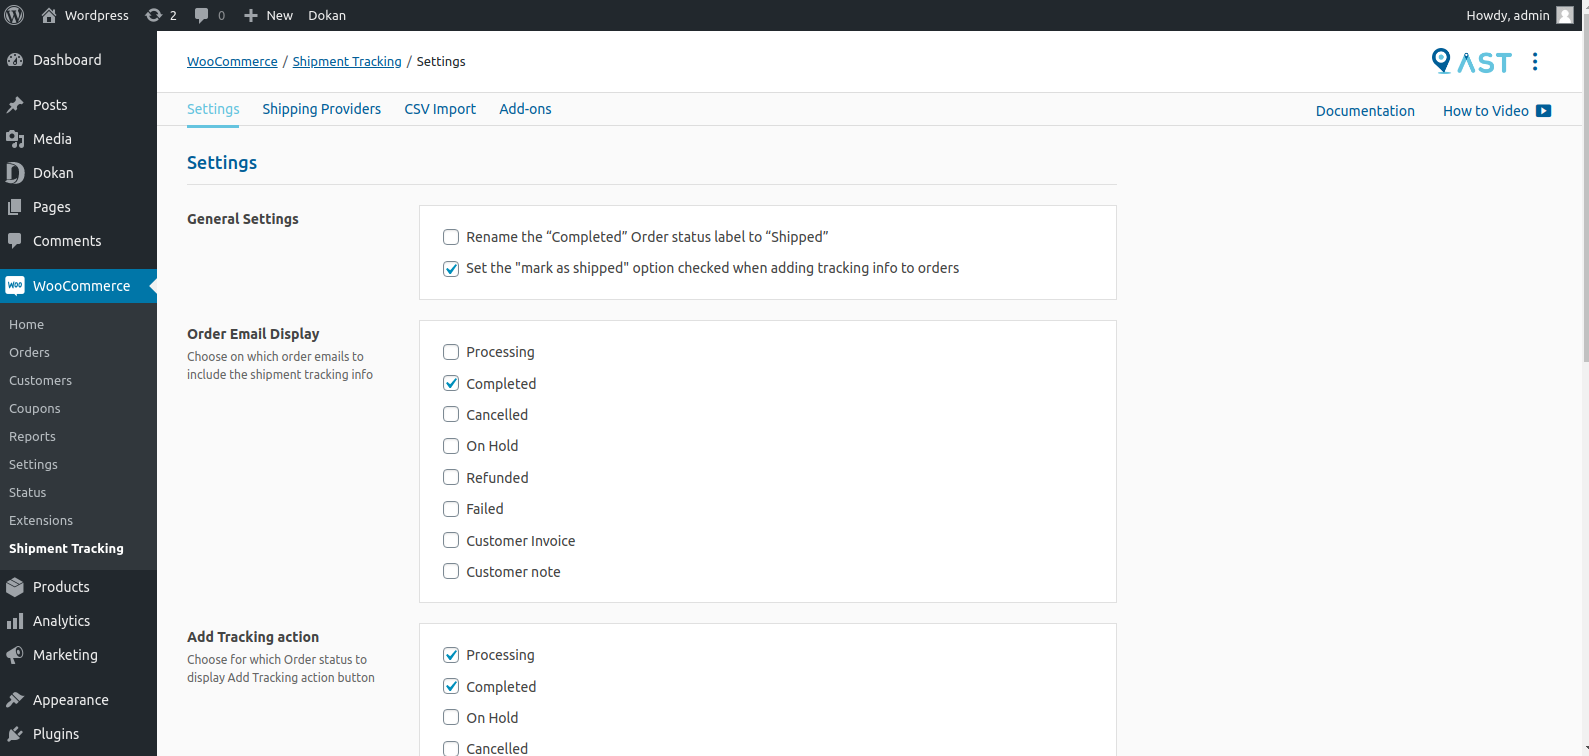
AST for WooCommerce lets you add tracking information to orders and provides your customers an easy
way to track their orders.
- AST Setting - General Settings, Order Email Display, Tracking action, Tracking Display My
Account and API Date Format
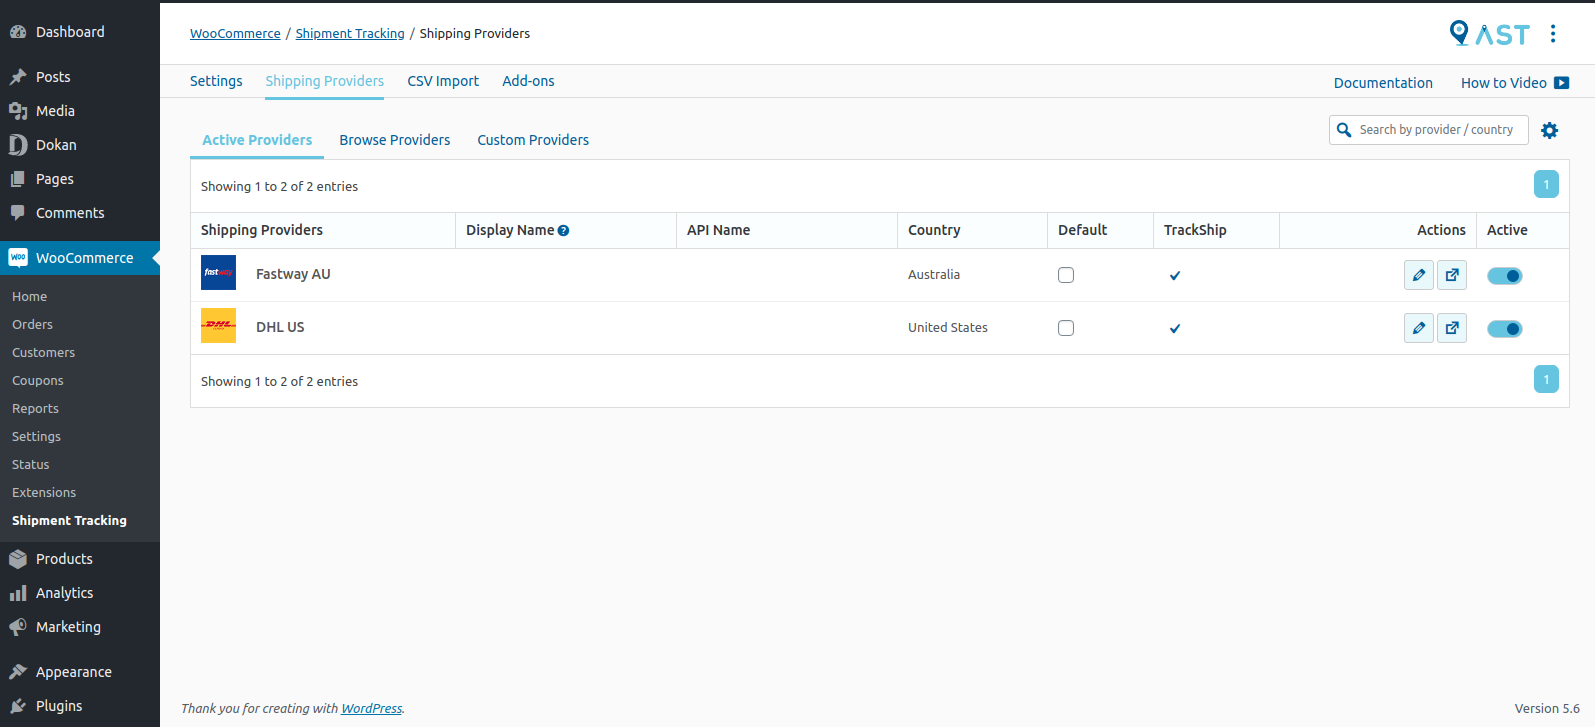
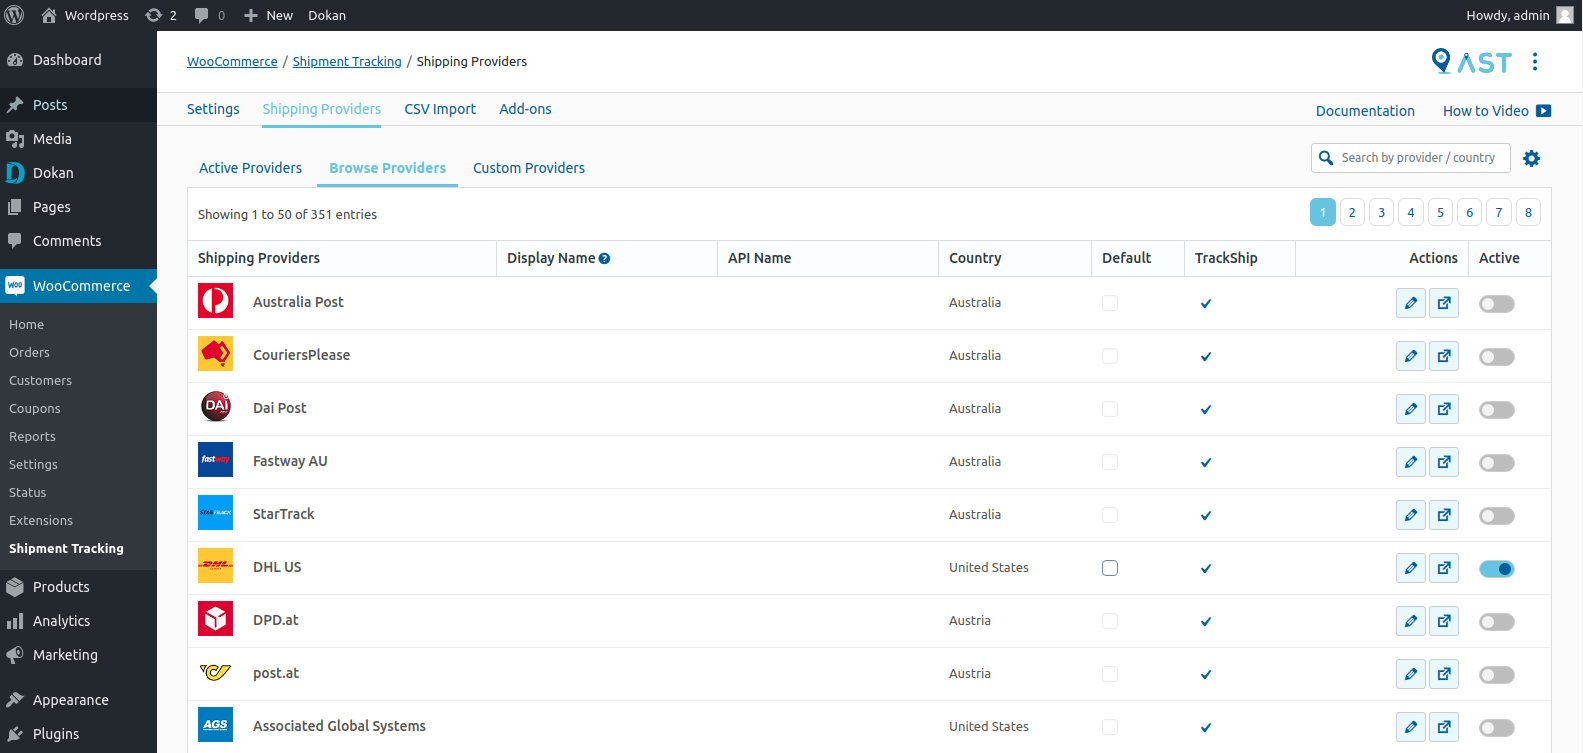
- AST Shipping Providers - Active Providers, Browse Providers, Custom Providers
Active Providers - List of selected active provider
Browse Providers - List of shipping providers,Select shipping provider
Custom Providers - Add custom provider
Follow this link for more details : https://wordpress.org/plugins/woo-advanced-shipment-tracking/#description
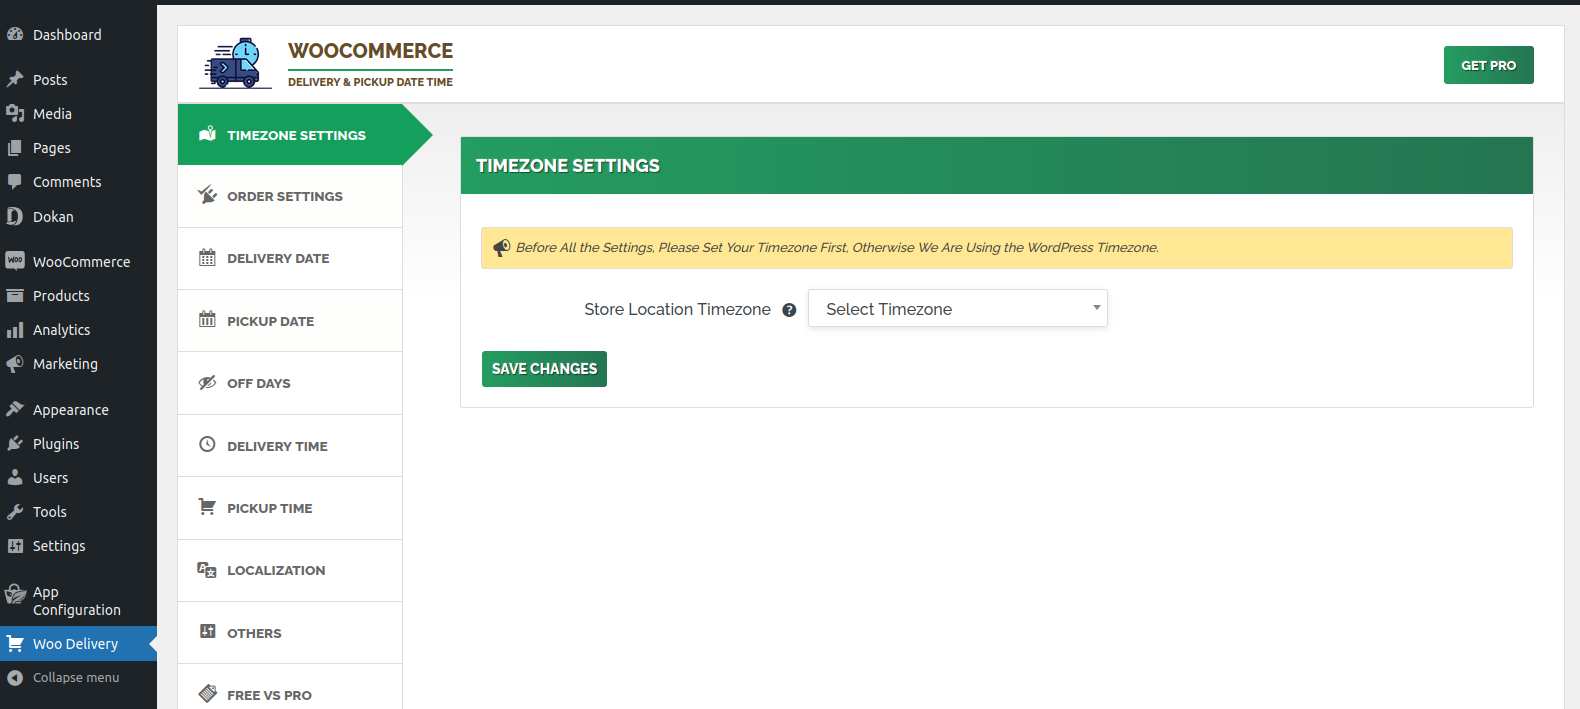
Delivery & Pickup Date Time for WooCommerce
- Delivery & Pickup Date Time for WooCommerce
It gives the facility of selecting delivery/pickup date and time at order checkout page. Follow
this link for more details : https://wordpress.org/plugins/woo-delivery/#description
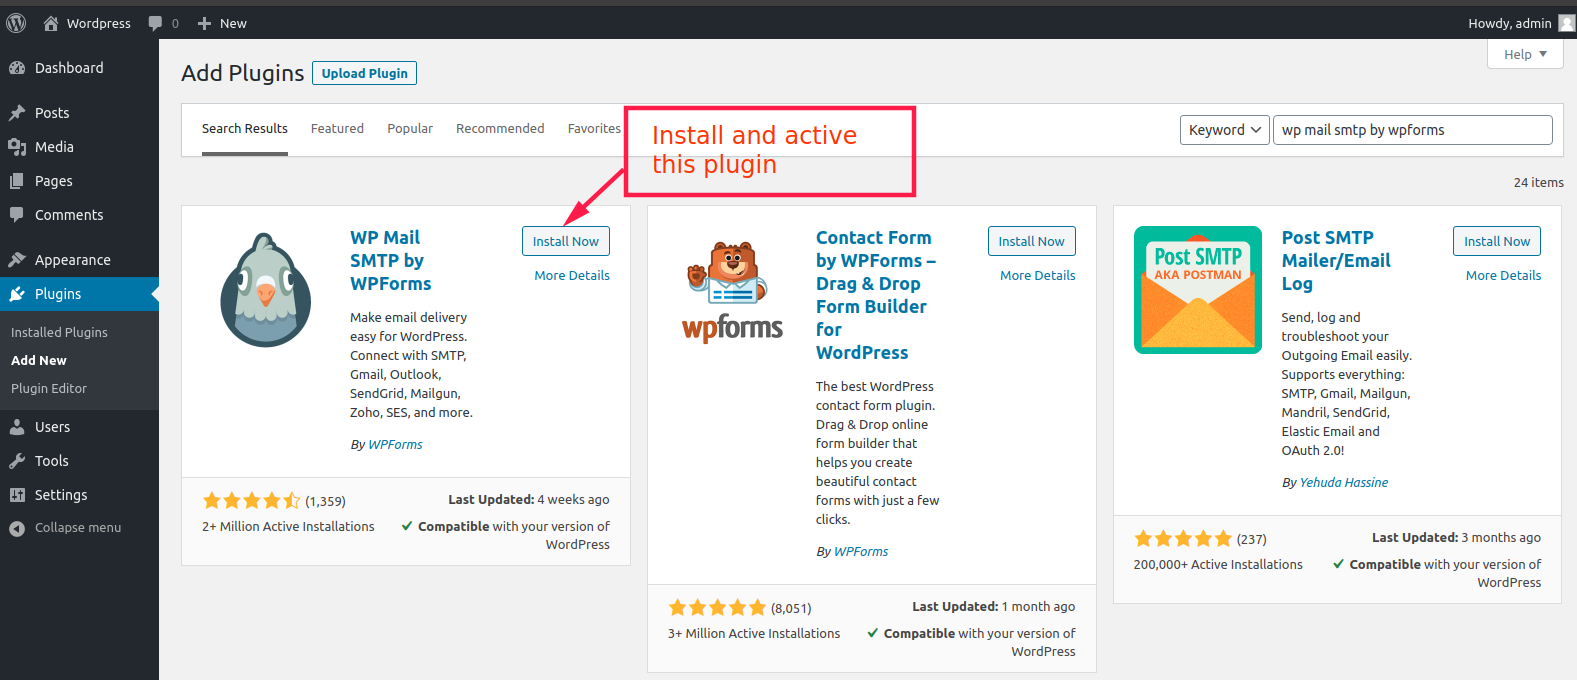
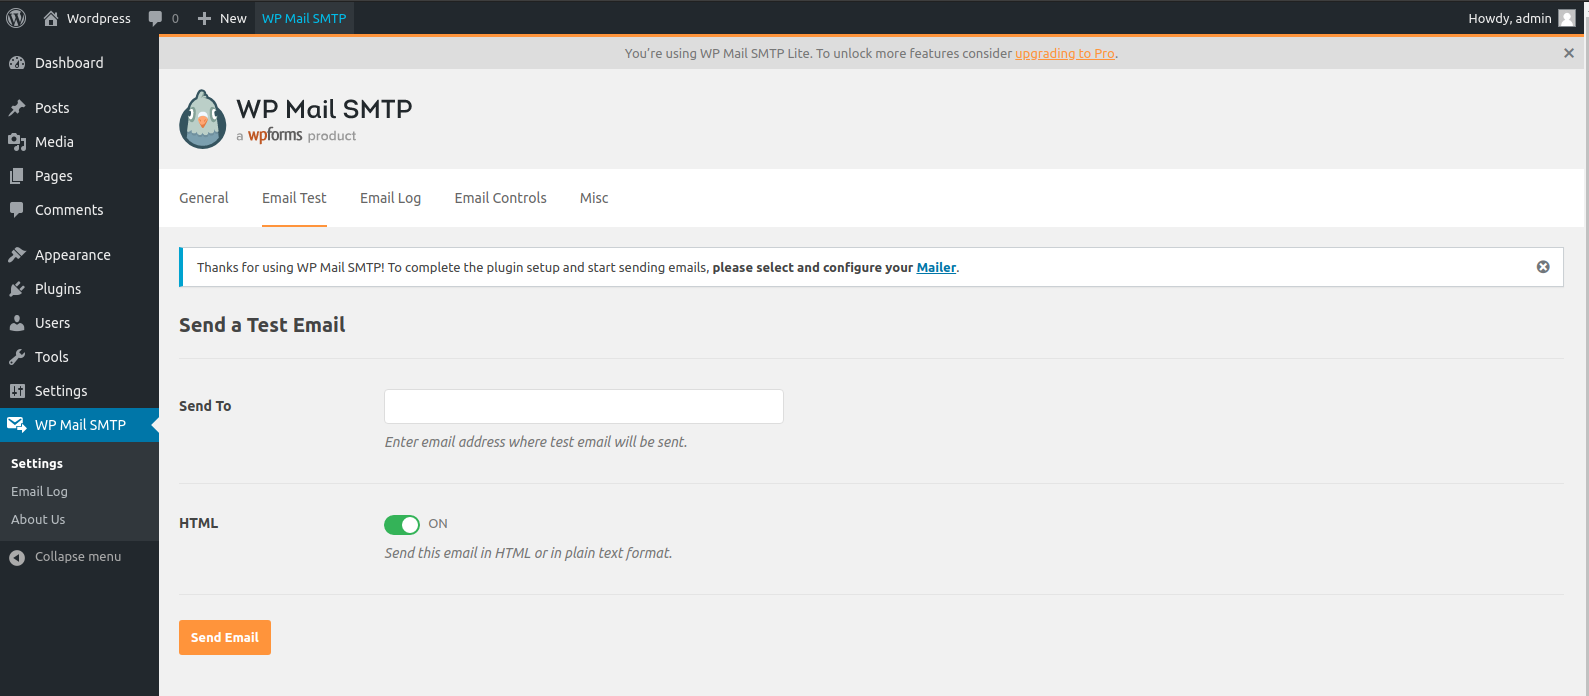
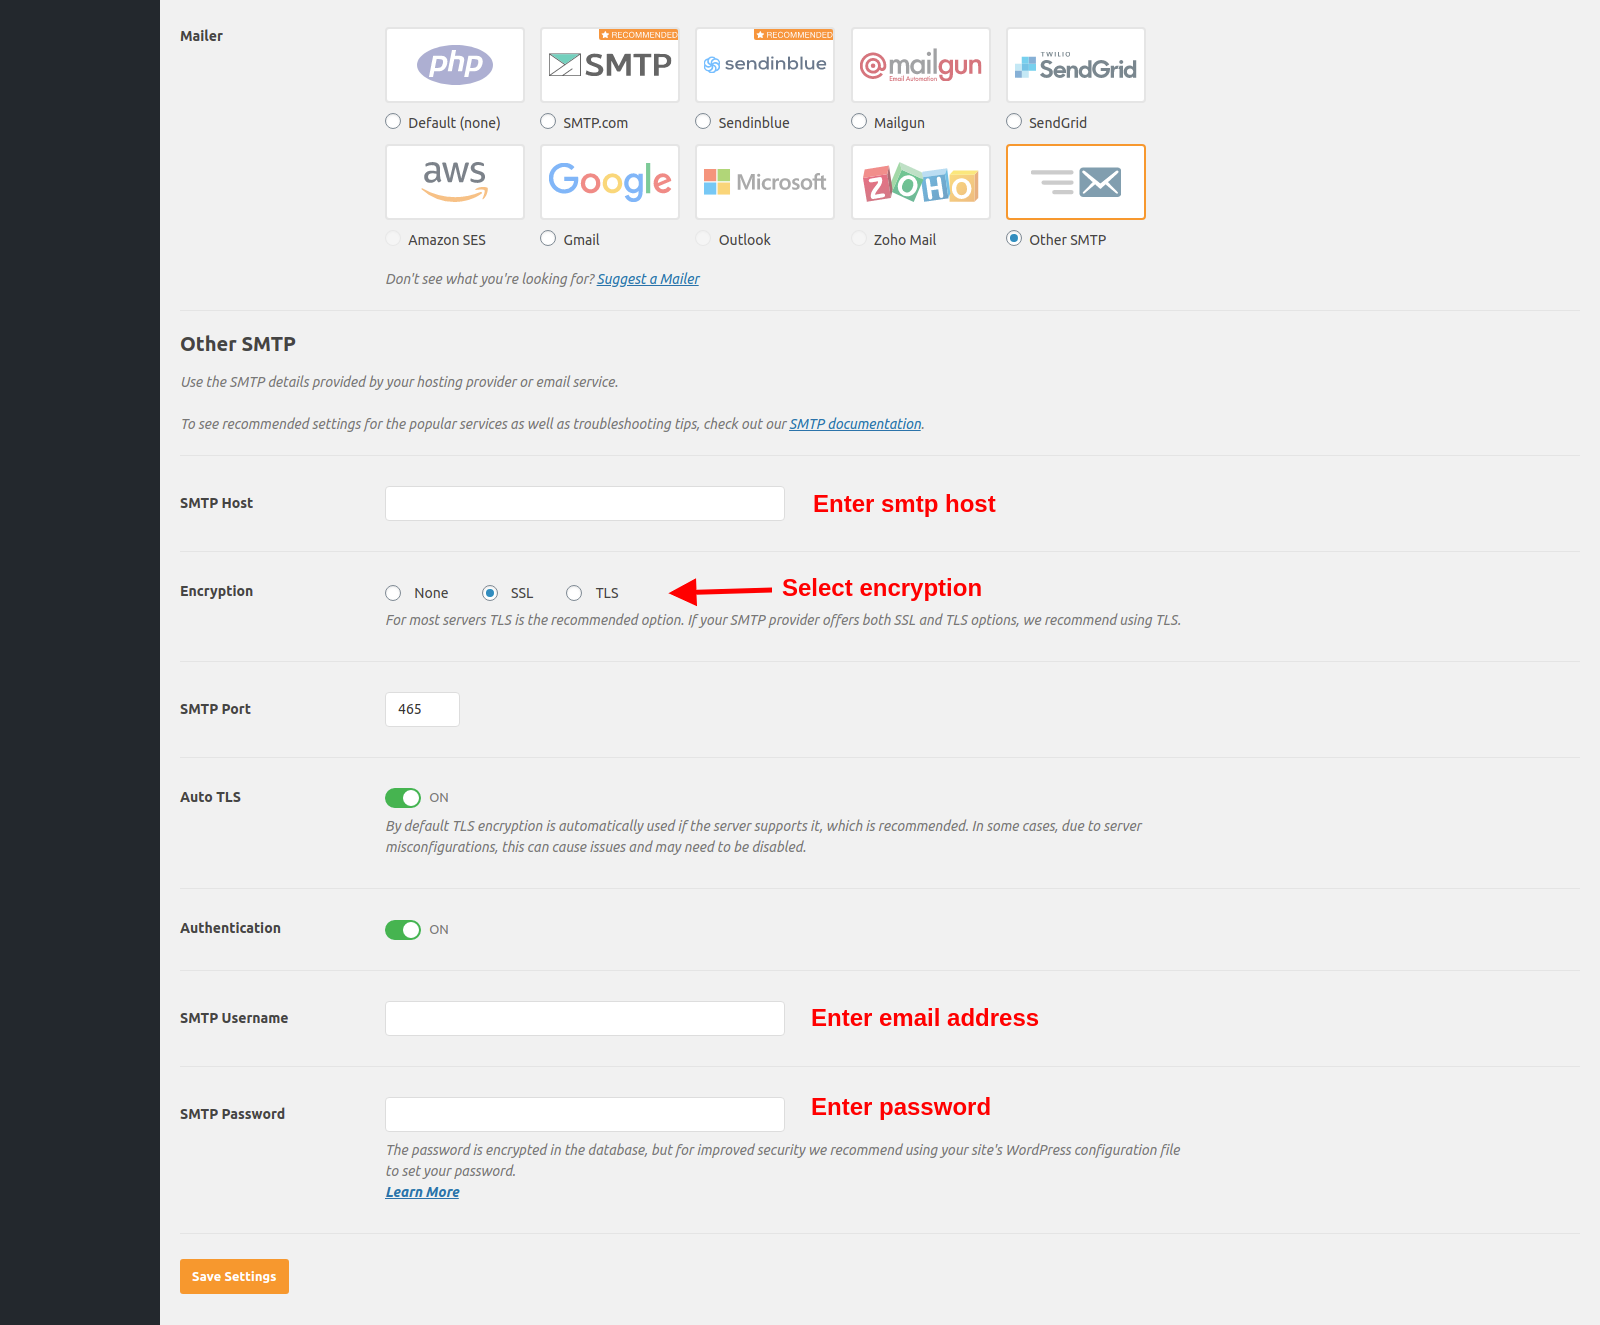
Install WP Mail SMTP
Woocommerce Featured Video
- It allows you to add a video as WooCommerce featured item.
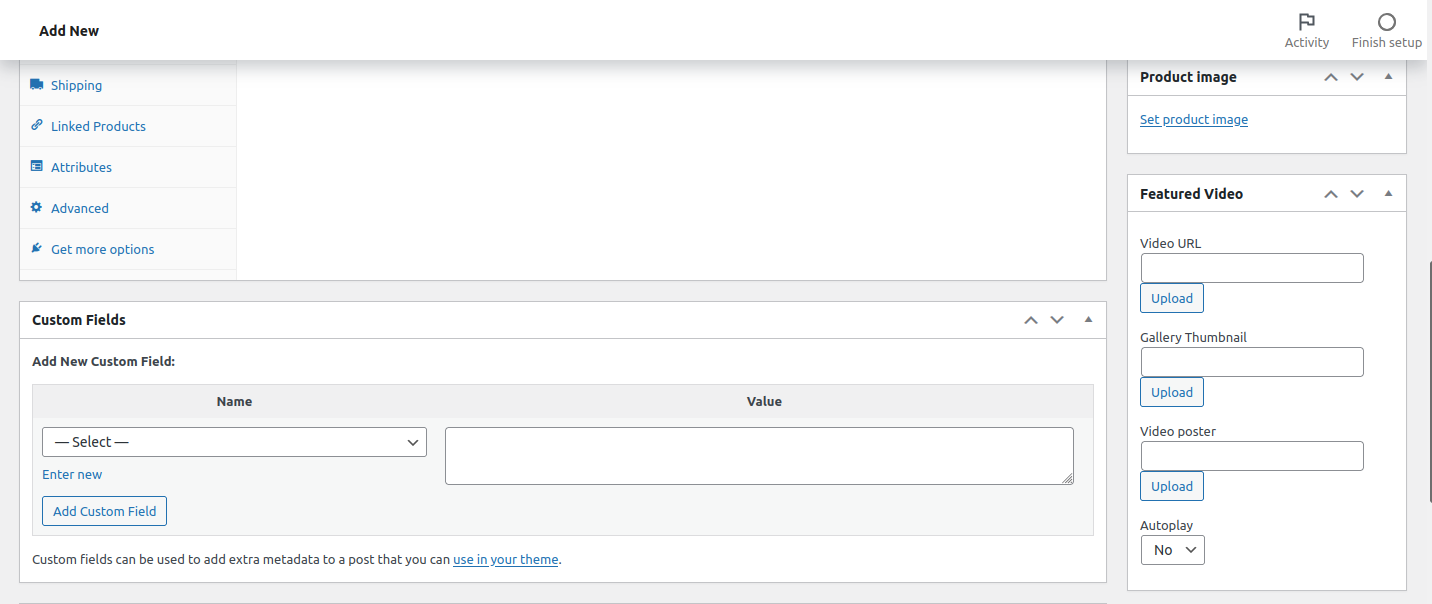
Add Video url in featured video.
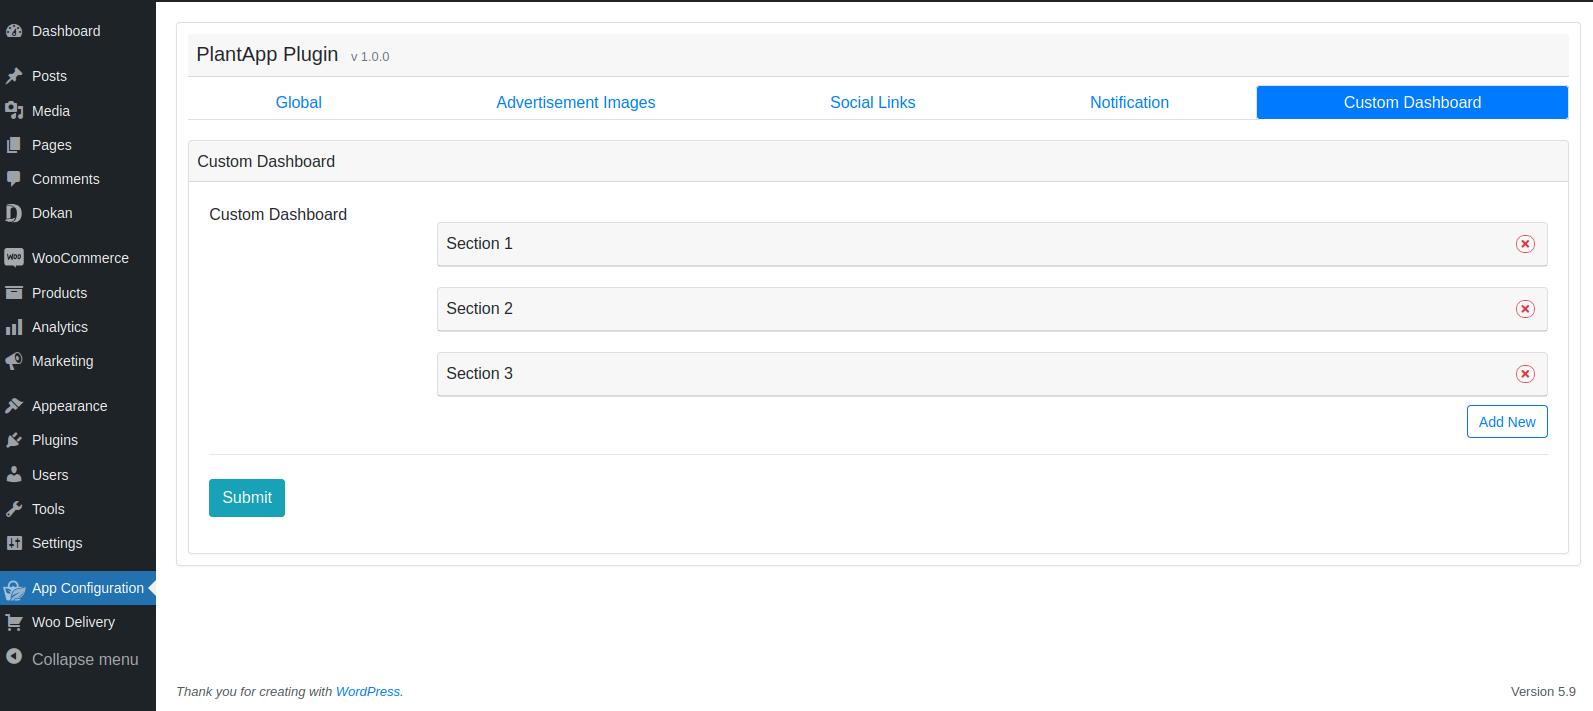
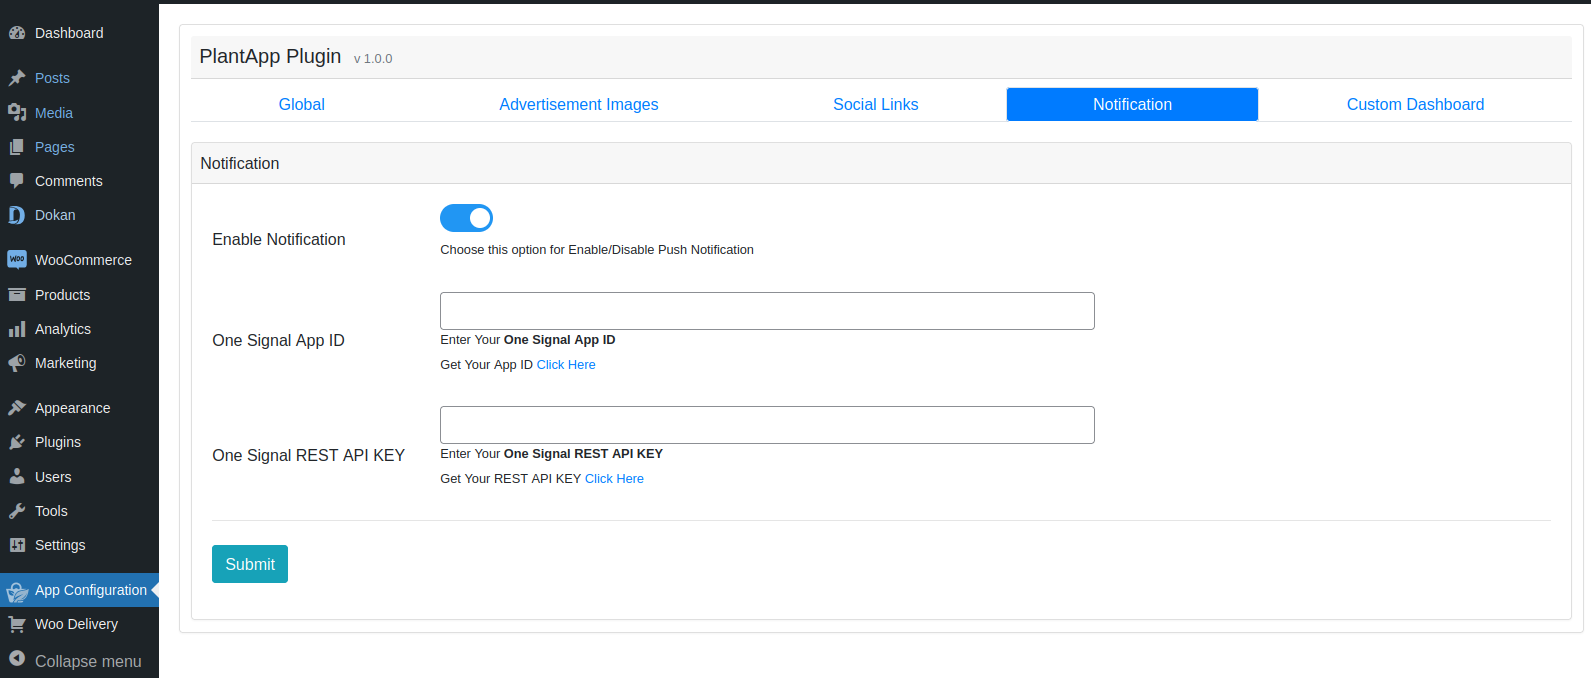
App Configuration - Global, Advertisement Images, Social Links, Notification, Sale
Banner
- 1. Select payment method
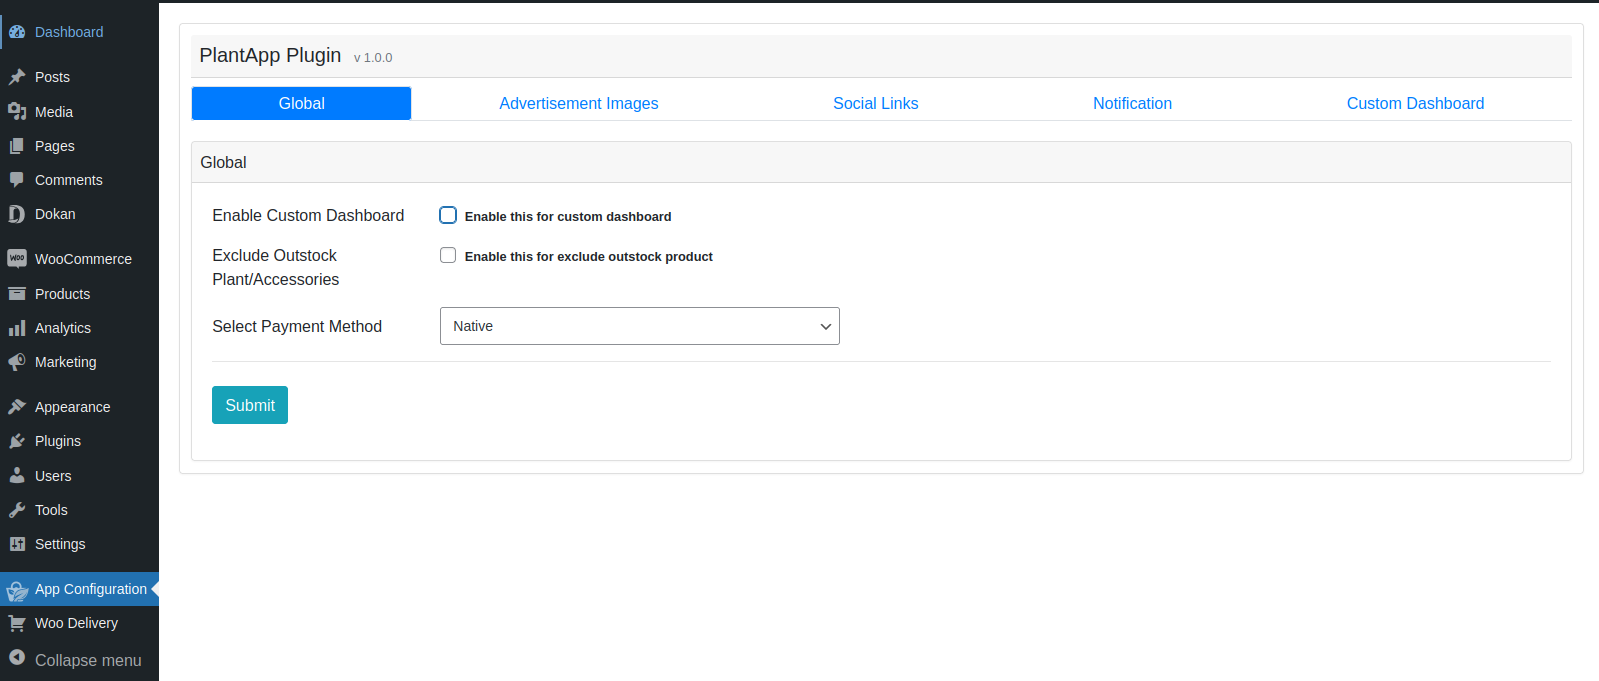
- 2. Add Advertisement Images for Banner
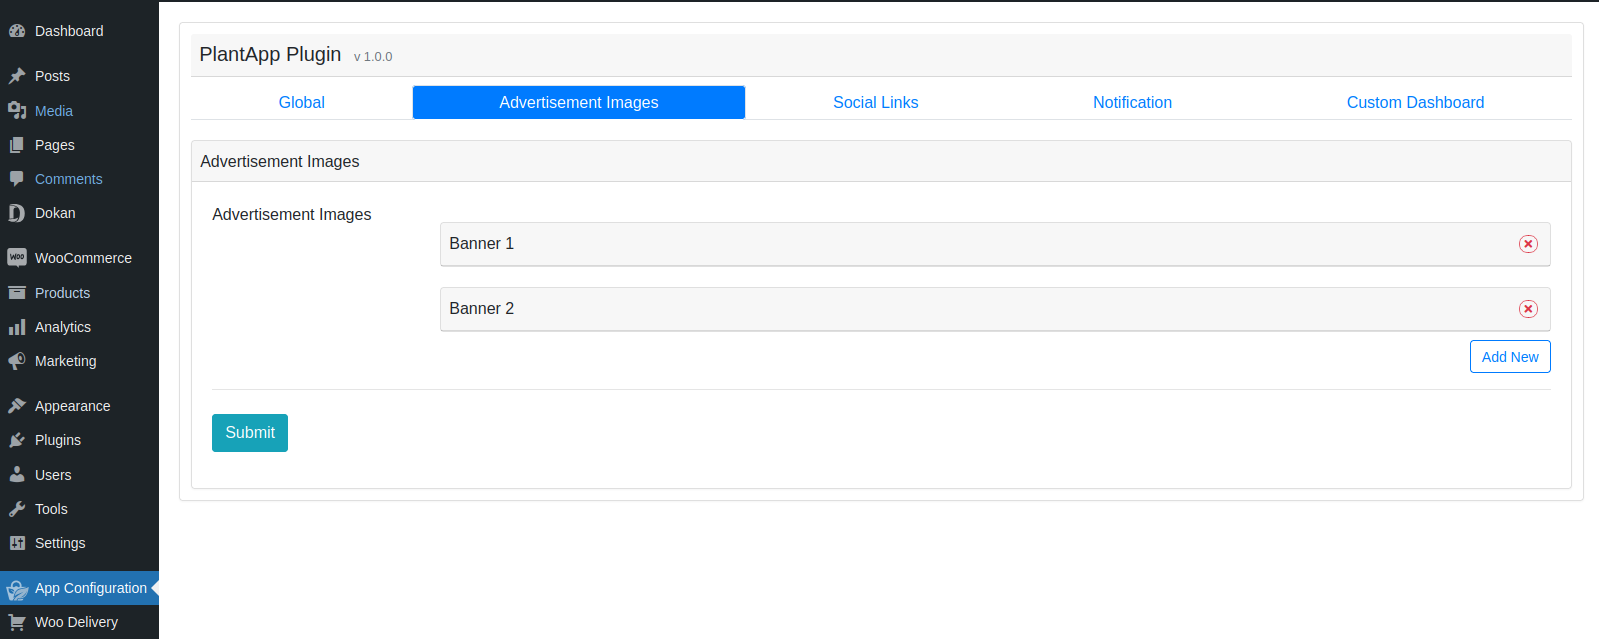
- 3. Social Link

- 4. Notification
- 5. Custom Dashboard