Change Payment Method
- WebView Payment: Support all payment gateway which is setup on wp-admin site
- Native Payment: Support all payment gateway which is setup on wp-admin site
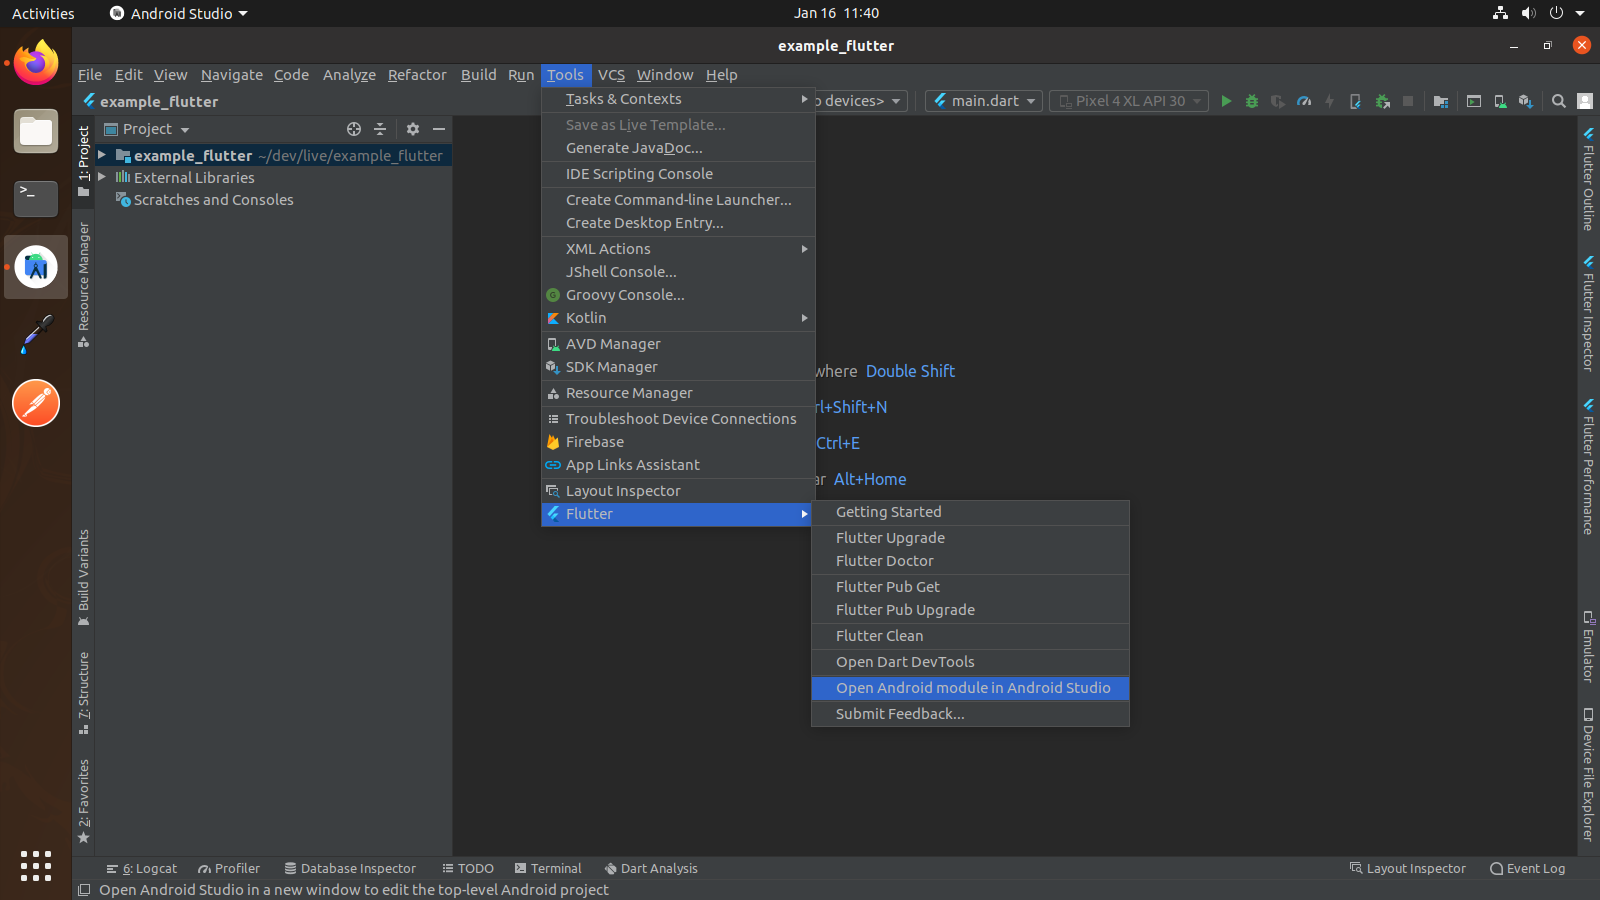
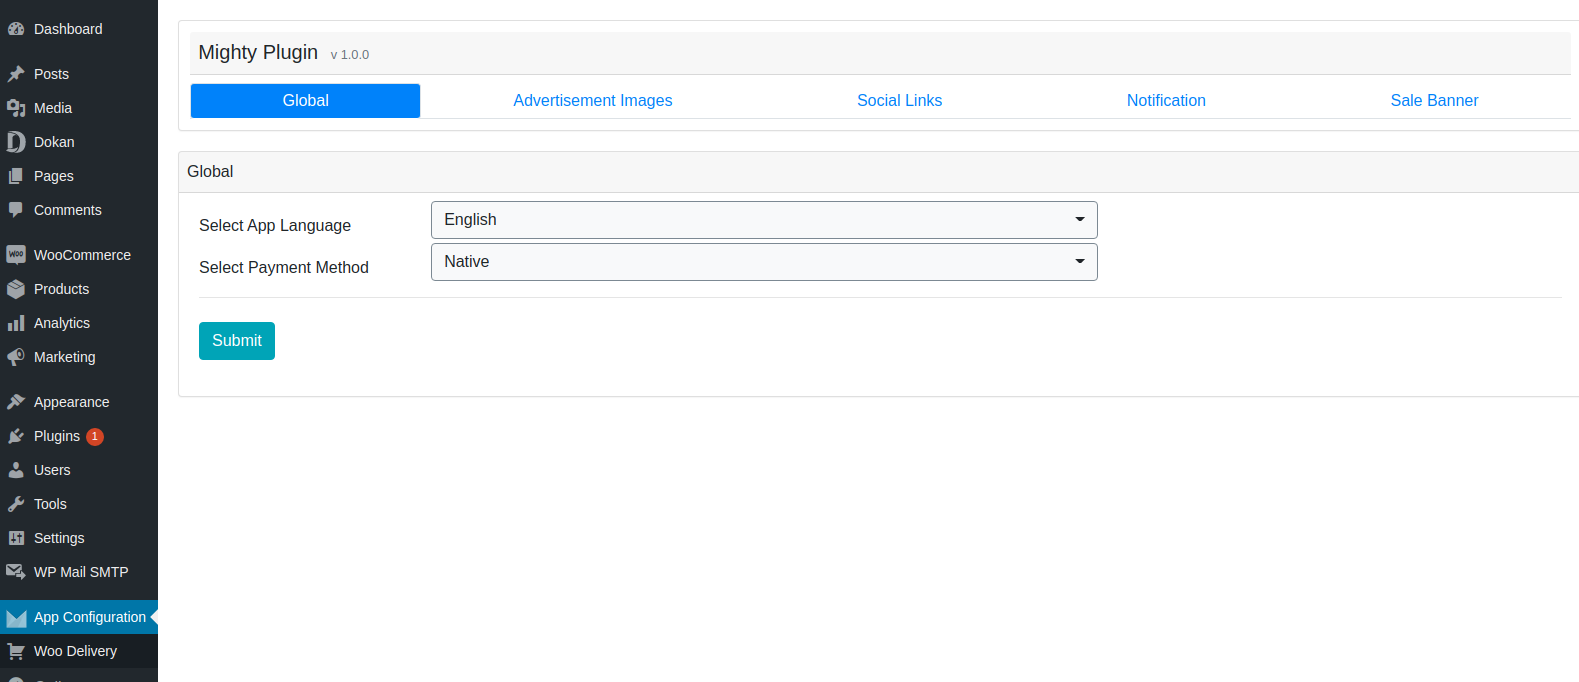
If you want to change payment method like Native or WebView. Follow below steps
- Go to -> App Option
- Select Globle option
- Select Payment method and click on submit button.
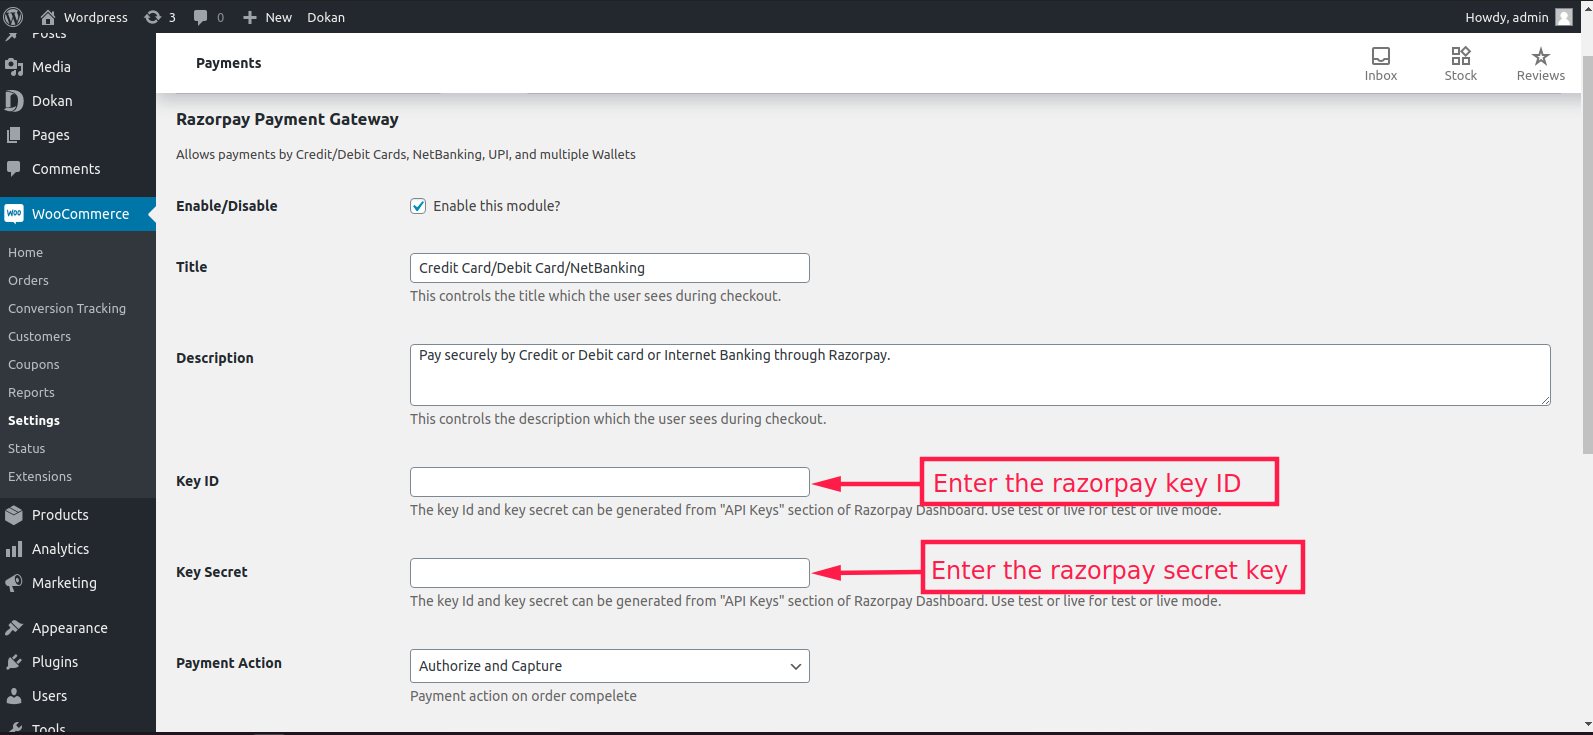
Razorpay Payment gateway
Razorpay is the only payments solution in India which allows businesses to accept, process and
disburse payments with its product suite. It gives you access to all payment modes including credit
card, debit card, netbanking, UPI and popular wallets including JioMoney, Mobikwik, Airtel Money,
FreeCharge, Ola Money and PayZapp.
Manage your marketplace, automate NEFT/RTGS/IMPS bank transfers, collect recurring payments, share
invoices with customers - all from a single platform. Fast forward your business with Razorpay.
Click here For more details about Razorpay payment gateway
Change Razorpay Key
Open lib/utils/constants.dart file and change the razorKey key.
const razorKey="Add your Razorpay Key"
Remove Razorpay Payment
We are recommended you to follow only second step if you don't know about dependency and code
If you want to remove Razorpay payment gateway option then follow below steps:
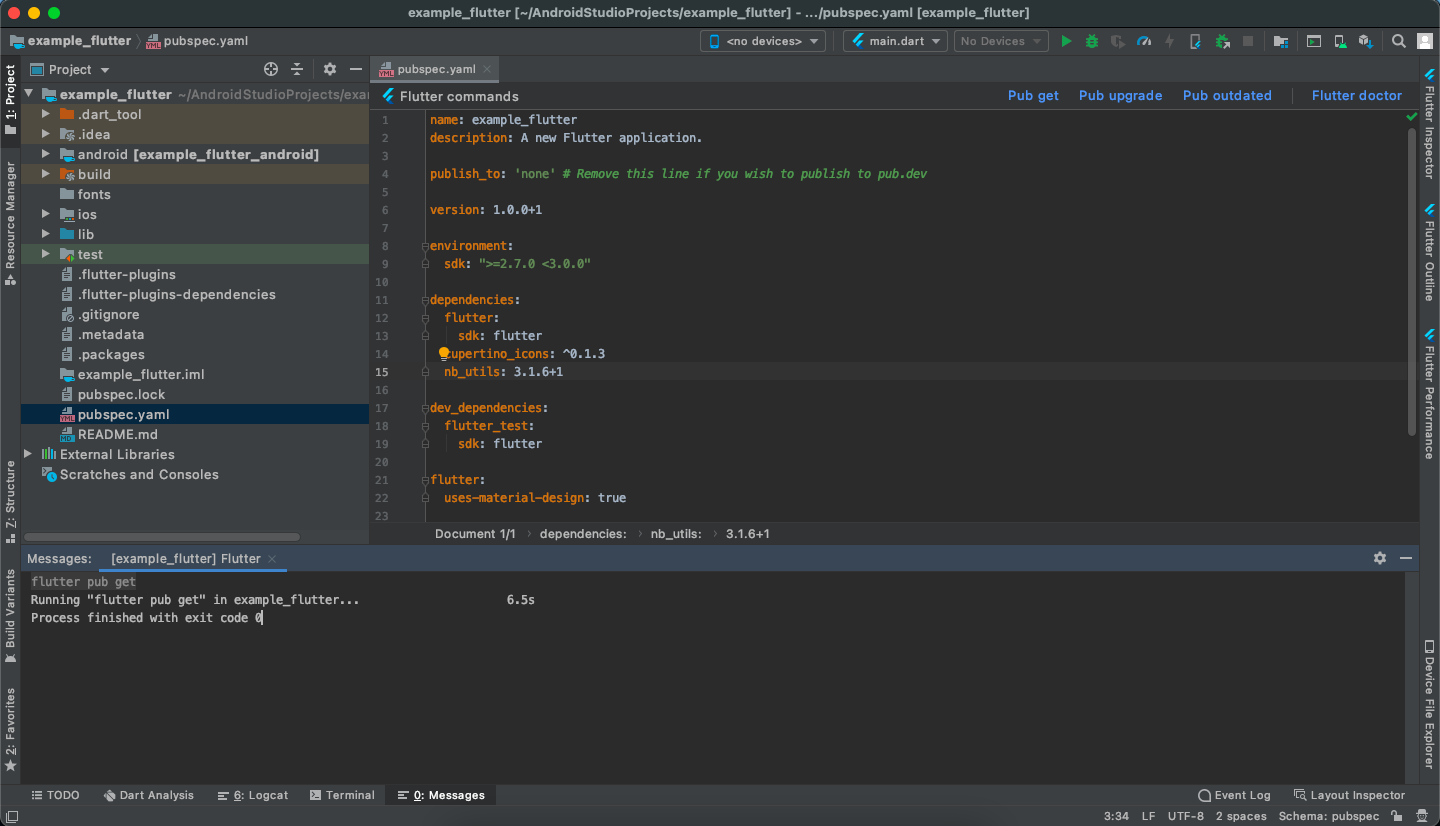
Step 1- Goto pubspec.yaml and remove the 'razorpay_flutter: 1.2.3'
from the file
razorpay_flutter: 1.2.3
Note:
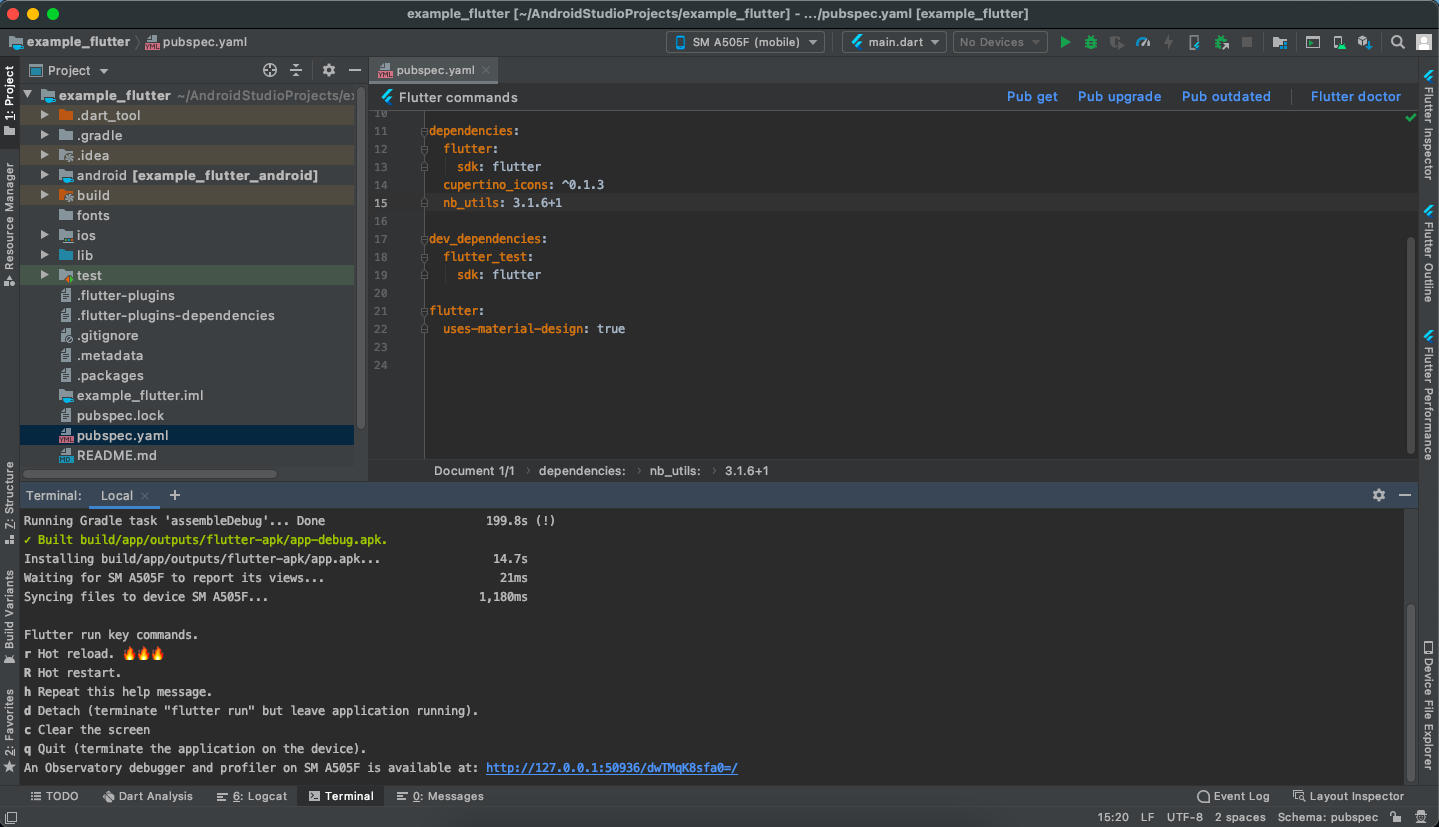
If you have remove dependency from pubspec.yaml then hit the pub get command. now,
remove the code related to razorpay_flutter.
Step 2 - Goto lib/screen/constants.dart file
const IS_RAZORPAY = true;
Change bool value of IS_RAZORPAY = false
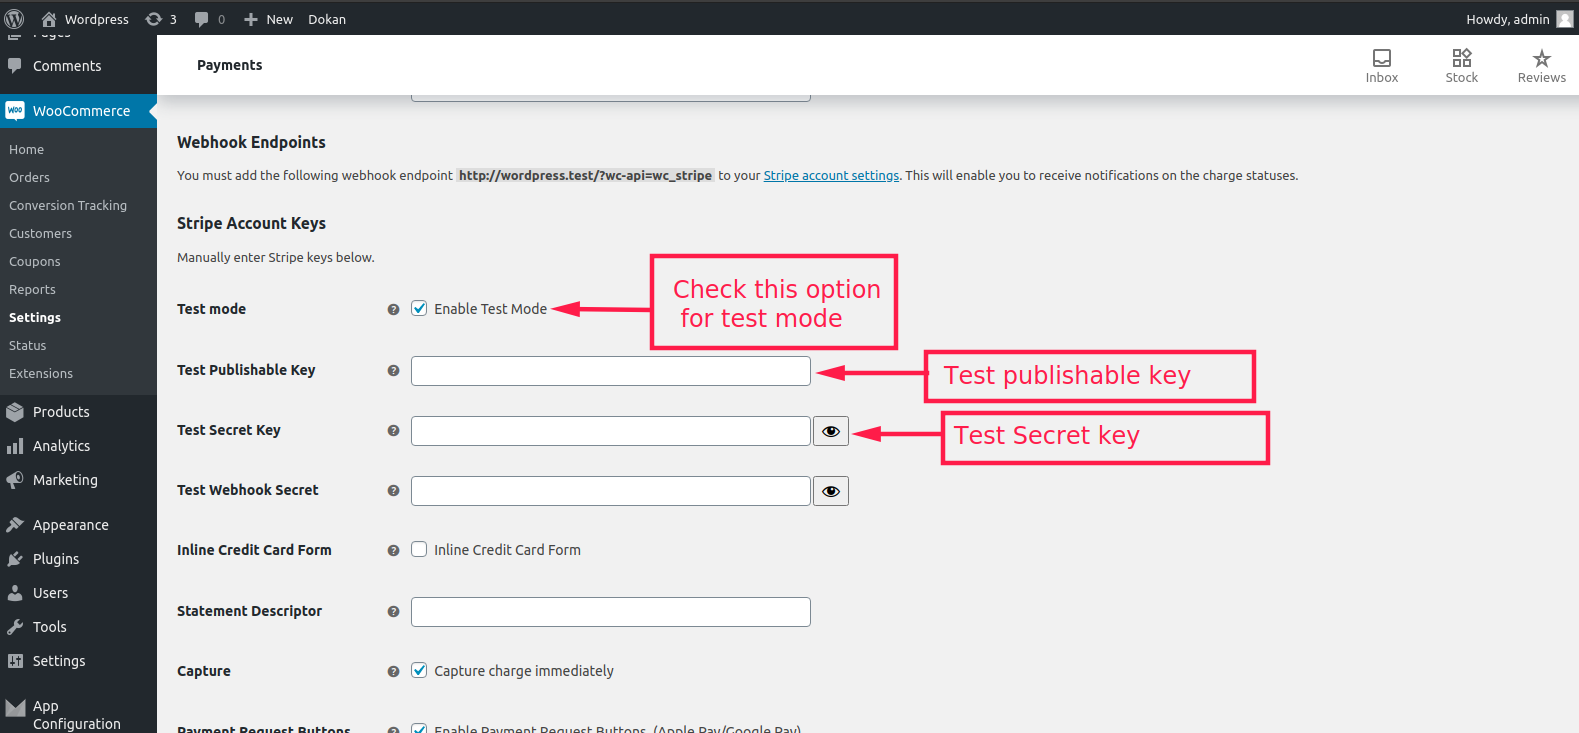
Stripe Payment gateway
Stripe is the best software platform for running an internet business. We handle billions of dollars
every year for forward-thinking businesses around the world.
Change Stripe Payment Key
Open lib/utils/constants.dart file and change the Stripe Payment Key key.
const stripPaymentKey= "Add your Stripe Payment Key"
Remove Stripe Payment Key
Step 1 - Goto pubspec.yaml and remove the 'stripe_payment: 1.0.9'
from the file
stripe_payment: 1.0.9
Note:
If you have remove dependency from pubspec.yaml then hit the pub get command. now,
remove the code related to stripe_payment.
Step 2 - Goto lib/screen/constants.dart file
const IS_STRIPE = true;
Change bool value of IS_STRIPE= false
PayStack Payment gateway
Change payStack Payment Key
Open lib/utils/constants.dart file and change the PayStack PublicKey key.
const payStackPublicKey= "Add your PayStack Public Payment Key"
Remove PayStack Payment Key
Step 1 - Goto pubspec.yaml and remove the ' flutter_paystack: ^1.0.5+1'
from the file
flutter_paystack: ^1.0.5+1
Note:
If you have remove dependency from pubspec.yaml then hit the pub get command. now,
remove the code related to payStack_payment.
Step 2 - Goto lib/screen/constants.dart file
const IS_PAY_STACK = true;
Change bool value of IS_PAY_STACK=false
FlutterWave Payment gateway
Change FlutterWave Payment Key
Open lib/utils/constants.dart file and change the flutter Wave PublicKey key,flutterWave
SecretKey & flutterWaveEncryptionKey.
const flutterWavePublicKey= "Add your PayStack Public Payment Key"
const flutterWaveSecretKey="Add your flutterWave Secret Payment Key"
const flutterWaveEncryptionKey="dd your flutterWave Encryption Payment Key";
Remove FlutterWave Payment Key
Step 1 - Goto pubspec.yaml and remove the 'flutterwave_standard: ^1.0.3'
from the file
flutterwave_standard: ^1.0.3
Note:
If you have remove dependency from pubspec.yaml then hit the pub get command. now,
remove the code related to payStack_payment.
Step 2 - Goto lib/screen/constants.dart file
const IS_FLUTTER_WAVE = true;
Change bool value of IS_FLUTTER_WAVE= false
Testing Credentials
Stripe Payment gateway
Here we have provided some of testing credentials for app
If you want to add your new payment gateway then buy our paid support for the same.
Use Only in Test Mode: You can use these test cards to make payments in test mode
only. Using these for live mode payments will
throw card issuer is invalid or invalid card input error.
Test Cards Details for stripe payment
There are several test cards you can use in test mode to make sure this integration is ready. Use
them with any CVC,
postal code, and future expiration date.
| Number |
Description |
| 4242 4242 4242 4242 |
Succeeds and immediately processes the payment. |
| 4000 0025 0000 3155 |
Requires authentication. Stripe will trigger a modal asking for the
customer to authenticate. |
| 4000 0000 0000 9995 |
Always fails with a decline code of insufficient_funds. |
Click here For
more details about test cards details for razorpay payment.
Click here For
more details about test cards details for paysatck payment.
Click here For
more details about test cards details for flutterWave payment.